So, I know it’s Fall now and everybody has moved on to pinning Halloween costumes and Thanksgiving tablescapes, but I just can’t let this project sit on my hard drive until next summer. It’s already been finished for months and months but between surgeries and fertility and recovery and the hellishness of the last year it never got the attention I wanted to give it. So I am going to stop waiting for perfection and just send it out into the world. Nobody reads things in order anymore anyway.
When we moved into this house I knew my backyard furniture wasn’t going to cut it. But outdoor furniture is EXPENSIVE!! Like, ridiculously expensive when most of it is plastic garbage anyway. But in this corner up against the house we had this huge paved area that was just begging for an outdoor sectional. I looked and I looked and when I could even find one it was over $10,000. Which is insanity. You can get a car for that much money!
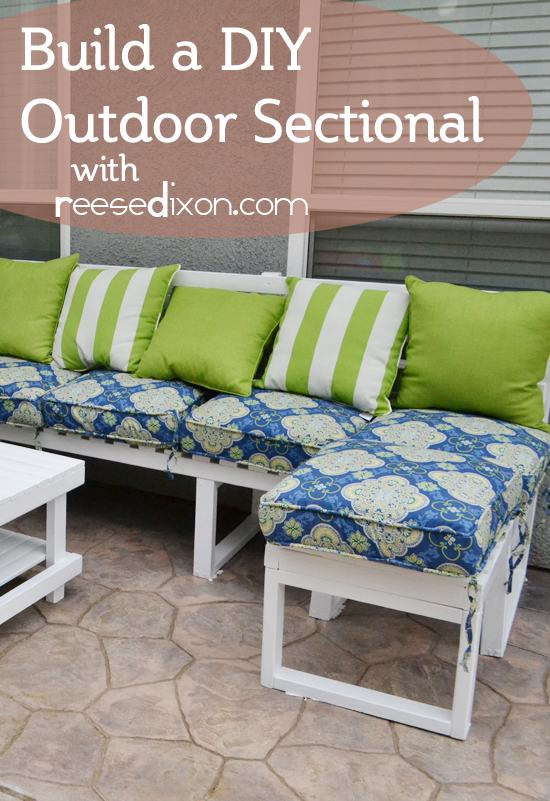
I finally realized that the only way I was going to get the outdoor seating area living in my dreams was if I built it my own dang self. So I did.
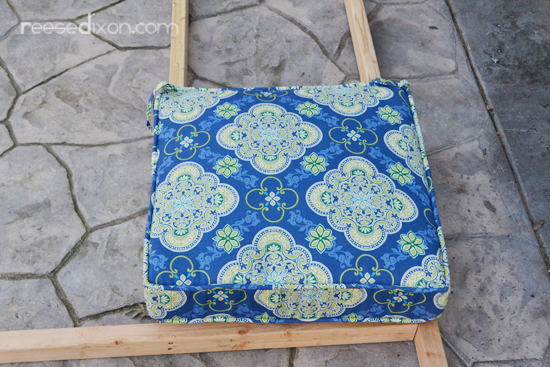
Everything starts with the cushions. I bought mine a couple summers ago now at end of season prices, which is so so so much cheaper than trying to make anything yourself. Cushions for patio furniture do not come in standard sizes, so you absolutely must have your cushions before you start sawing wood. You’ll need to base all of your measurements around the ones you plan on using if you expect anything to fit. Mine were 21″ square, which is what all the measurements I’m about to give you will reference, so if you end up with cushions that are not 21″ square, remember to change the math! I also used 2 x 3’s to make it look a little less like studs, to cut some of the heaviness out where I could, and to save myself some cash. Remember as you’re changing the math to always account for the width of the wood pieces you’re assembling. A finished 21″ wide is actually an 18″ piece sandwiched between two 2 x 3’s.
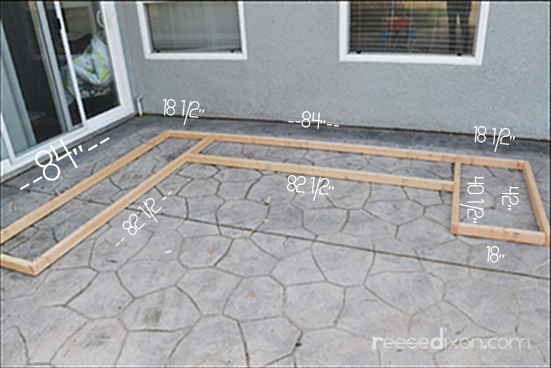
Despite the size of the project, it really only consists of a few parts and is really manageable, even with my rudimentary building skills. The first thing to build is the frame. I made mine to be a corner sectional with a chaise lounge on one side. With your 2 x 3’s cut to the proper sizes, then it’s just drilling through the pieces to make a pilot hole, and following it up with a wood screw to secure it. With something this big and heavy, I like to use two wood screws in each joint.
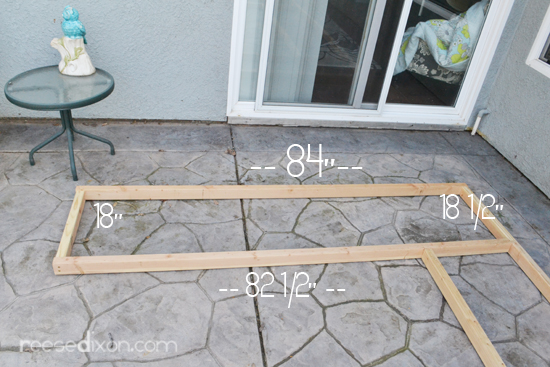
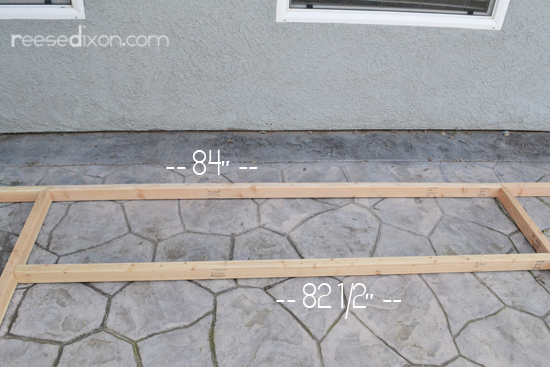
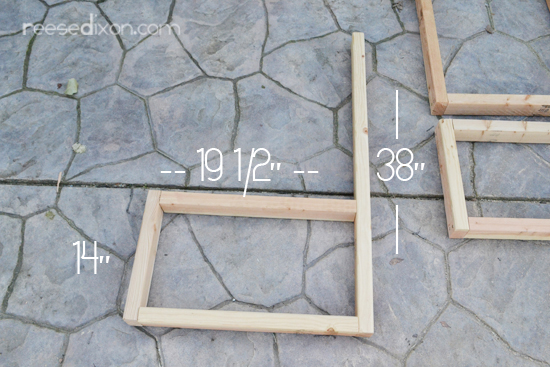
Right side cut measurements. Not pictured: another 18″ long piece I attached across the middle to offer some more support.
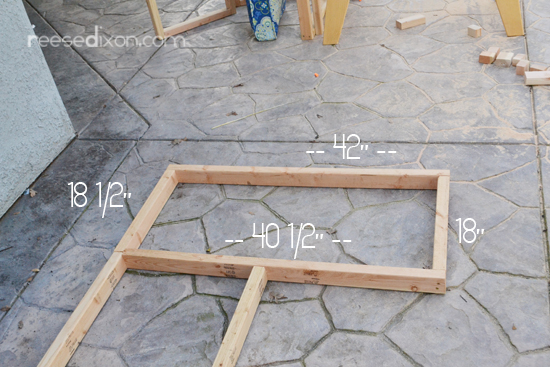
Center cut measurements. Not pictured: Another 18″ crosspiece I added after I got a little further in the building process and realized I wanted it more stable.
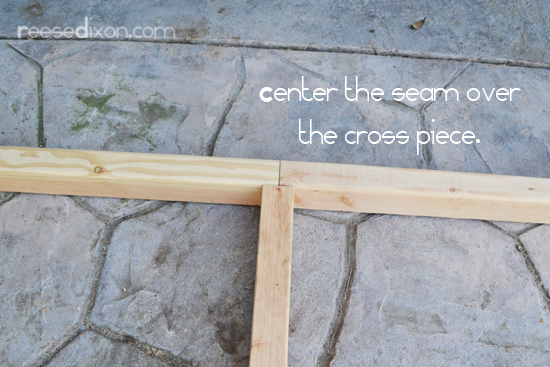
Left cut measurements.
But Tresa? I can hear you asking, Why aren’t the sides of your rectangle the same size? Good question. It’s because of how those joints need to line up for assembly. The exterior sides are longer because they don’t have to account for the width of the wood it’s joining up with. So you see in the back how the top side meets the back on the outside, while the bottom side butts up against the back? I needed to do that to get the sectional as long as I wanted it to be. If you’re changing the dimensions on this, don’t forget the width of the other piece next to it! I can’t emphasize that part enough, it’s so easy to forget you have a whole other 2 x 3 to make room for.
To make your sectional as long as mine, you could use a metal brace of some kind, but I designed it so that the sides of the sectional would seam that back together. Which is also why that back piece is 1/2″ longer than its mate across from it. It needs to overlap a bit to be able to screw into the 2 x 3 it crosses.
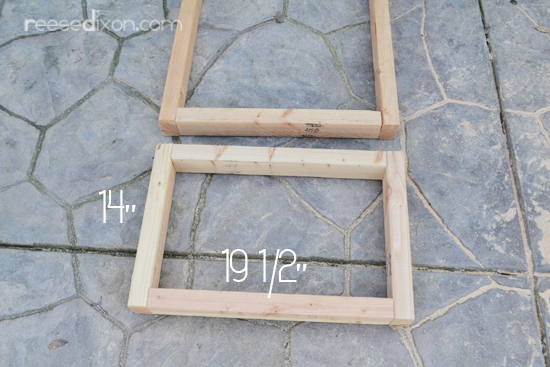
With your frame built, now you’ll need legs. You need three of these little boxes. Two to go under the joints where the sides meet the back, and one to hold up the end of the chaise.
And then you’ll need 6 of these d-shapes which are legs with back support. Cut an extra 38″ piece to create your corner piece.
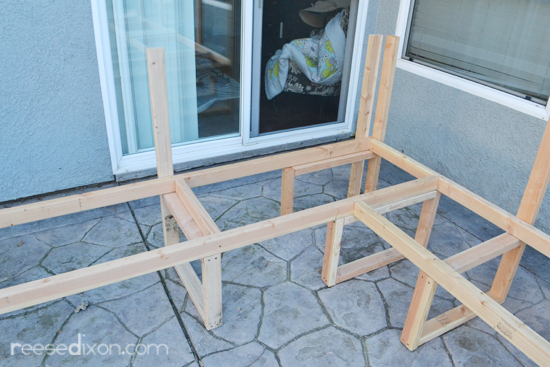
Lift the frame up onto the legs and attach with screws. In this picture you can see the crosspiece I added to make the frame stronger, the little box directly under the joint, and the corner piece. This is just one of your six d-shaped legs, but you add that second back piece onto the outer side of it to make that corner. You gotta have something for your back pieces to screw into.
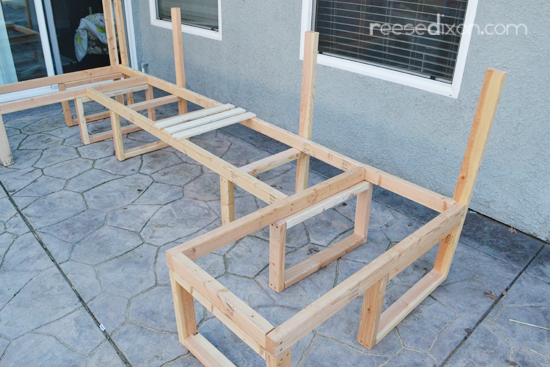
Now we just have to add the seat and back. I switched to 1 x 3 furring strips here. I cut 58 pieces 21″ long for the seat and installed those by screwing them directly into the frame. I didn’t bother measuring how much space was between each piece, I just eyeballed it to make sure that the pieces weren’t touching on one end and far enough to fall through on the other.
The six back pieces on the right side are 84″ long, but on the long center section I wasn’t going to be able to make it all the way across with one piece, so I had to measure how long the pieces had to be to reach the leg they needed to screw into. You’re going to have to measure your own based on where that leg ends up, but in my case I cut 6 pieces to be 87″ long and 6 pieces to be 37″ long and attached them with screws into each leg’s back.
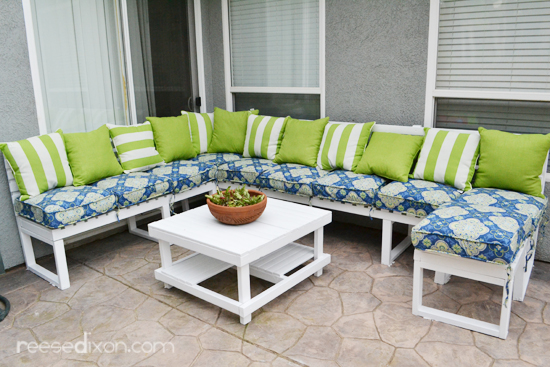
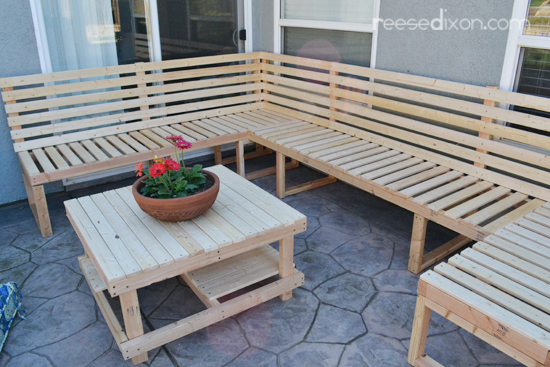
After that everything needed a good sanding, priming, and a painting, and then I put all those cushions where they were destined to be. Of course, I also realized in a hurry that I can’t have an outdoor seating area with no place to put a cold drink, so I had to come up with a matching coffeetable. Instructions for that will be coming tomorrow.


This looks awesome! And I love how you break everything into pieces–it makes it seem do-able for someone not crafty (me!)
Any chance we'll get a tour of the whole backyard sometime?
This platform provides the instruction of build up the table and sofa and color is so beautiful. With school uniform, students are trained on how to follow simple rules and there is inferiority aspect. At the same time, it helps them build on their self-expression with ease and more so if they are in a mixed school. They don’t have this feeling of “is the other student having better cloths than mine”?
Fantastic!!! How nice it is to create this original seat with your own hands. The result is amazing and apart from being involved also economic illusion I have created for yourself. Congratulations!!!!
Me parece fascinante que con sólo la imaginación y unos elementos tan sencillos se puedan hacer verdaderas maravillas. Creo que toda creación debe partir de ese foco: la imaginación… los elementos aparecerán según nuestra mente los proyecte y el resultado será tal y como esperamos. Esto es arte. Muchas felicidades.
This article about outdoor activities really you write awesome. Recently i searched outdoor furniture and cheap accent chairs that time i saw this awesome article and i bookmarked it. Today i read it.
decorate the outdoor section of our home with furniture is comparatively awesome. make sure to use small and easy movable furniture for outdoor use. measurement of yourself for outdoor furniture is perfect. i recommended my friends to follow your suggestion.