
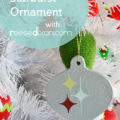
Lucky for you we’re running out of time for me to share ornaments for my 60’s kitsch tree. Otherwise you’d have to listen to me gush on and on about my obsession with midcentury design. It’s just so stinkin cool! I got the idea for this ornament from an ad from the 60’s that I found in my googling. Bold Geometric shapes were a real hallmark of this period, so when I found that ad breaking Santa up into his most basic shapes, I geeked out and set upon making him into an ornament, through the power of Shrinky Dinks!
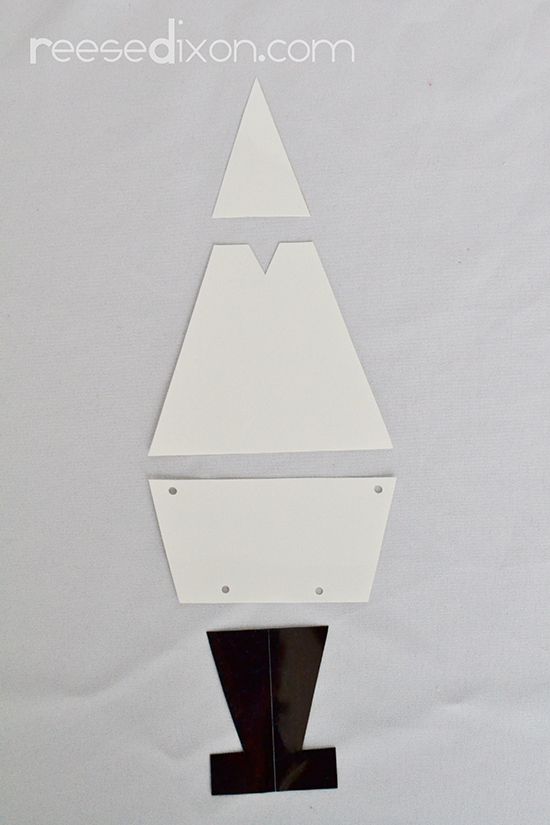
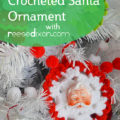
Your shapes will have to start out much bigger than you want them to end up, of course. And they’ll need to line up with each other so that you can attach them easily. I didn’t make a pattern here, I just used my ruler. I started by cutting a large triangle. Draw a line 4″ wide. Mark the mid point of that line, and then measure 6″ up from that point and mark it. Use your ruler to draw a straight line from the end of your 4″ line to the point you made 6″ up. With your triangle drawn, draw another line across the top of the triangle, 3 1/2″ up from the bottom. Cut everything out and you’ve made the hat and the body. I cut a notch in the neckline of the body to evoke a coat look.
For the bottom, draw a line 4″ long. Mark the midpoint of that line and then measure 2″ down. Mark that point too. Draw another line going 1 1/2″ out in each direction from that point. You should now have two parallel lines that share a midpoint, one 4″ long and the other 3″ long. Use your ruler to connect the lines on each side.
For the boots, draw a rectangle that is 2 1/2″ tall and 2″ wide. Measure 1/2″ up from the bottom, and mark 1/2″ in to create the toe of the boot. Draw a line connecting the top of the rectangle to the point 1/2″ in. Repeat on the other side.
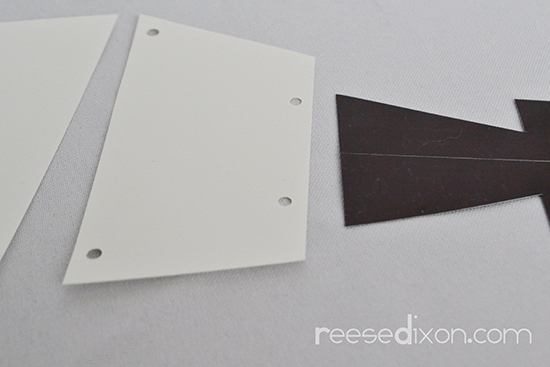
Punch holes everywhere your pieces will connect. Getting them to line up properly now will save you MAJOR headaches later. I found it best to hold two pieces together and punch through them both at the same time. You know they’ll line up if they have the same punch.
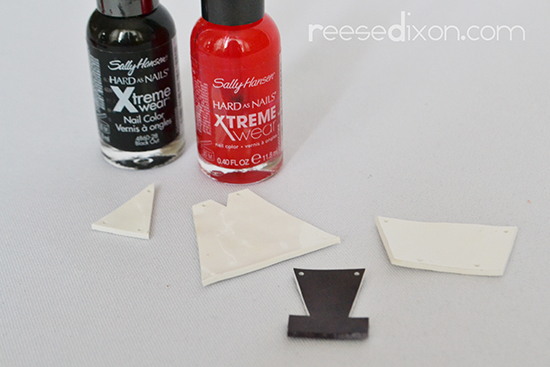
Bake your shrinky dinks as directed on the packaging. I used white shrinky dinks because that’s what I happened to have handy, but if you use the frosted kind you can add color in all kinds of different ways. I used a combination of sharpie and nail polish on the boots, and used a bright red nail polish on Santa’s clothes. I really ended up loving the look of the red nail polish on top of the white plastic. It made a super bold saturated color.
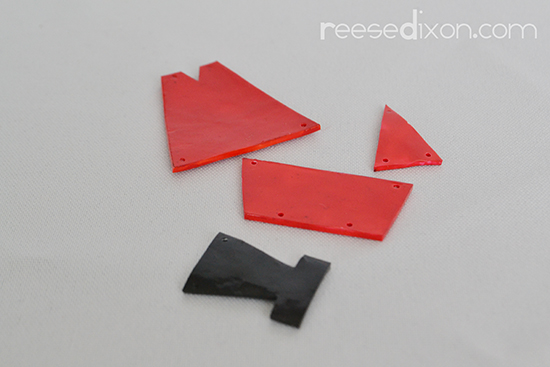
It might take a few coats, but the trouble is worth it. Paint the front, back, and all the edges until you’re happy with the color.
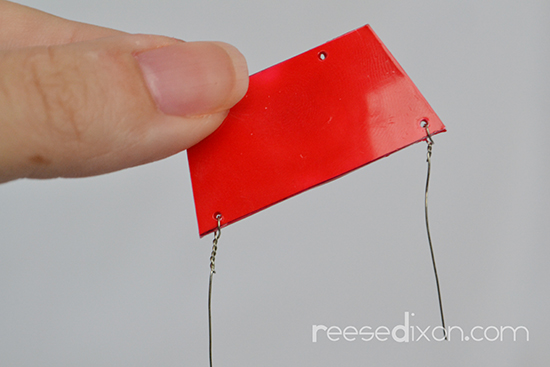
Push a piece of wire through the holes you punched and twist it around itself. Snip off any extra with wire cutters. Repeat that for the hole on the other side.
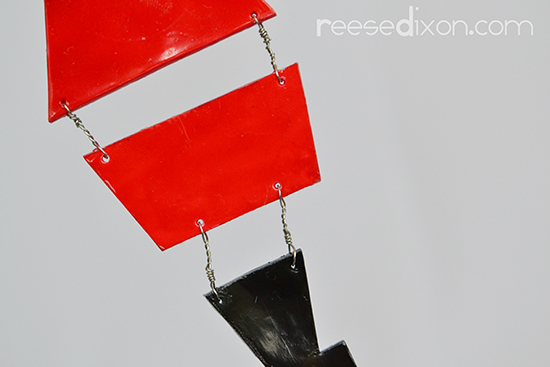
Take the wires hanging off the piece you just prepared and push them through the holes on the piece next to it. I found it much easier to work with both wires connecting a piece at the same time. It really helped to keep the pieces level and straight instead of tighter on one side than the other and slanted in that direction. Connect the hat to the body, the body to the bottom, and the bottom to the boots.
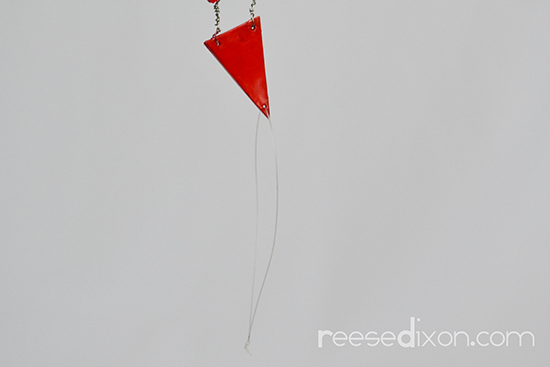
Add a piece of fishing line or thread through the top hole and tie it into a loop to serve as the ornament hanger.
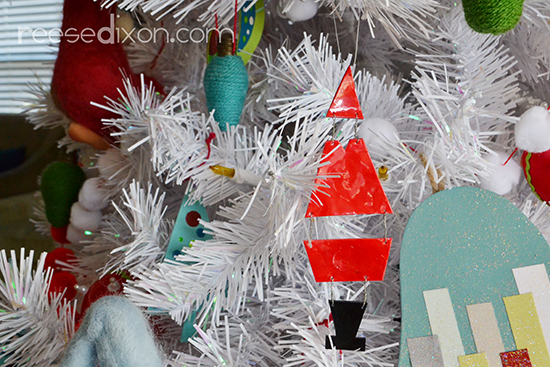
I love how cool and modern this ornament makes Santa look! Bold colors and geometric shapes and yet you still see the iconic man in red. Proof that you’re never too cool for Santa.

You gave me a great idea! I love to have this Christmas décor on my Salon Spa. I can endorse also the gorgeous nail polish and their beautiful shades in this décor. Thanks!
You offered me a good idea! I enjoy have this Christmas décor on my small Salon Spa. I'm able to endorse even the gorgeous nailpolish as well as their beautiful shades within this décor. Thanks!
I have seen trendy necklaces, rings, and pendants at Connexion Republic – Body Jewelry and I am impressed with uniquely designed pieces of jewellery.
Wow! I loved the idea of making a geometric figure of Santa.
Read about karaoke machines guide at karaokebananza
You proposed advisable! I like have this Christmas décor in my Salon Spa. I am in a position to endorse the gorgeous nailpolish in addition to their beautiful shades in this particular décor. Thanks!
I am not interested in jewelleries but I do like reading articles related to internet technology and I learned to remove Chrome error messages by visiting here – itechgyan.com
I loved great idea!
For those who are planning to build their won spa, salon or a spa salon, go visit https://www.pedisource.com/. This entire team of professionals is ready to provide you the best services to set up your salon spa.
I remember how passionately I used to create earrings for college fate. It reminded me of my youth. ~ PA Recruitment Agency
I also thinks a blog can help your website to get ranked and improve search engine visibility. Good ahead.
Amazing, I appreciates
Wave Brush are used to make some different and yet awesome waves in your hair which makes your personality look more cute. with waves, we have listed our some of the best wave hairs of 2018. These wave hair brushes will surely work the way you want them to do so. http://bestwavebrush.com/
Good article! Thanks bro
This post is just amazing loved it keep posting such information on a daily basis thanks for your views on it. loved it.
Extraordinary Article it its truly enlightening and creative update us as often as possible with new upgrades. its was truly important. much obliged. lumion download free
You proposed advisable! I like to have this Christmas décor in my Salon Spa. I am in a position to endorse the gorgeous nail polish in addition to their beautiful shades in this particular décor. Thanks! batterypoweredleafblower
Wow, these ideas are amazing.
amazing post thanks for sharing with us i really enjoyed with us
This Is Very Simple, I Will Make It These Time
Great post. I just stumbled upon your blog and wanted to say that I have really enjoyed reading your blog posts. Any way I'll be subscribing to your feed and I hope you post again soon.
Luxury Unisex Salons
Best Spa in Hyderabad
Best Salon in Hyderabad
Best Gym In Hyderabad
Best Fitness in Hyderabad
Best Nutrition in Hyderabad
Agriculture equipments se very important to understand before you start farming or home gardening
people have to know about each and every tools of agriculture to take better results in farming and to be safe during farming.
thanks for writing and sharing this article with us!!
keep up!!
best wishes!!!!
good one