
In my quest to outfit this superstar backyard of mine, as is my duty as Park Ranger of this place, I’ve been searching for a windchime that was both 1) not obnoxious and 2) not so outrageously expensive I would resent it every time I heard it’s gentle chime. So as usual, I knew I had to make what I was looking for. I love the sound of bamboo windchimes because they’re so light and subtle and not glaringly high pitched, so when I found bamboo windchimes at the dollar store I knew they were exactly what I needed. Now I just needed to make them grand enough to fit into my very grand backyard. I bought five of the windchimes, a bowl, and used some rope I had on hand, so for $6 plus tax I’m making something that would have cost me a fortune otherwise.

If you are a regular blog follower, by now you are a pro at drilling through glass and pottery. But in case you’re coming to this tutorial fresh I’ll give you a nutshell version of how to drill through a bowl. 1) Get yourself a drill bit made for the job. It will say so on the packaging. I like the ones that come in a spade shape because they’re easier to control as you drill. 2) Set up a drilling station. I have here a plastic tub, an old towel, and some cool water. You really just need the cool water and a way to keep your bowl from sliding around. The towel gives you a nice non-slip surface and the tub keeps the water where you need it, but there are a million variations on this. 3) Make sure you’ve got water on both sides of what you’re drilling, then go steady and slow without a lot of pressure. If you push on the drill you could crack the bowl. If it gets too hot you could crack the bowl, and if you create too much friction through heat or non lubrication (which the water also takes care of) you could crack the bowl.
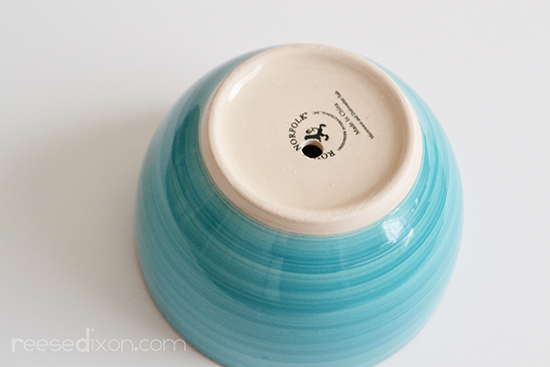
Here’s my bowl with the hole drilled through, and you can see that it is off center. Really not a big deal. I’m showing this as proof that perfection is not worth the stress.

Run your rope through the hole you’ve made. Ropes fray, so wrapping the end with some tape will save you some major frustration.
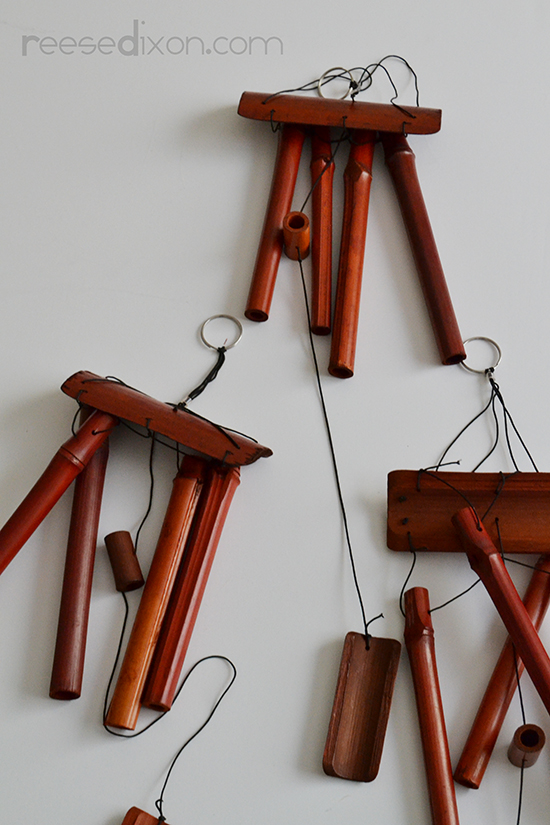
Now it’s time to deal with your bamboo windchimes. Lay them out to make you’re new configuration. At first I thought I was going to cut them all apart and start from scratch, and then I decided it would be enough just to attach them all together. Do some experimenting and see what works for you. I ended up stringing three sets across the top, and then two more hanging down from the middle. It makes a kind of inverted pyramid shape. Remember to leave enough room between the pieces for them to move around and make that lovely noise.
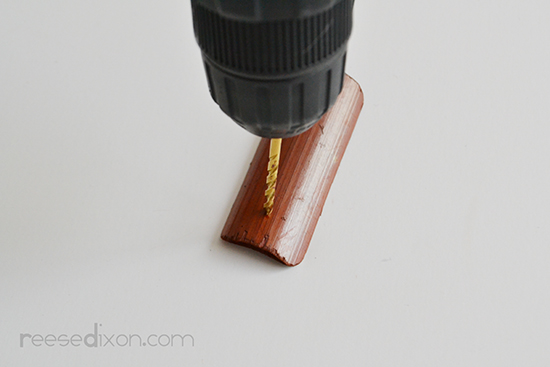
With all your decisions made, drill holes where you need to attach them together.
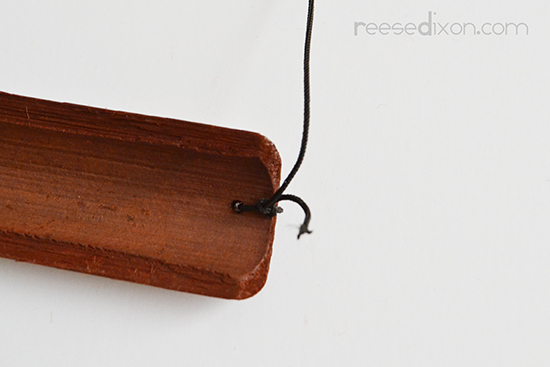
Tie them together with rope or string. Remember the tape trick, this can get frustrating.
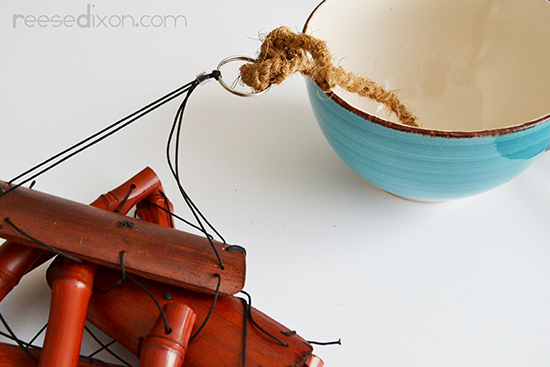
Tie the top of your newly assembled wooden pieces onto the rope and make a big giant secure knot. Remember, this is going to stand up to wind, so triple knot that baby.
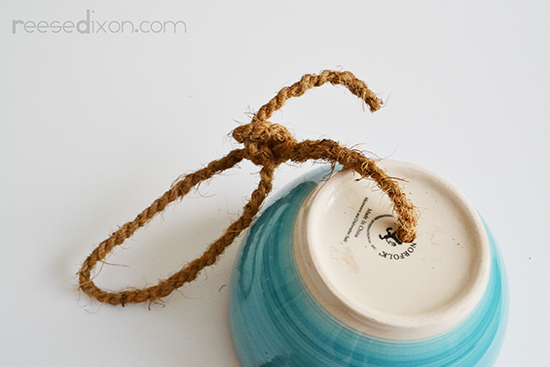
Pull the rope all the way through the bowl so the knot catches. Then tie the rest of the rope into a loop you can hang the whole operation from.

I made my windchime super long, so I hung it from a high point on my roofline. I wanted the look and the sound, but I also didn’t want anyone to get wrapped up in it as they walked around the yard. Fittingly enough, the day I hang this up it was super crazy windy, which you’ll hear on the video, but you’ll also hear how great this sounds. Even better, each time I hear it I am reminded that it only cost me $6.


Thanks for the idea and for the tutorial on how to drill through a bowl. I tried to do it before, but with no success, because I haven't used water.