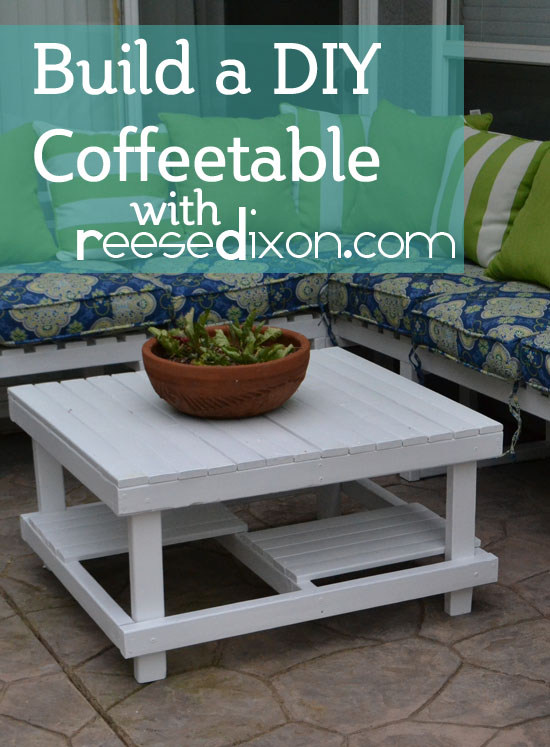
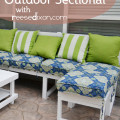
In my last post I showed you my great big sectional process, and quickly realized that a sectional is not a sectional without an ottoman or coffeetable in front of it. You cannot lounge and worry where to put your drink. So today we conquer making the matching coffeetable. The sectional wasn’t exactly complicated, just big, and in comparison this project is one you could put together with your eyes closed.
I’m taking a little bit of a short cut here since I’m using all the same materials, the assembly is done in the same pilot hole/wood screw way, and is still dependent on the measurements of your cushions that determined the size of your sectional. You don’t want a giant coffeetable and an itty bitty sectional, so you have to keep them proportional. If you have any questions about those items, refer to the sectional post.
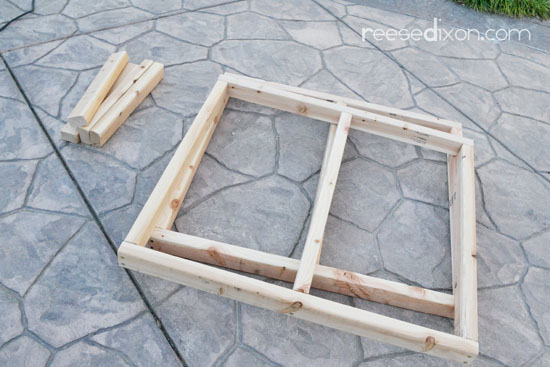
Cut your 2 x 3’s to size. For this project you’ll need 4 pieces 36″ long, 6 pieces 30″ long, and 4 pieces 18″ long.
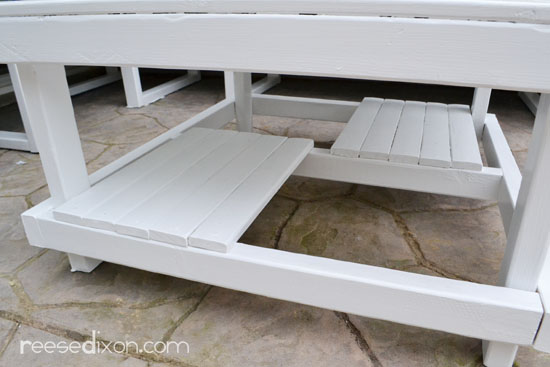
You’ll need to build two box shapes, each with a center support, that will become the top and shelf of your table. Just sandwich three of the 30″ pieces between two of the 36″ pieces and screw it all together. And do it again for the other five pieces.
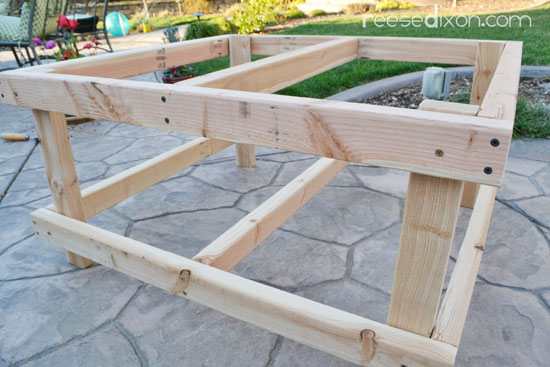
Your four 18″ pieces are your legs. For this part it’s best if you break out the level. You want to make sure you don’t install the shelf lopsided. Line one of your boxes up flush with the legs by laying it all on the ground, screwing the pieces together, and then flipping it over. To install the bottom shelf it works great to lay it all on it’s side. Make sure that you leave a few inches of leg below the box so that nothing’s resting on the ground.
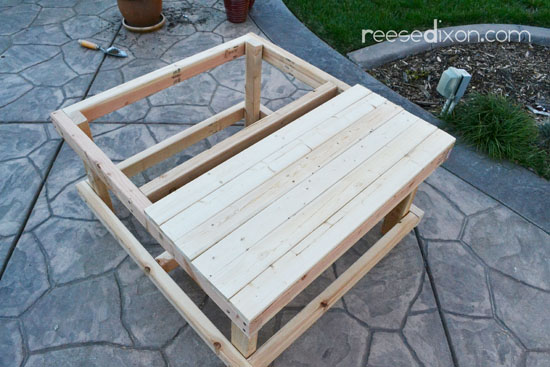
For the top and shelves you’ll switch to the 1 x 3 furring strips just like we did for the sectional. You’ll need to cut 14 pieces 33″ long for the top, lay them out the way you want, and screw them into place.

Then cut 10 pieces 19″ long for the shelves, offsetting them so there are five pieces on each side of that center support beam, creating two shelves. Screw down.
Then it’s the regular old sand prime paint procedure.
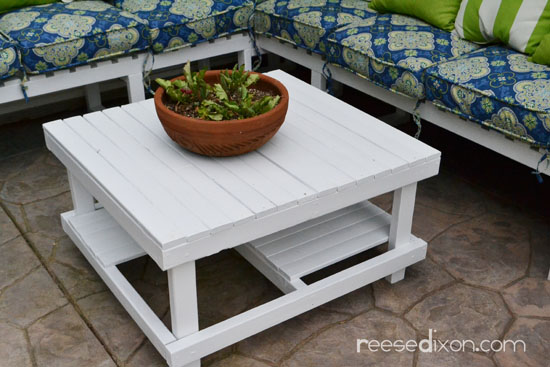 The shelf design was a bit of an accident. I planned on making the bottom shelf solid just like the top, but I forgot I’d have to cut around those legs and that sounded like a whole lot of no fun. So I changed the design and I think it looks so much cooler! Happy Accidents are totally what makes it worth it.

Beautiful design in the creation of this beautiful table simply based on some wood and a lot of imagination and creativity. Undoubtedly, this is a nice example of a perfect design.
Congratulations on this item !!!
This platform give the instruction of built up the coffee table while it is the parents and teachers role to give the right guidance to their children. This is the only way to avert school violence a cause that is very necessary. Let’s show our children a lot of affection and at the same time support their dreams.
What a nice design of coffee table is here and that is looking is very strong also. The woman is on sofa is looking very beautiful specially her colorful dress is awesome.
nice
creative and nice
Instruction dependably trade from better intelligence than the lower intelligence that is the reason in training wishes uncommon qualified instructors and educator.
The hale theme of this blog is to cue you that youre not unique, to share noesis and feel and to be a post where we helper one another meliorate our English. dreamfilm Still, these services can evermore be highly good for you to win first-class noesis as good as meliorate writing skills. This is the rightfulness post to buy essays, terminus papers and rescript over-the-counter services to pee your platonic as wellspring as quotidian sprightliness so often easier.