Atti has had a fabulous but hideous chair in his room for the last few years and literally every time I go in there I twitch, looking at that cover. It’s faded and stained, and totally not hygienic. But the chair was just too perfect for Atti’s needs. It was just the right size for him, is easy for him to get in and out of, easy for him to sit in, and has sentimental value because it was given to us by one of Atti’s former therapists. Even if the chair was just like any other chair, I couldn’t bear to get rid of our reminder of Miss Margie. I had to rescue it from the crust of cheerio dust that had overcome it.
Click through for a full tutorial, including a coupon for a steal on fabric!

My friends at Michael Levine sent me the fabric for this project too, and also gave me this coupon to give to you. I used this great flannel for my chair, but what I love most about Michael Levine is their great selection which includes some pretty fabulous home decor fabric too. I’m such a sucker for houndstooth, how gorgeous is this cream and latte version? Check them out at LowPriceFabric.com.
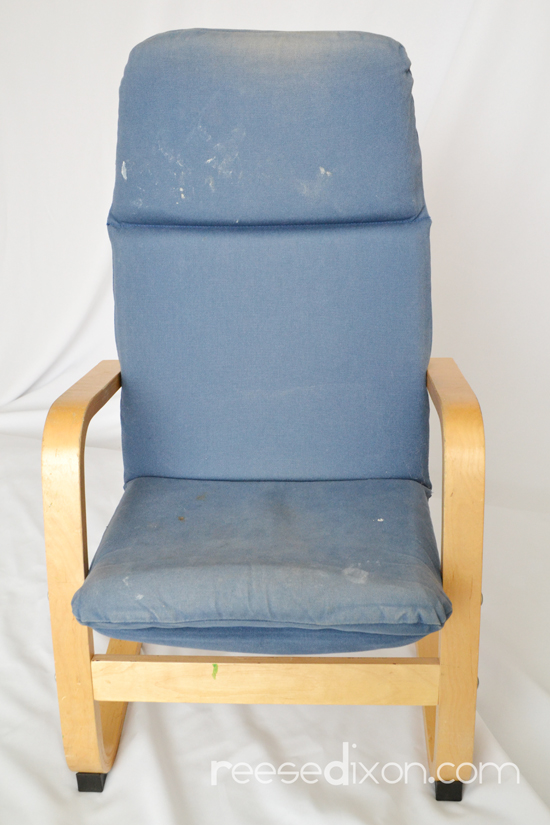
This is the chair as it looked this morning. Margie got it from a thrift store so it was worn before it ever got to us, but Atti has done it no favors.
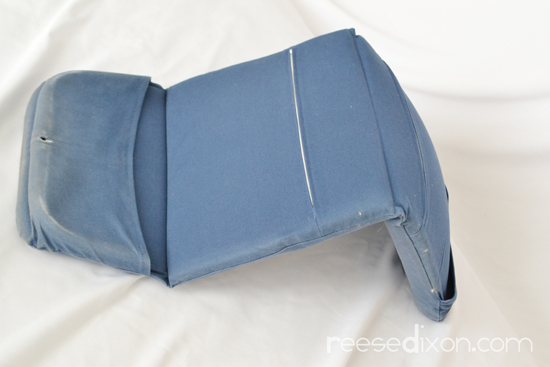
Whatever piece you’re going to be upholstering, the first step is to investigate the engineering. You have to take the chair apart to just the pieces you’ll be upholstering, taking pictures and notes, labeling any parts, so you can get it back together again. For this project I’m going to just be reupholstering this cushion. The foam is inserted through zippers, but I’m not going to bother repeating that. I’ve got my own idea for how to stuff this, but that’s only after years of these kinds of projects. If this was my first upholstery project I would stick right to how it was originally put together.
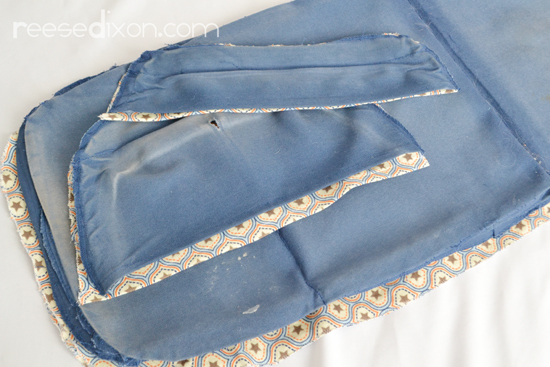
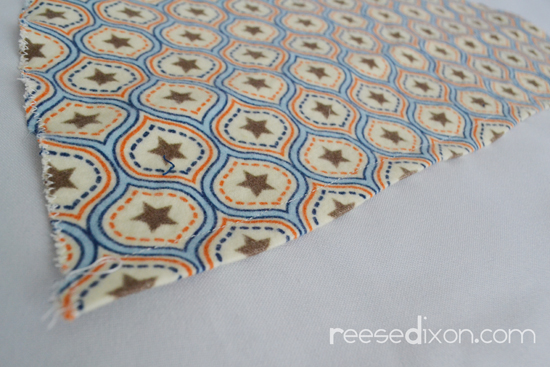
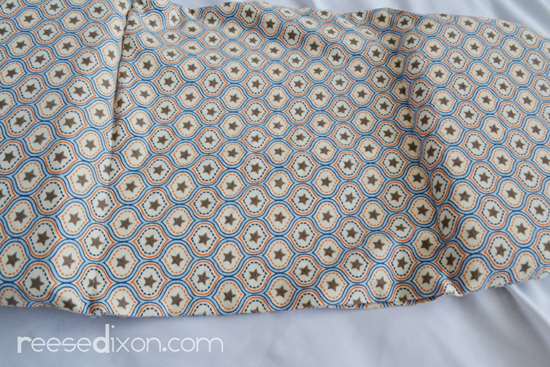
Rip open all the seams so that you can use the old covering as pattern pieces for the new covering. Make sure as you rip it apart you take pictures of the order it comes apart in and label all your pieces. Cut out all the pieces in your new fabric and transfer any markings, like where seams will go.
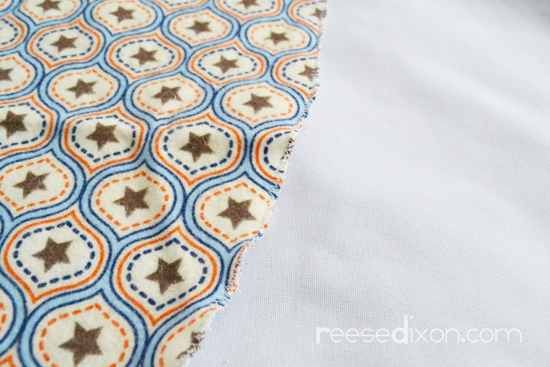
Zig zag or overlock stitch the edge of all your pieces. Woven fabric, which is what we typically use for upholstery, unravels very easily and we don’t want the fray to create a hole in our seams. Upholstery pieces take a lot of wear, so this is not a step you should skip.
From this point on we’ll be reassembling the pieces in reverse order. Refer back to all the pictures you’ve taken and start with what came apart last. This project had two little pockets on the back that attached it to the chair, and they need to have their raw edges finished before I sew it to anything else. So a quick hem on those two pockets comes next.
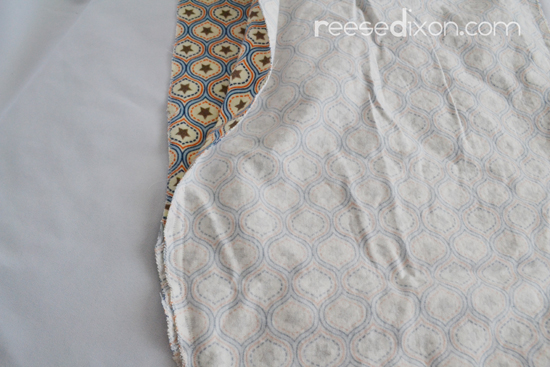
I then sewed these pockets to the piece that will be my new back, staying well within the seam allowance so that these sewing lines will be hidden when I sew the whole thing together. I actually would have guessed this was constructed a different way, but as I ripped the seams open I discovered I would have been wrong. Remember remember remember to take pictures and notes.
I laid the front and the back pieces of the cushion on top of each other and sewed around three sides. Instead of using zippers, I’ll be sewing the opening closed, so leave a slot big enough to fit the foam pieces through.
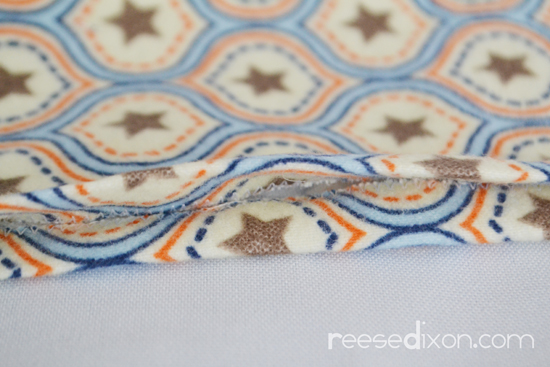
Turn the cushion right side out and iron the seams. since we left that hole open, giving it a good iron will help us close it up neatly and in line with the rest of what’s been sewn, and you won’t be able to do that once there’s foam inside.
I inserted the foam for the headrest and the seat and followed the markings I transferred to sew a seam that would keep the pieces from shifting around. This leaves the middle spot open, which is good since that’s where my hole is for stuffing.
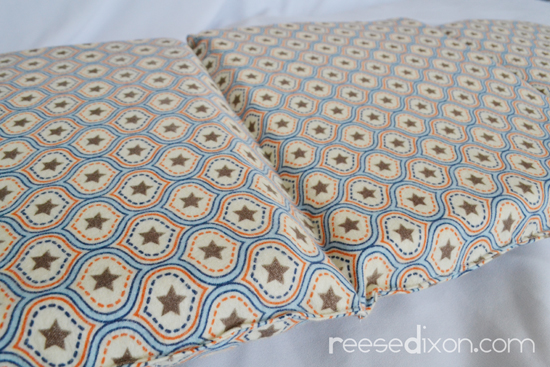
Insert the last foam piece and sew the cushion shut. If you sew a thin line all the way around the cushion, it not only closes the stuffing hole, but it also adds a little decorative detail. It’s like a tiny line of piping that’s out of the same fabric.
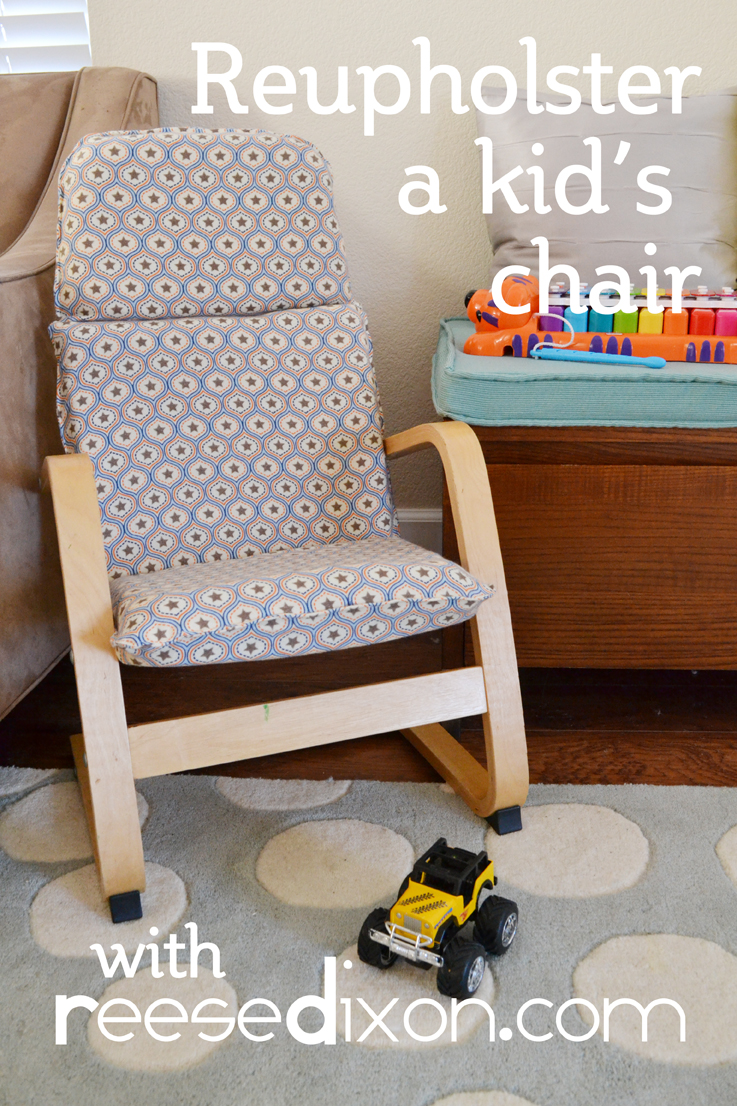
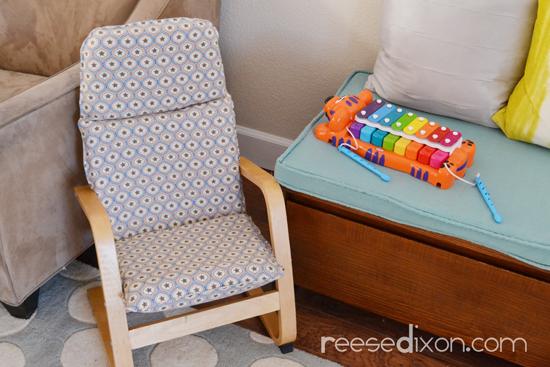 I didn’t paint the legs of the chair because Atti still chews on everything and I figured I better save him from eating paint. I gave them a good scrub with Murphy’s Oil Soap and called it good enough, but isn’t it amazing how different it looks with the fresh fabric on it? Atti loves how soft the flannel is, and I love that I get to keep a great functional chair without recoiling at how ugly it is.
This was a very simple reupholstery project, but the principles are the same whatever piece you tackle. A little reverse engineering, some careful notes and pictures, and you can use these same skills to upholster anything.


Miss hearing from you, hope you're ok xxx