 For every knitter I’ve ever talked to, the finished item was only half the joy of knitting, if that. Most knitters I know would be content to just have balls of yarn piled up in every room, surrounded by the luscious colors and extravagant fibers, even if we never got to knit again. Most of us actually do live that way, stashes of yarn piled up in every spare space, more than some of us could ever get around to knitting but it won’t stop us. Such is the appeal of the yarn that we love.
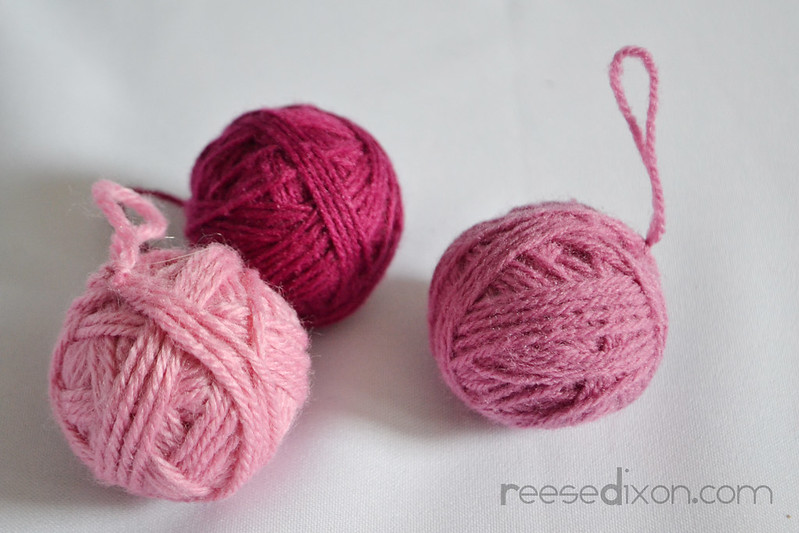
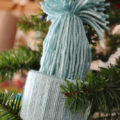
So when brainstorming cozy, this was one of the first places my mind stopped. Balls of yarn all bundled up and waiting to be made into something lovely, looking lovely all by itself in the meantime.
 Yarn balls, even small ones, take quite a bit of yardage, which costs money, and can weigh an awful lot. So to become an ornament that can hang on a flexible tree branch we have to come up with a way to cheat. My brainstorm came in the form of ping pong balls. They’re super light weight and will give you a perfectly round starting point.
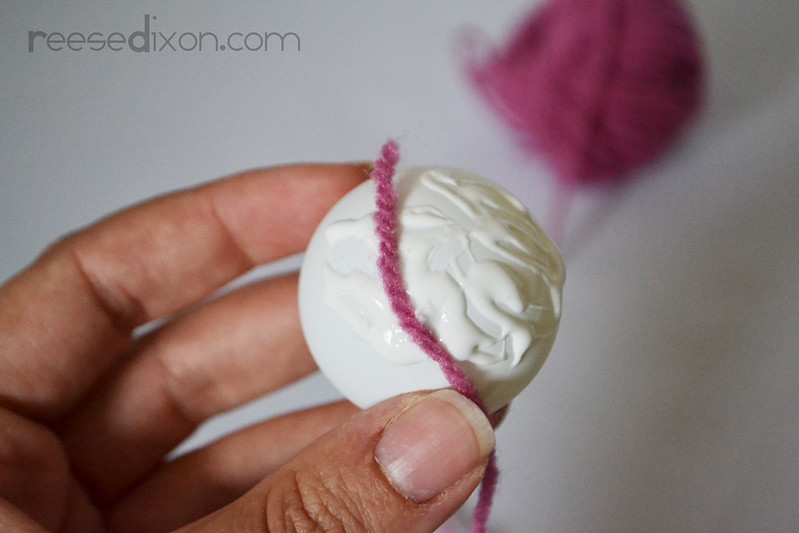 I spread some white glue all over the ball. It provides an easy starting point, but it will also keep all the remaining yarn in place against the onslaught of pokey branches or curious cats. After a couple of experiments, I found that the yarn ball looks tidiest and most appealing (to me anyway, ymmv) if the yarn is wrapped in groupings. I wrapped the ball four times each direction before turning.
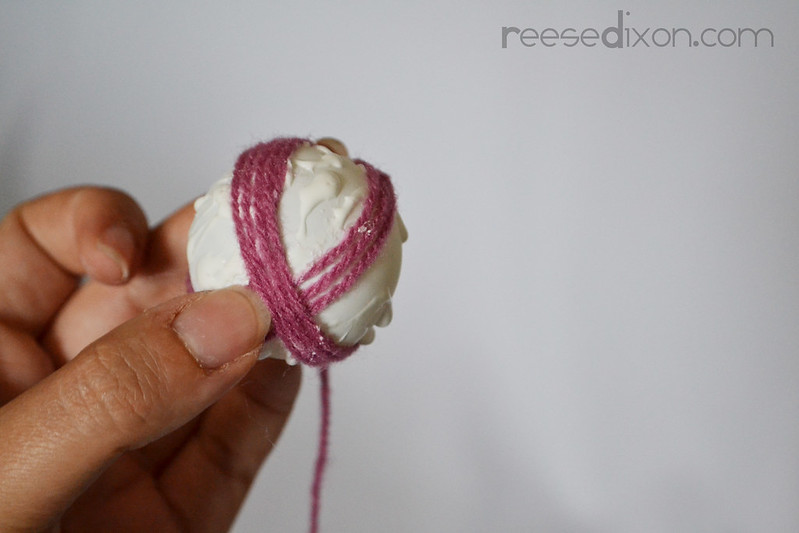 If you’ve never made a yarn ball, this next step might sound like I’m making things needlessly complicated. But if you have tried to make one, then you know how easily it can go from a ball to an egg. Or a football. Which doesn’t matter even a little bit if you’re just trying to keep your yarn neat as you knit, but if you’re trying to make a pretty little ornament it can make things complicated. Here’s the method I came up with to keep things spherical.
After you wrap the yarn four times around the ball, turn it and wrap four more across it in the other direction. Now you can’t just keep turning between these two positions while keeping the ball spherical, so imagine that there is a compass sitting on top of your ball. If the south arrow is pointing at you when you’re holding it, turn it until the east arrow is pointing at you. Now imagine you’re looking at a clock. Turn the ball so that what was 12 o’clock becomes 3 o’clock. This is one of those things that’s hard to write out so if you’re confused than give a watch to the video down below. You’re basically just turning the ball a quarter of the way around on both the x axis, and the y axis.
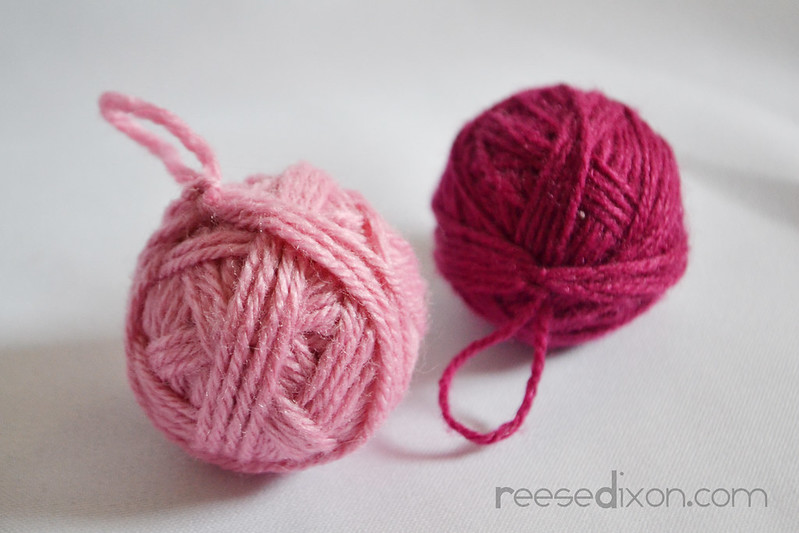 When you’re happy with how you’ve got the ball wrapped, cut the yarn leaving about a 5″ tail. Push an inch or so underneath the last group of wraps and use it to tie around the loop to make your ornament hanger.
These work up so quick and take such little yarn, that I think once the season is over I might just make a whole bunch of them to sit in a bowl on a desk somewhere. Yarn is just so lovely, it’s totally worth being an object of art.

Hi !I would like to give you an idea what to do with those loose ends.Put them in a basket for the birds oustide,.. the build their nest with those nice warm ends. The bird association in the Netherlands supports it highly!Kind regards,Hedwig from The Netherlands