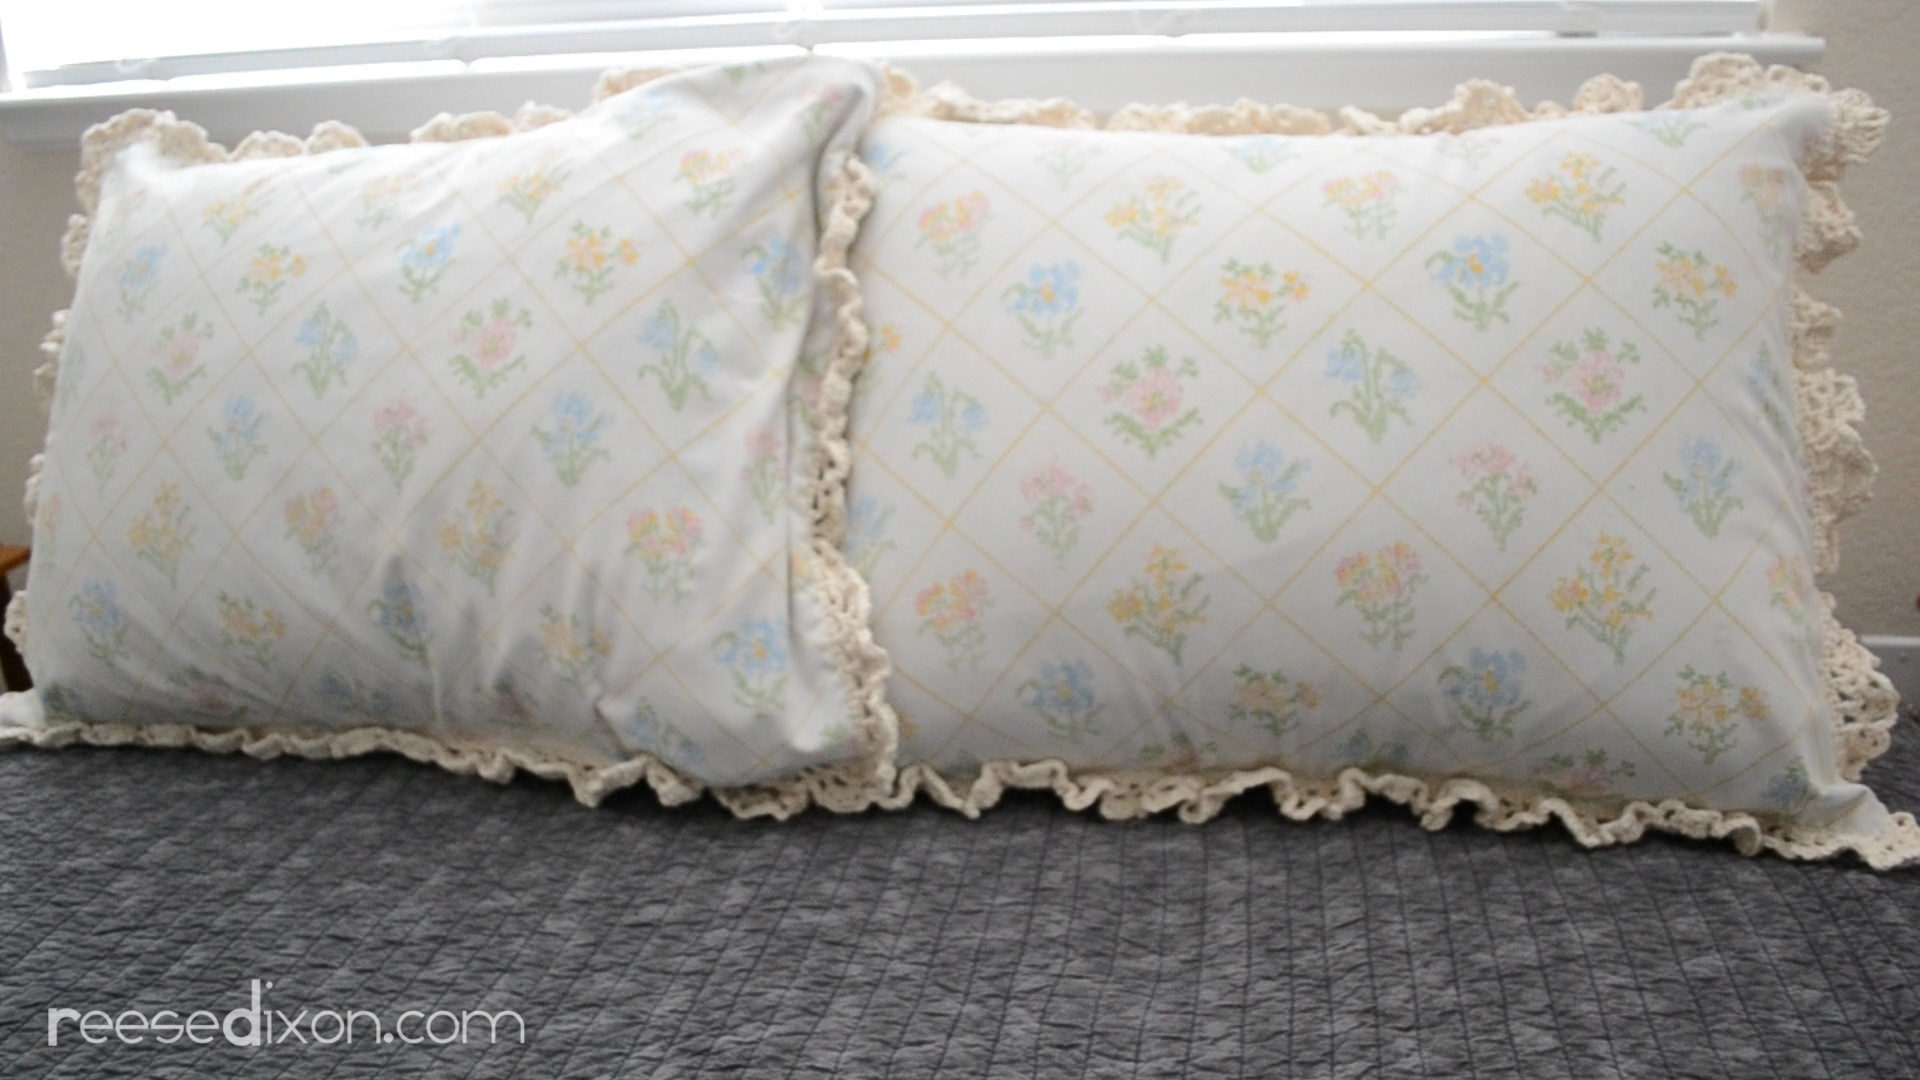

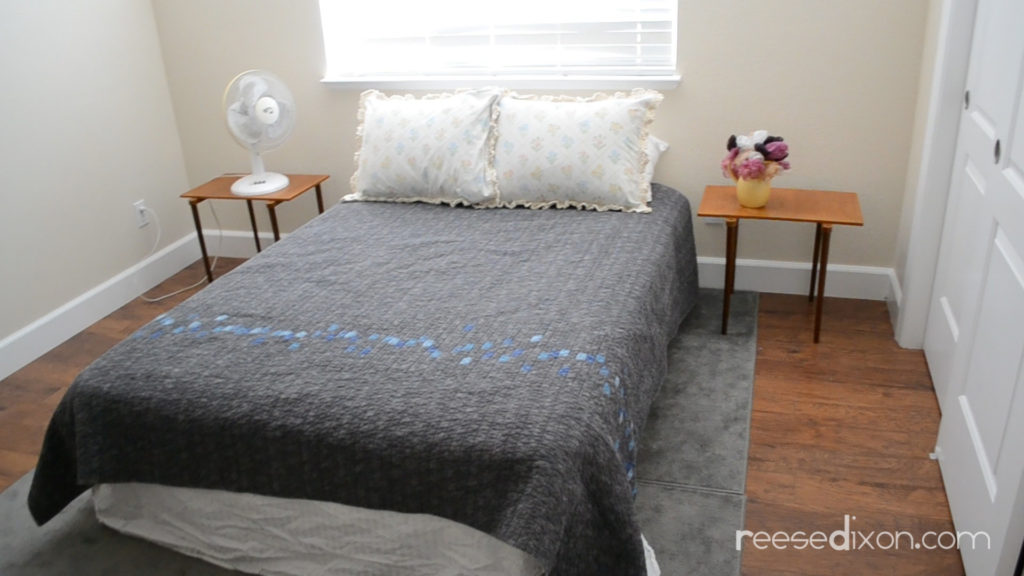
My guest room is functional, but kind of sad looking right now. There’s not much going on in the way of decor, but I know where I want to go with it. Despite my super modern taste everywhere else, my guest room I want to look like visiting grandma’s house. I want it to be cozy and maternal and feel like you’re going back to childhood memories that aren’t even your own. So since there’s already a handmade quilt on the bed, the next thing to address was pillows.
Pillow shams make such a huge difference on a bed. I’m not a big fan of tons of excess non-functional pillows, but shams make the bed look inviting and have the added benefit of covering up your drool covered smashed down pillow you actually sleep on.

This is the easiest possible sewing project. No zippers or buttons to worry about, just an envelope closure. To really get the grandma look I used a vintage sheet (doubled for thickness) and cut three pieces. You need a front as big as your pillow, and then two back pieces each half the width of your pillow, plus about three inches. Add 1/2″ of seam allowance on each side. For the pillow I was using, the front measured 27″ long and 21″ wide, and the back pieces each measured 16″ long and 21″ wide. Hem one side of each back piece by folding it 1/4″ over twice and sewing down. Make sure that the side you hem will be the side that faces the middle.

Line the ends of the back pieces up with the front piece, letting the back pieces overlap each other in the middle. Pin in place and sew all the way around. If you’re using an easily frayed fabric like I am, it’s a good idea to zig zag or overlock stitch the edges.
Cut the corners off diagonally. This will make it so that you’ll get a sharper corner when you turn it inside out.

Once you’ve turned the sham right side out, you’ll need to add a row of stitches to add your crochet to. I did this with my sewing machine set to the blanket stitch, but you can also do it by hand.

For the crochet:
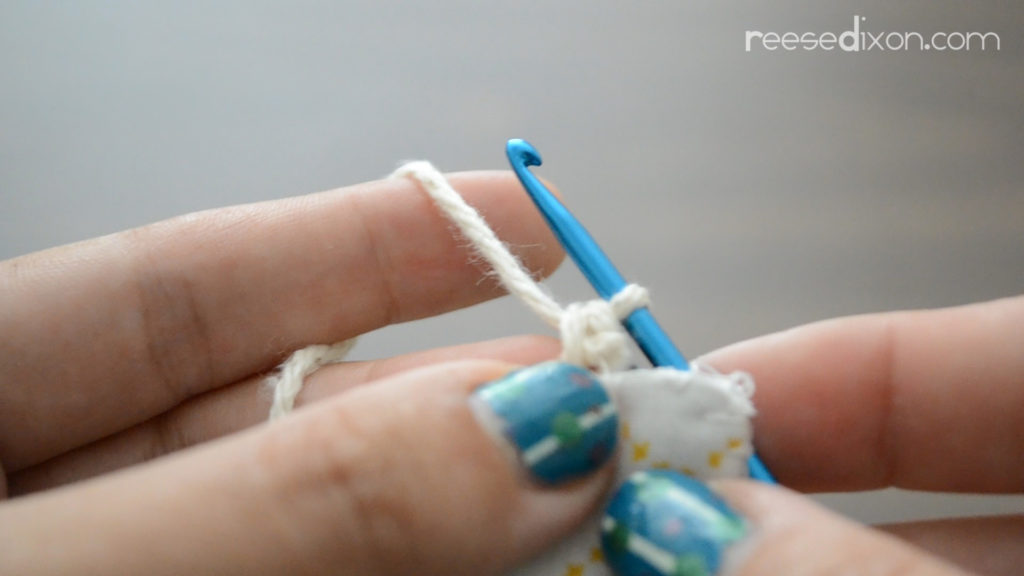
Row 1: single crochet (sc) evenly spaced around the sham in multiples of six. Just stick your hook right through that hole the blanket stitch Unless you have precision sewing skills you’ll need to use a little flexibility in where you place your stitches. Don’t stress about it too much, just work enough stitches so that the fabric can lay flat and do your best to get to a multiple of six. You can always fudge that part if you need to.

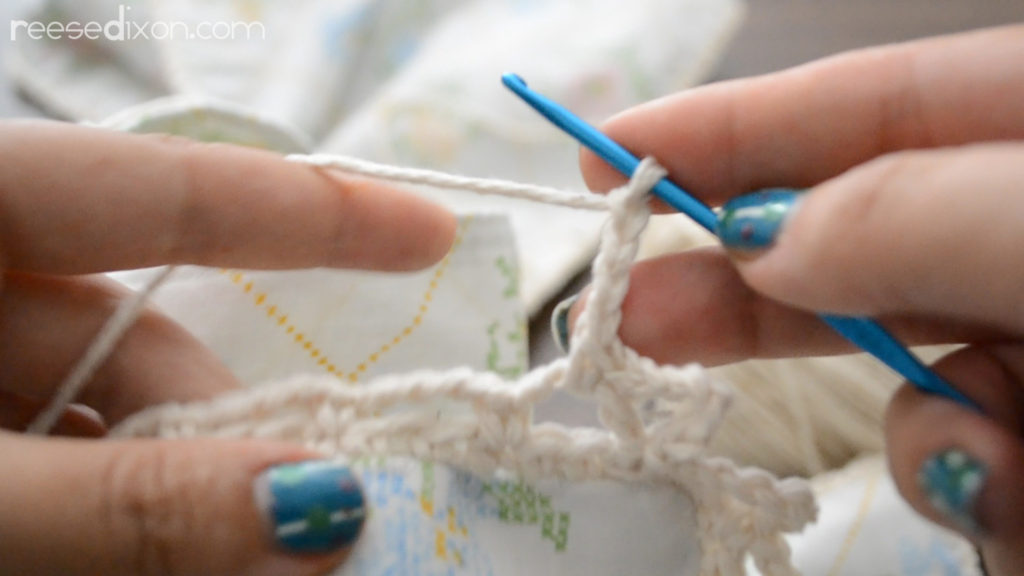
Row 2: Chain six. Skip 2, single crochet. *Chain 4, skip two, sc* Repeat around the entire sham except for when you get to each corner. There you’ll want to chain six to give yourself enough room to round the bend. Close with a slip stitch.

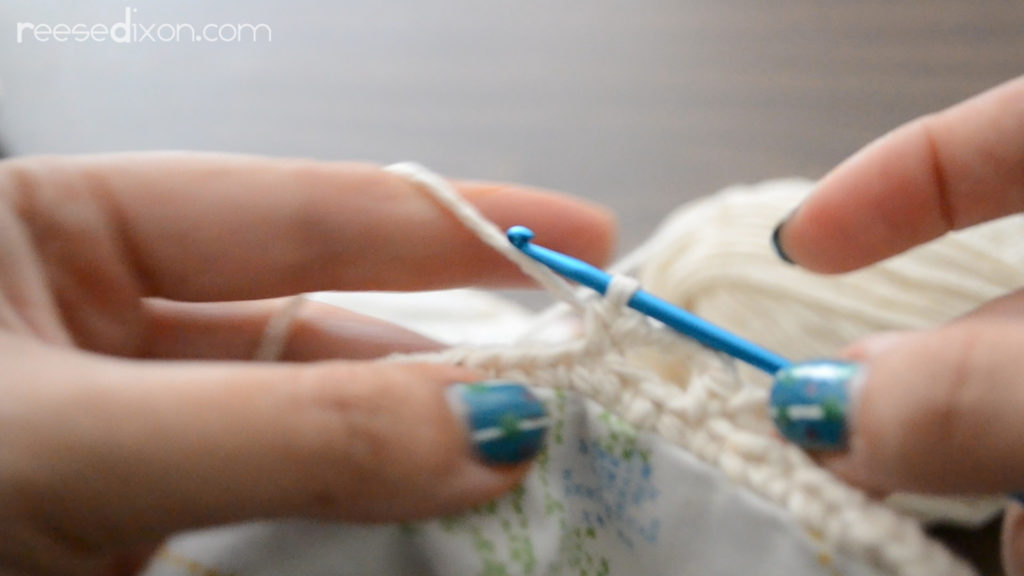
Row 3: *Chain 4, sc in chain 4 loop.* Repeat around the whole sham except for those corner pieces again. In each corner you’ll sc, chain 4, sc, chain 4, and then sc in the next loop. So each corner loop gets two of our pattern.

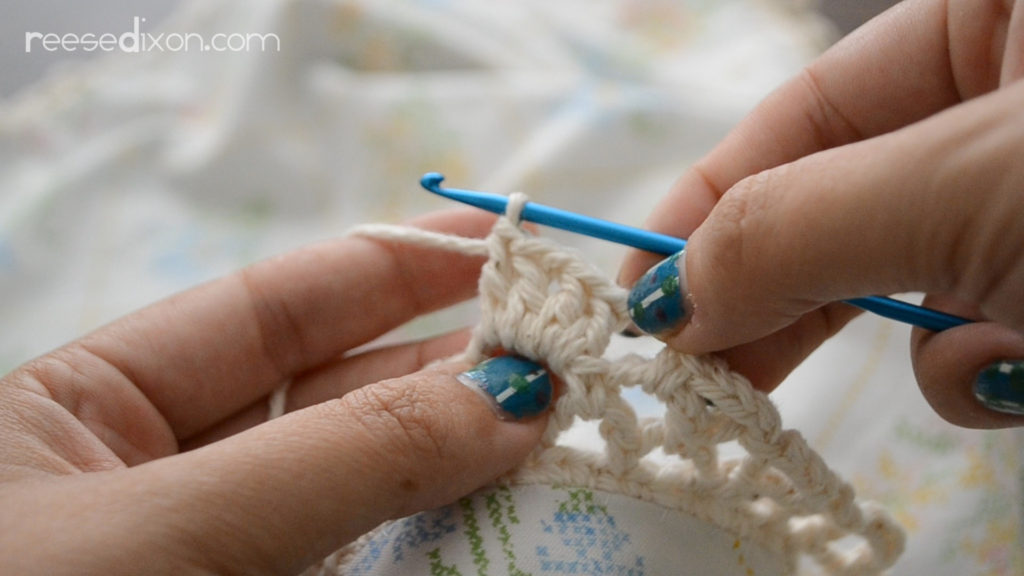
Row 4: Chain 4, sc in chain 4 loop, chain 4. *In next chain 4 loop, 2 Double crochet, chain 1, 2 Double crochet, chain 4. sc in next chain 4 loop, chain 4.* Repeat. Close with a slip stitch and weave in ends.

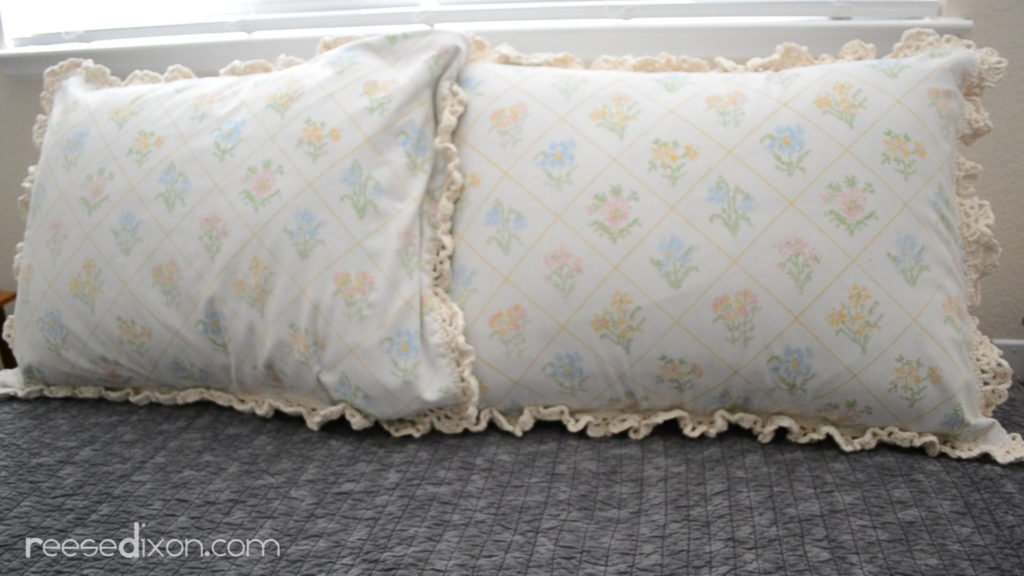
What a difference a couple of pillows make. This room still needs a lot of work, but it’s actually starting to look intentional now. Once I get some lamps in here and something hung up on the walls, I think this room might compete for where I usually sleep.
My guest room is functional, but kind of sad looking right now. There’s not much going on in the way of decor, but I know where I want to go with it. Despite my super modern taste everywhere else, my guest room I want to look like visiting grandma’s house. I want it to be cozy and maternal and feel like you’re going back to childhood memories that aren’t even your own. So since there’s already a handmade quilt on the bed, the next thing to address was pillows.
Pillow shams make such a huge difference on a bed. I’m not a big fan of tons of excess non-functional pillows, but shams make the bed look inviting and have the added benefit of covering up your drool covered smashed down pillow you actually sleep on.

This is the easiest possible sewing project. No zippers or buttons to worry about, just an envelope closure. To really get the grandma look I used a vintage sheet (doubled for thickness) and cut three pieces. You need a front as big as your pillow, and then two back pieces each half the width of your pillow, plus about three inches. Add 1/2″ of seam allowance on each side. For the pillow I was using, the front measured 27″ long and 21″ wide, and the back pieces each measured 16″ long and 21″ wide. Hem one side of each back piece by folding it 1/4″ over twice and sewing down. Make sure that the side you hem will be the side that faces the middle.
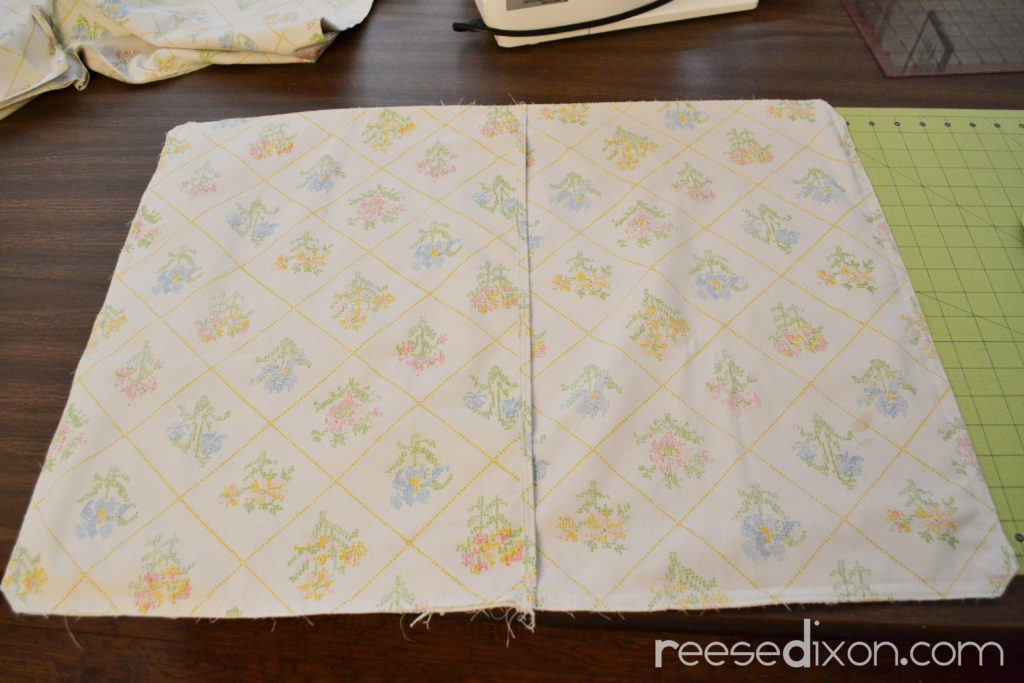
Line the ends of the back pieces up with the front piece, letting the back pieces overlap each other in the middle. Pin in place and sew all the way around. If you’re using an easily frayed fabric like I am, it’s a good idea to zig zag or overlock stitch the edges.
Cut the corners off diagonally. This will make it so that you’ll get a sharper corner when you turn it inside out.
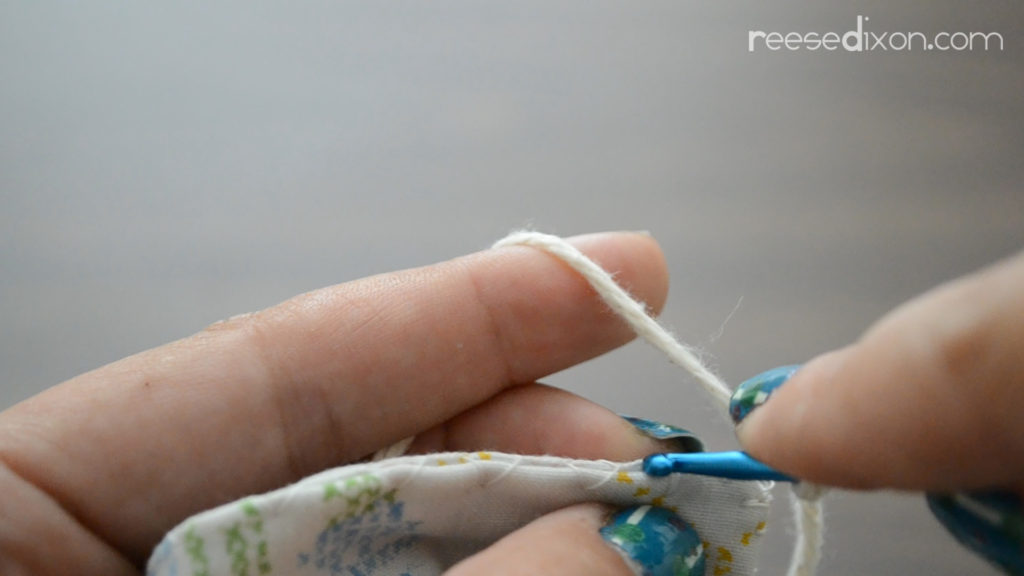
Once you’ve turned the sham right side out, you’ll need to add a row of stitches to add your crochet to. I did this with my sewing machine set to the blanket stitch, but you can also do it by hand.
For the crochet:
Row 1: single crochet (sc) evenly spaced around the sham in multiples of six. Just stick your hook right through that hole the blanket stitch Unless you have precision sewing skills you’ll need to use a little flexibility in where you place your stitches. Don’t stress about it too much, just work enough stitches so that the fabric can lay flat and do your best to get to a multiple of six. You can always fudge that part if you need to.
Row 2: Chain six. Skip 2, single crochet. Chain 4, skip two, sc Repeat around the entire sham except for when you get to each corner. There you’ll want to chain six to give yourself enough room to round the bend. Close with a slip stitch.
Row 3: Chain 4, sc in chain 4 loop. Repeat around the whole sham except for those corner pieces again. In each corner you’ll sc, chain 4, sc, chain 4, and then sc in the next loop. So each corner loop gets two of our pattern.
Row 4: Chain 4, sc in chain 4 loop, chain 4. In next chain 4 loop, 2 Double crochet, chain 1, 2 Double crochet, chain 4. sc in next chain 4 loop, chain 4. Repeat. Close with a slip stitch and weave in ends.
What a difference a couple of pillows make. This room still needs a lot of work, but it’s actually starting to look intentional now. Once I get some lamps in here and something hung up on the walls, I think this room might compete for where I usually sleep.


Through studying this post I memorized my childhood!! It's amazing to learn you have attentively taken such concept and crocheted pillow sham tutorial indeed inspired me to make something like such pillow.
Your sewing machine has a blanket stitch setting?? I wonder if mine does…
I’m so glad I found my solution online.
Very nice article . thanks a lot for sharing your awesome experiences with us.
try to visit my 12 inch drop bed skirt.