
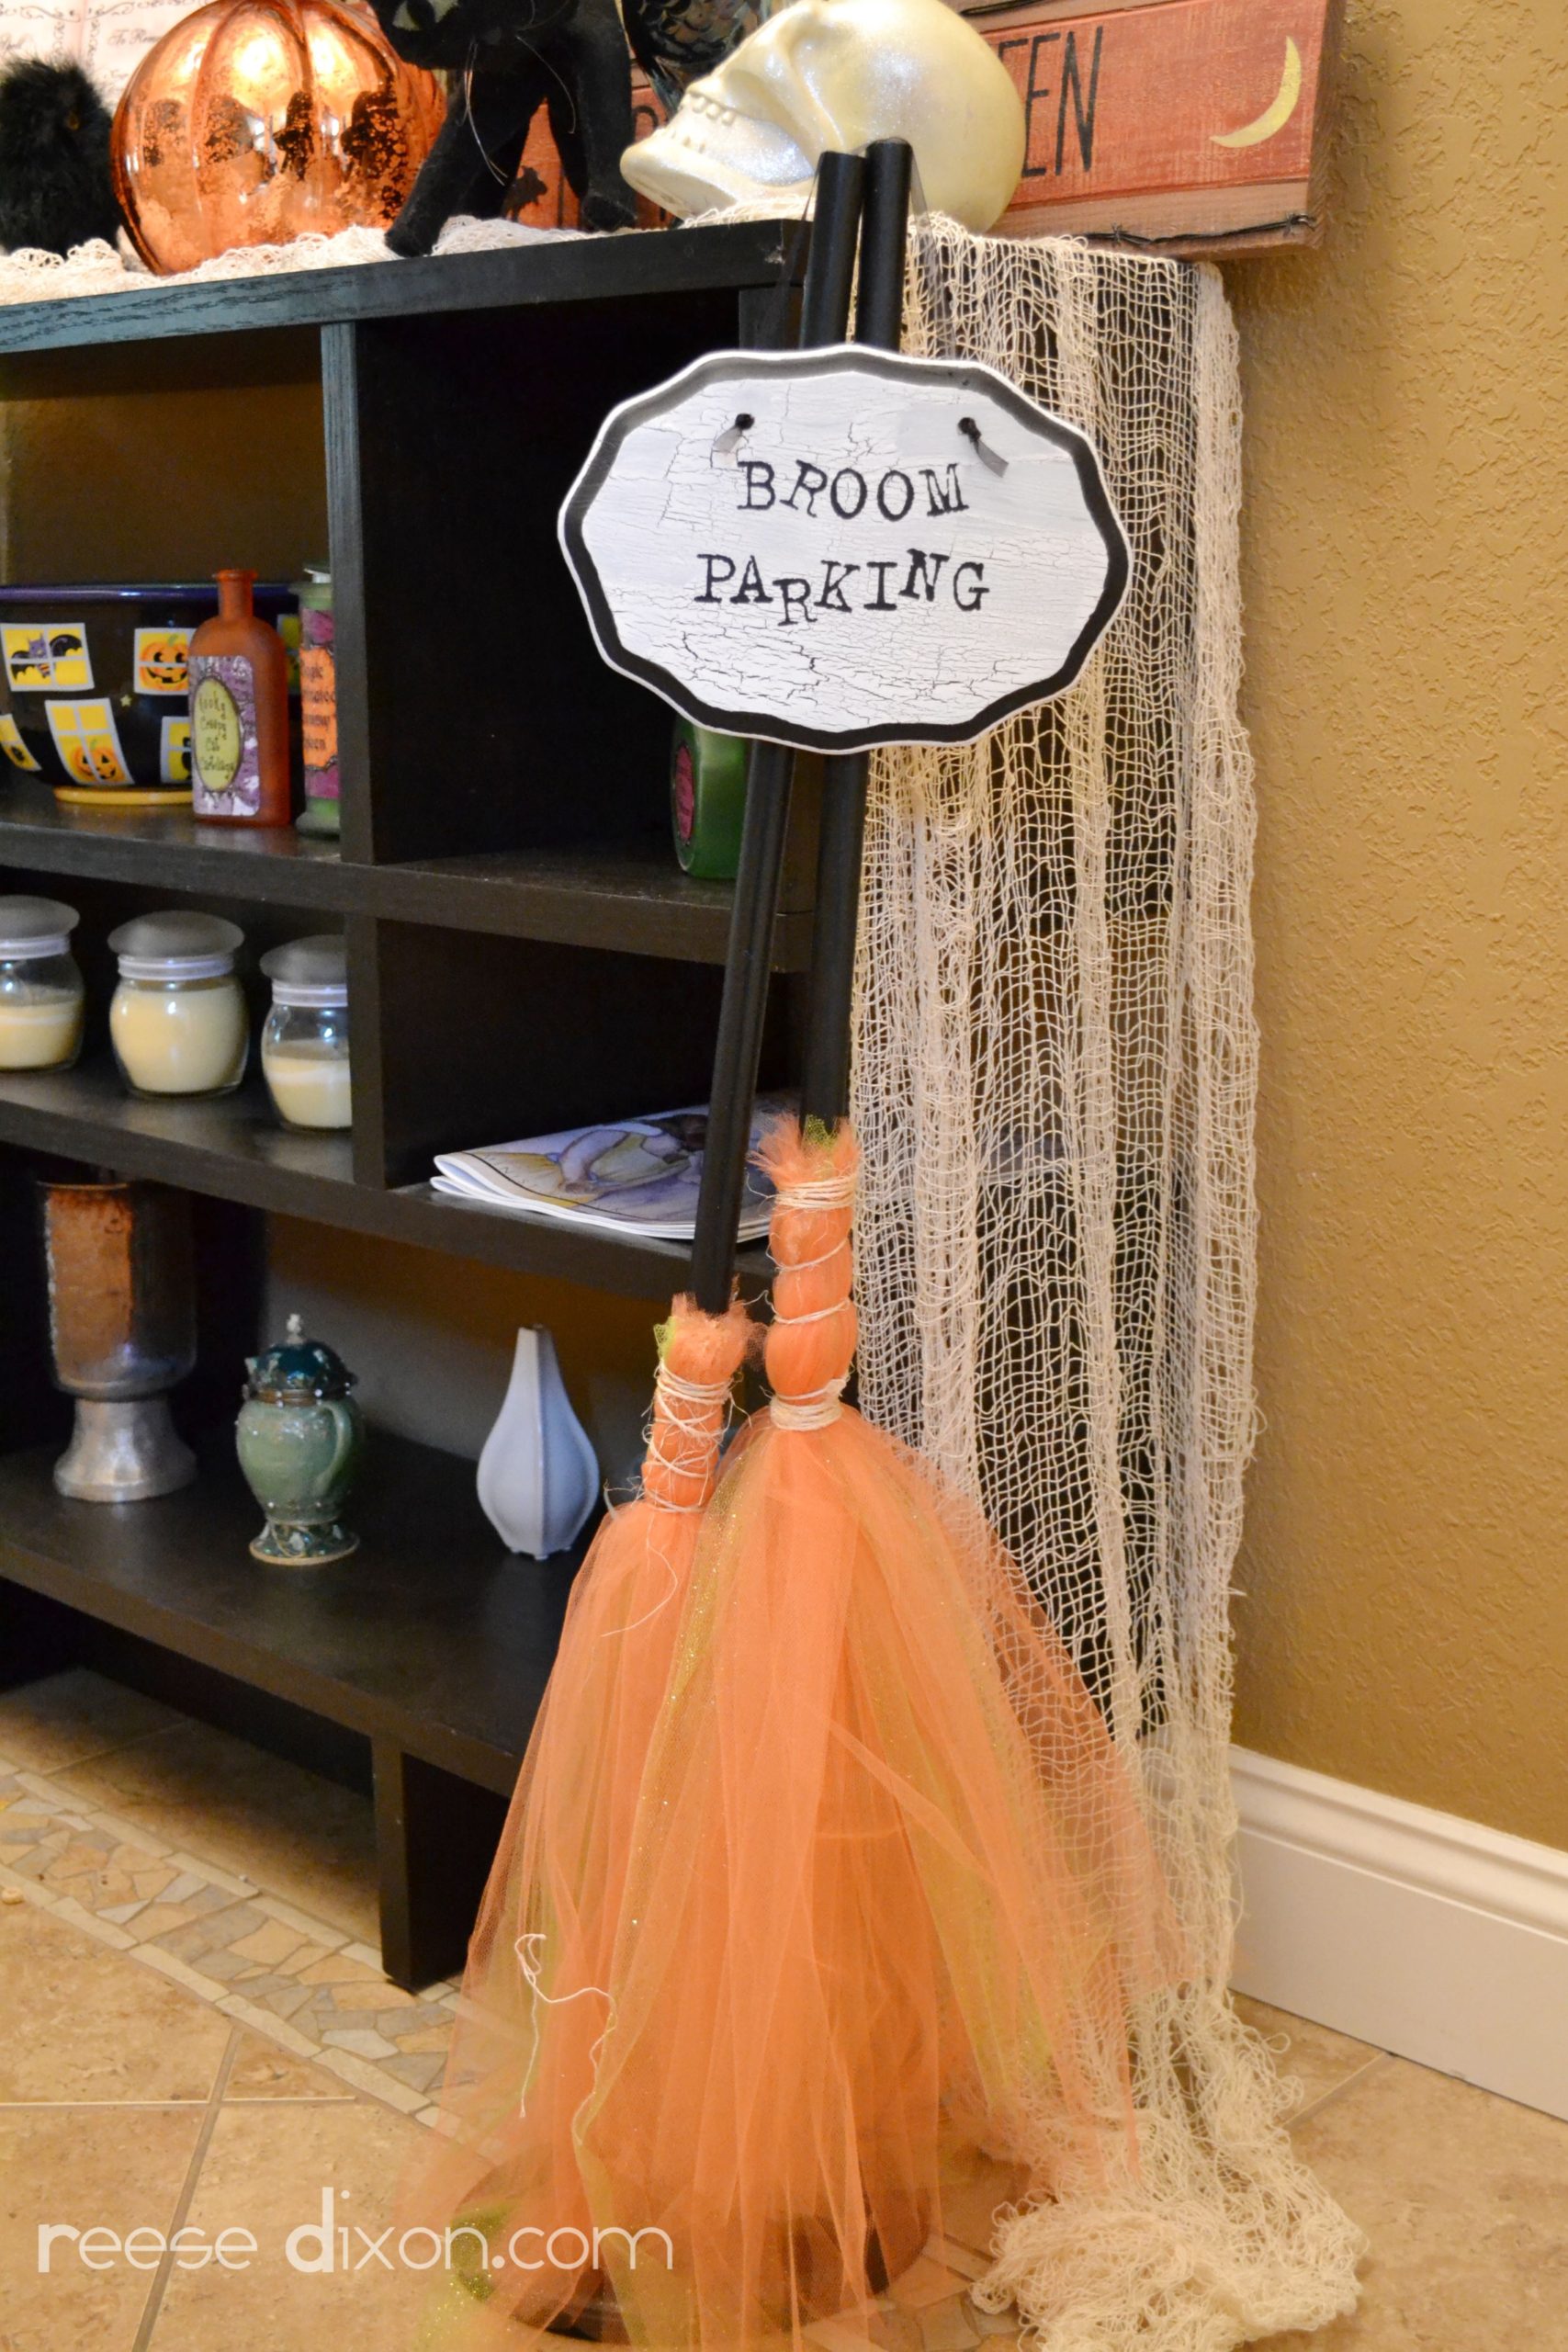
I go so crazy in my holiday decorating that there are really no surfaces left to decorate. Every table has a centerpiece, my mantle is filled to overflowing, and there’s barely a place left to set a drink. But that’s not going to stop me, oh no. Not by a long shot. I’ve already got two Halloween trees filling up corners, but I wanted to make something slightly smaller scale for the corner of the entry way. Something that could stand up by itself and fill in any old spot that’s looking less than festive. This “Broom Parking” display is the perfect thing to put right by the front door for any guests needing a place to stash their transportation.
You’ll need:
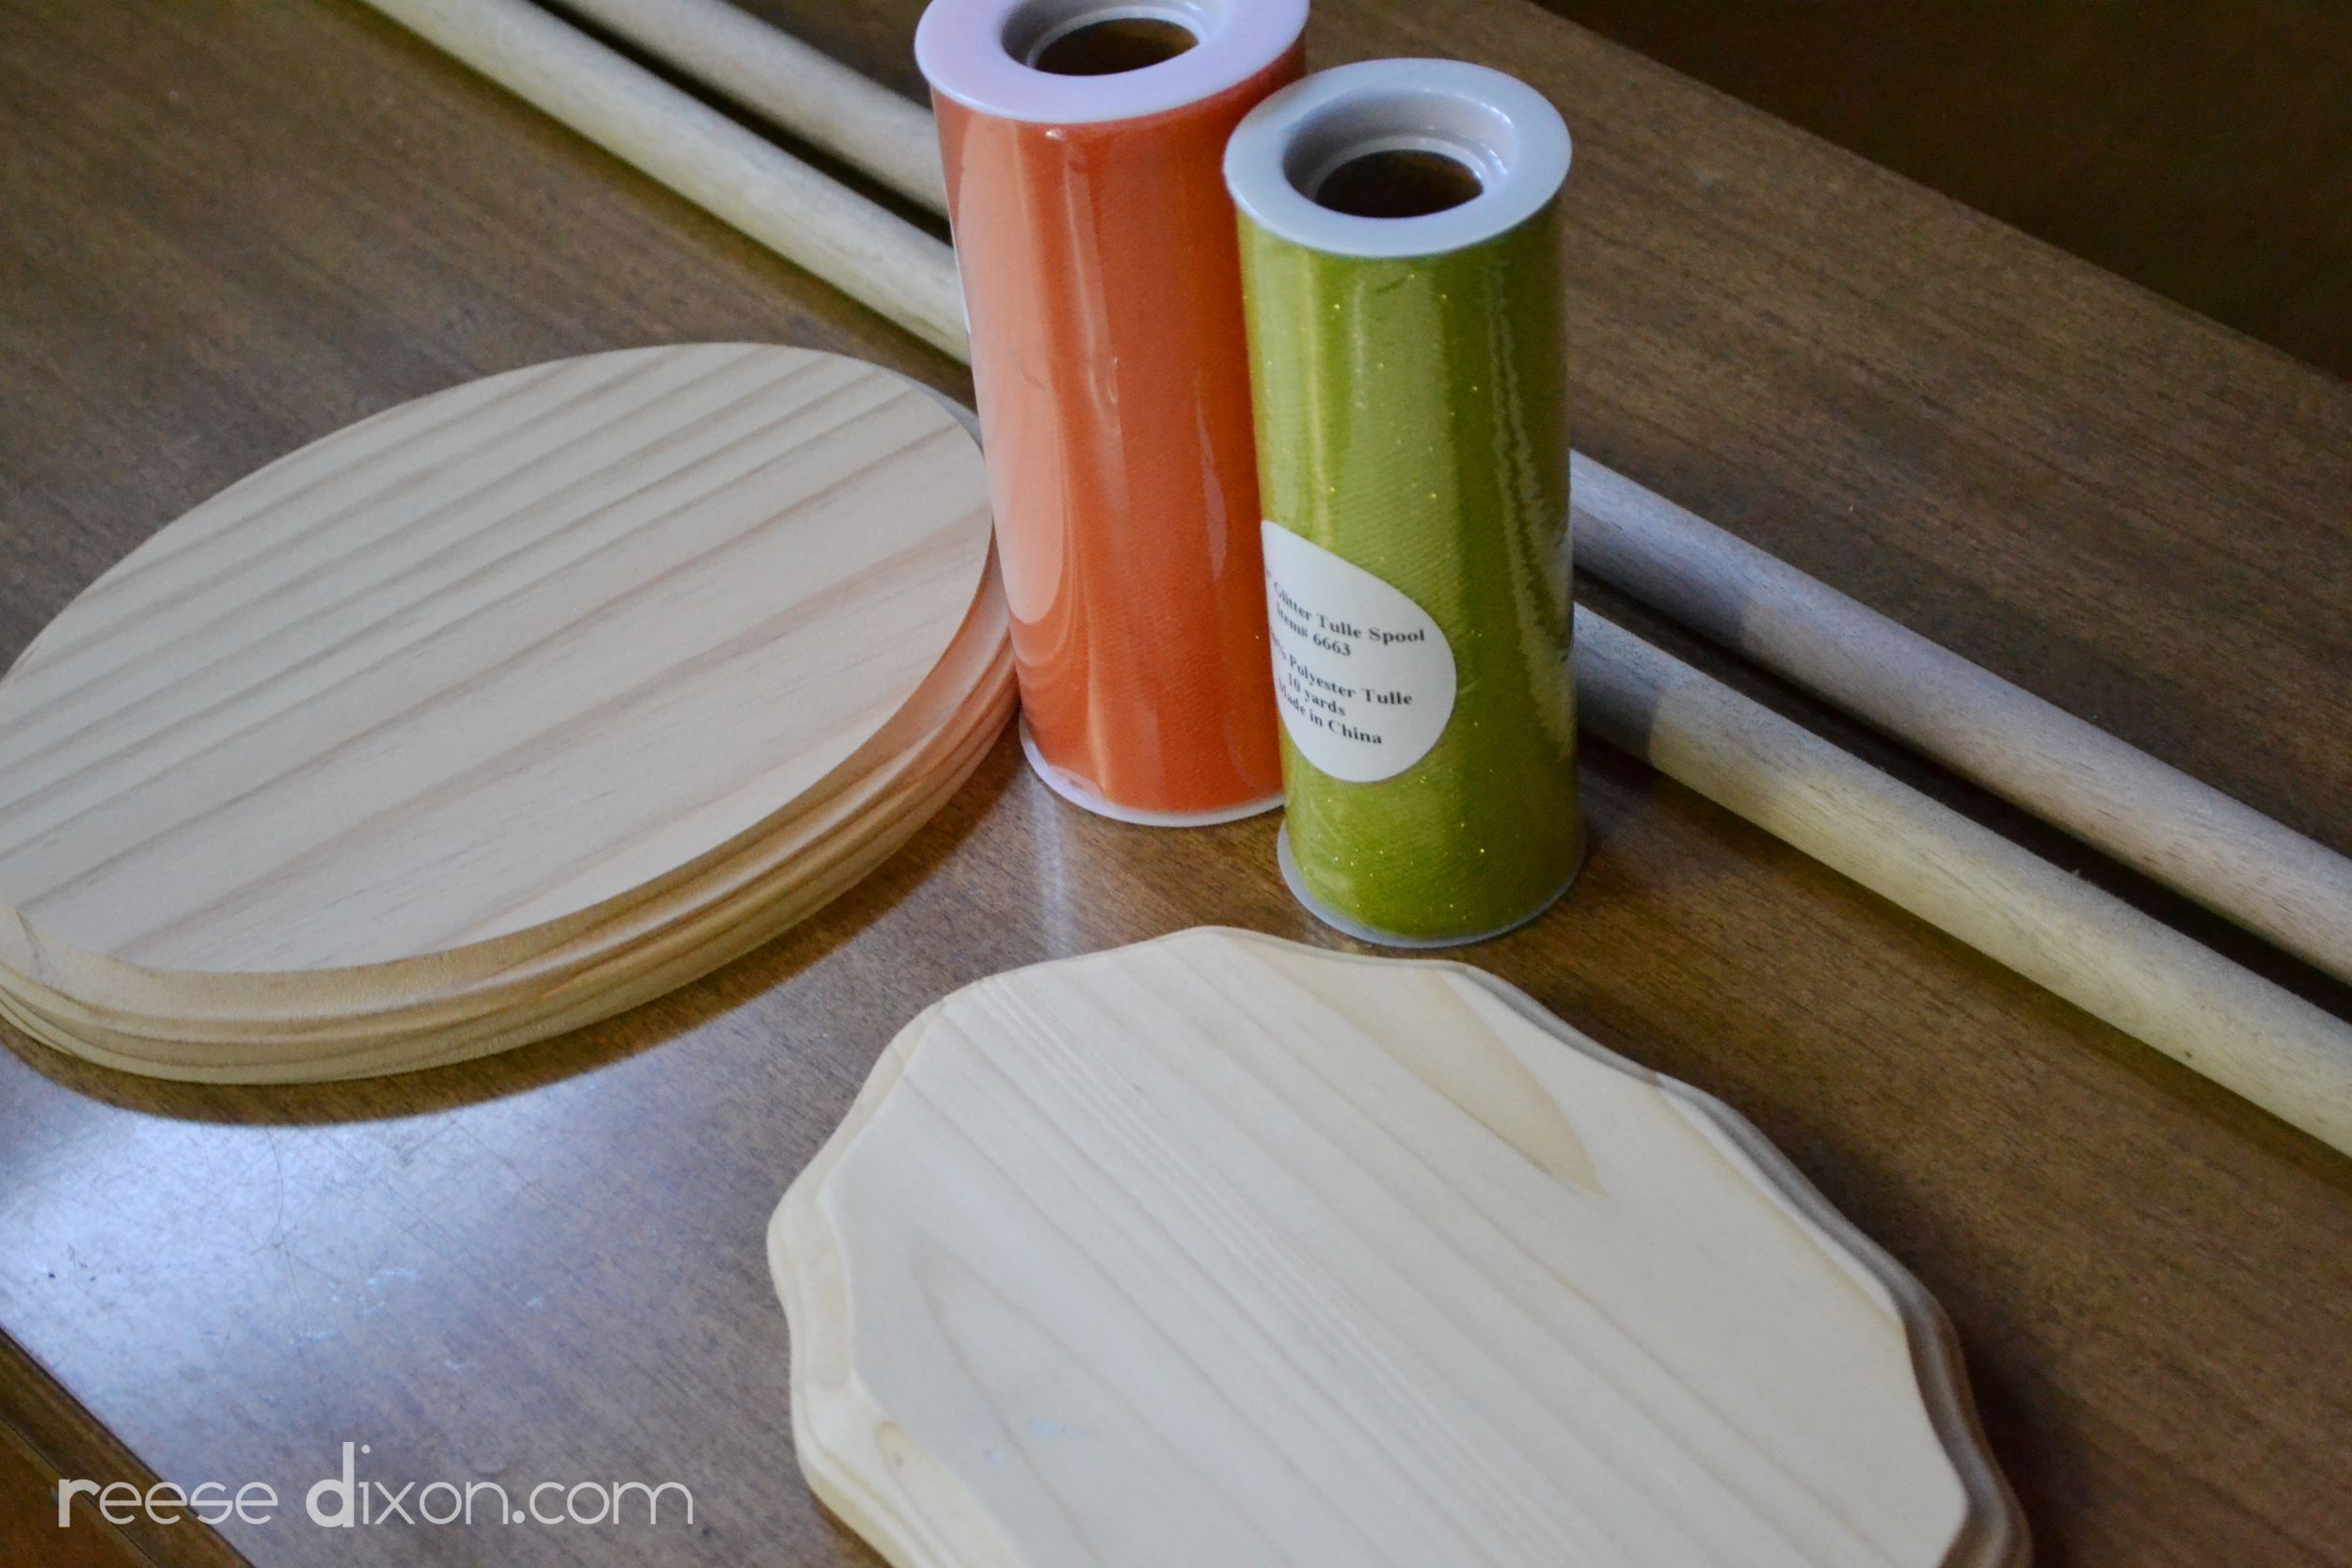
Two wooden plaques. One large enough to be the base, and the other decorative to be the sign.
Two wooden dowels. Mine measure 3/4″ x 3′
Two spools of tulle.
Paint
A drill and bits
Ribbon
Rubons

Start by painting all the wood pieces black. Once the plaque you’ll be using for your sign has dried, I painted it with a coat of crackle medium. This will give my sign the cracked paint effect I want to make it look older and spookier.

While the crackle paint is drying, take your base and drill two holes in it. The paddle bit you use should be the same size as your dowels. Don’t drill all the way through, just about 3/4 of the way through to make a pocket for your dowels. I drilled one of the holes straight down, and the other I drilled at an angle to make the brooms lean against each other.
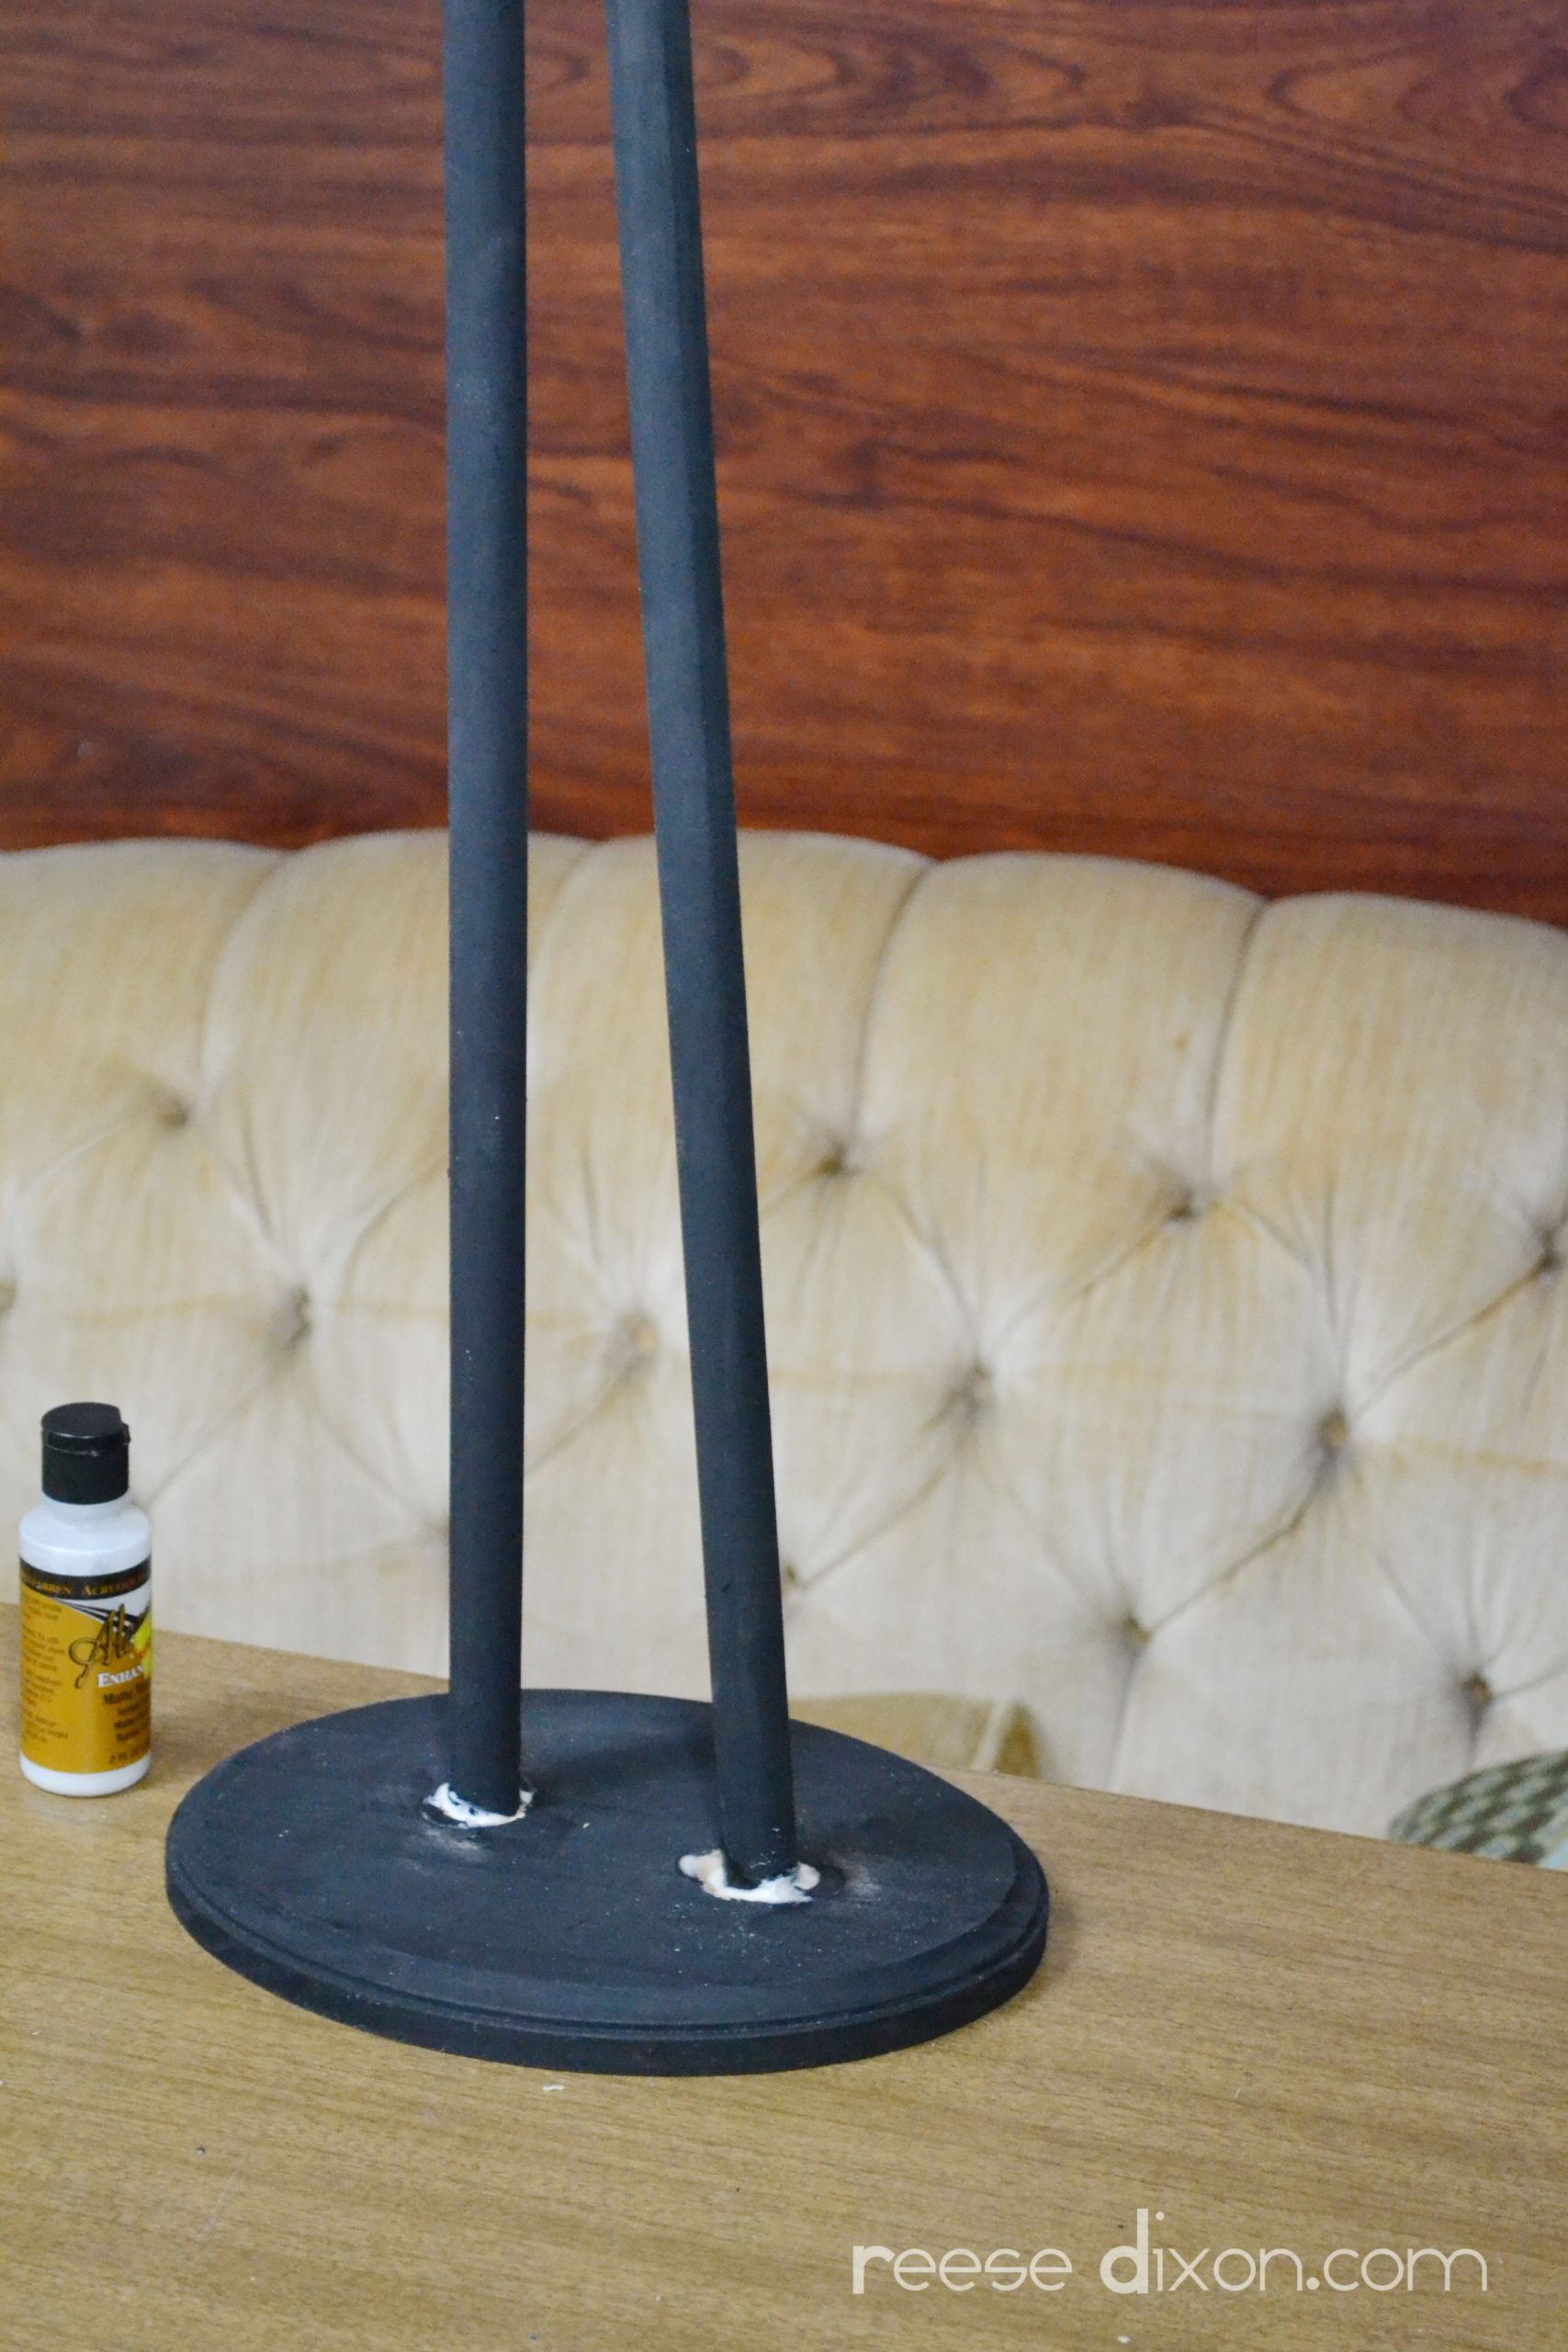
Use a whole lot of wood glue and stick those dowels into their holes. I used a matte varnish to add a bit of polish to the broomsticks, and to give it a bit of texture I let the varnish drip and splatter so it would look like more than just flat painted dowels.
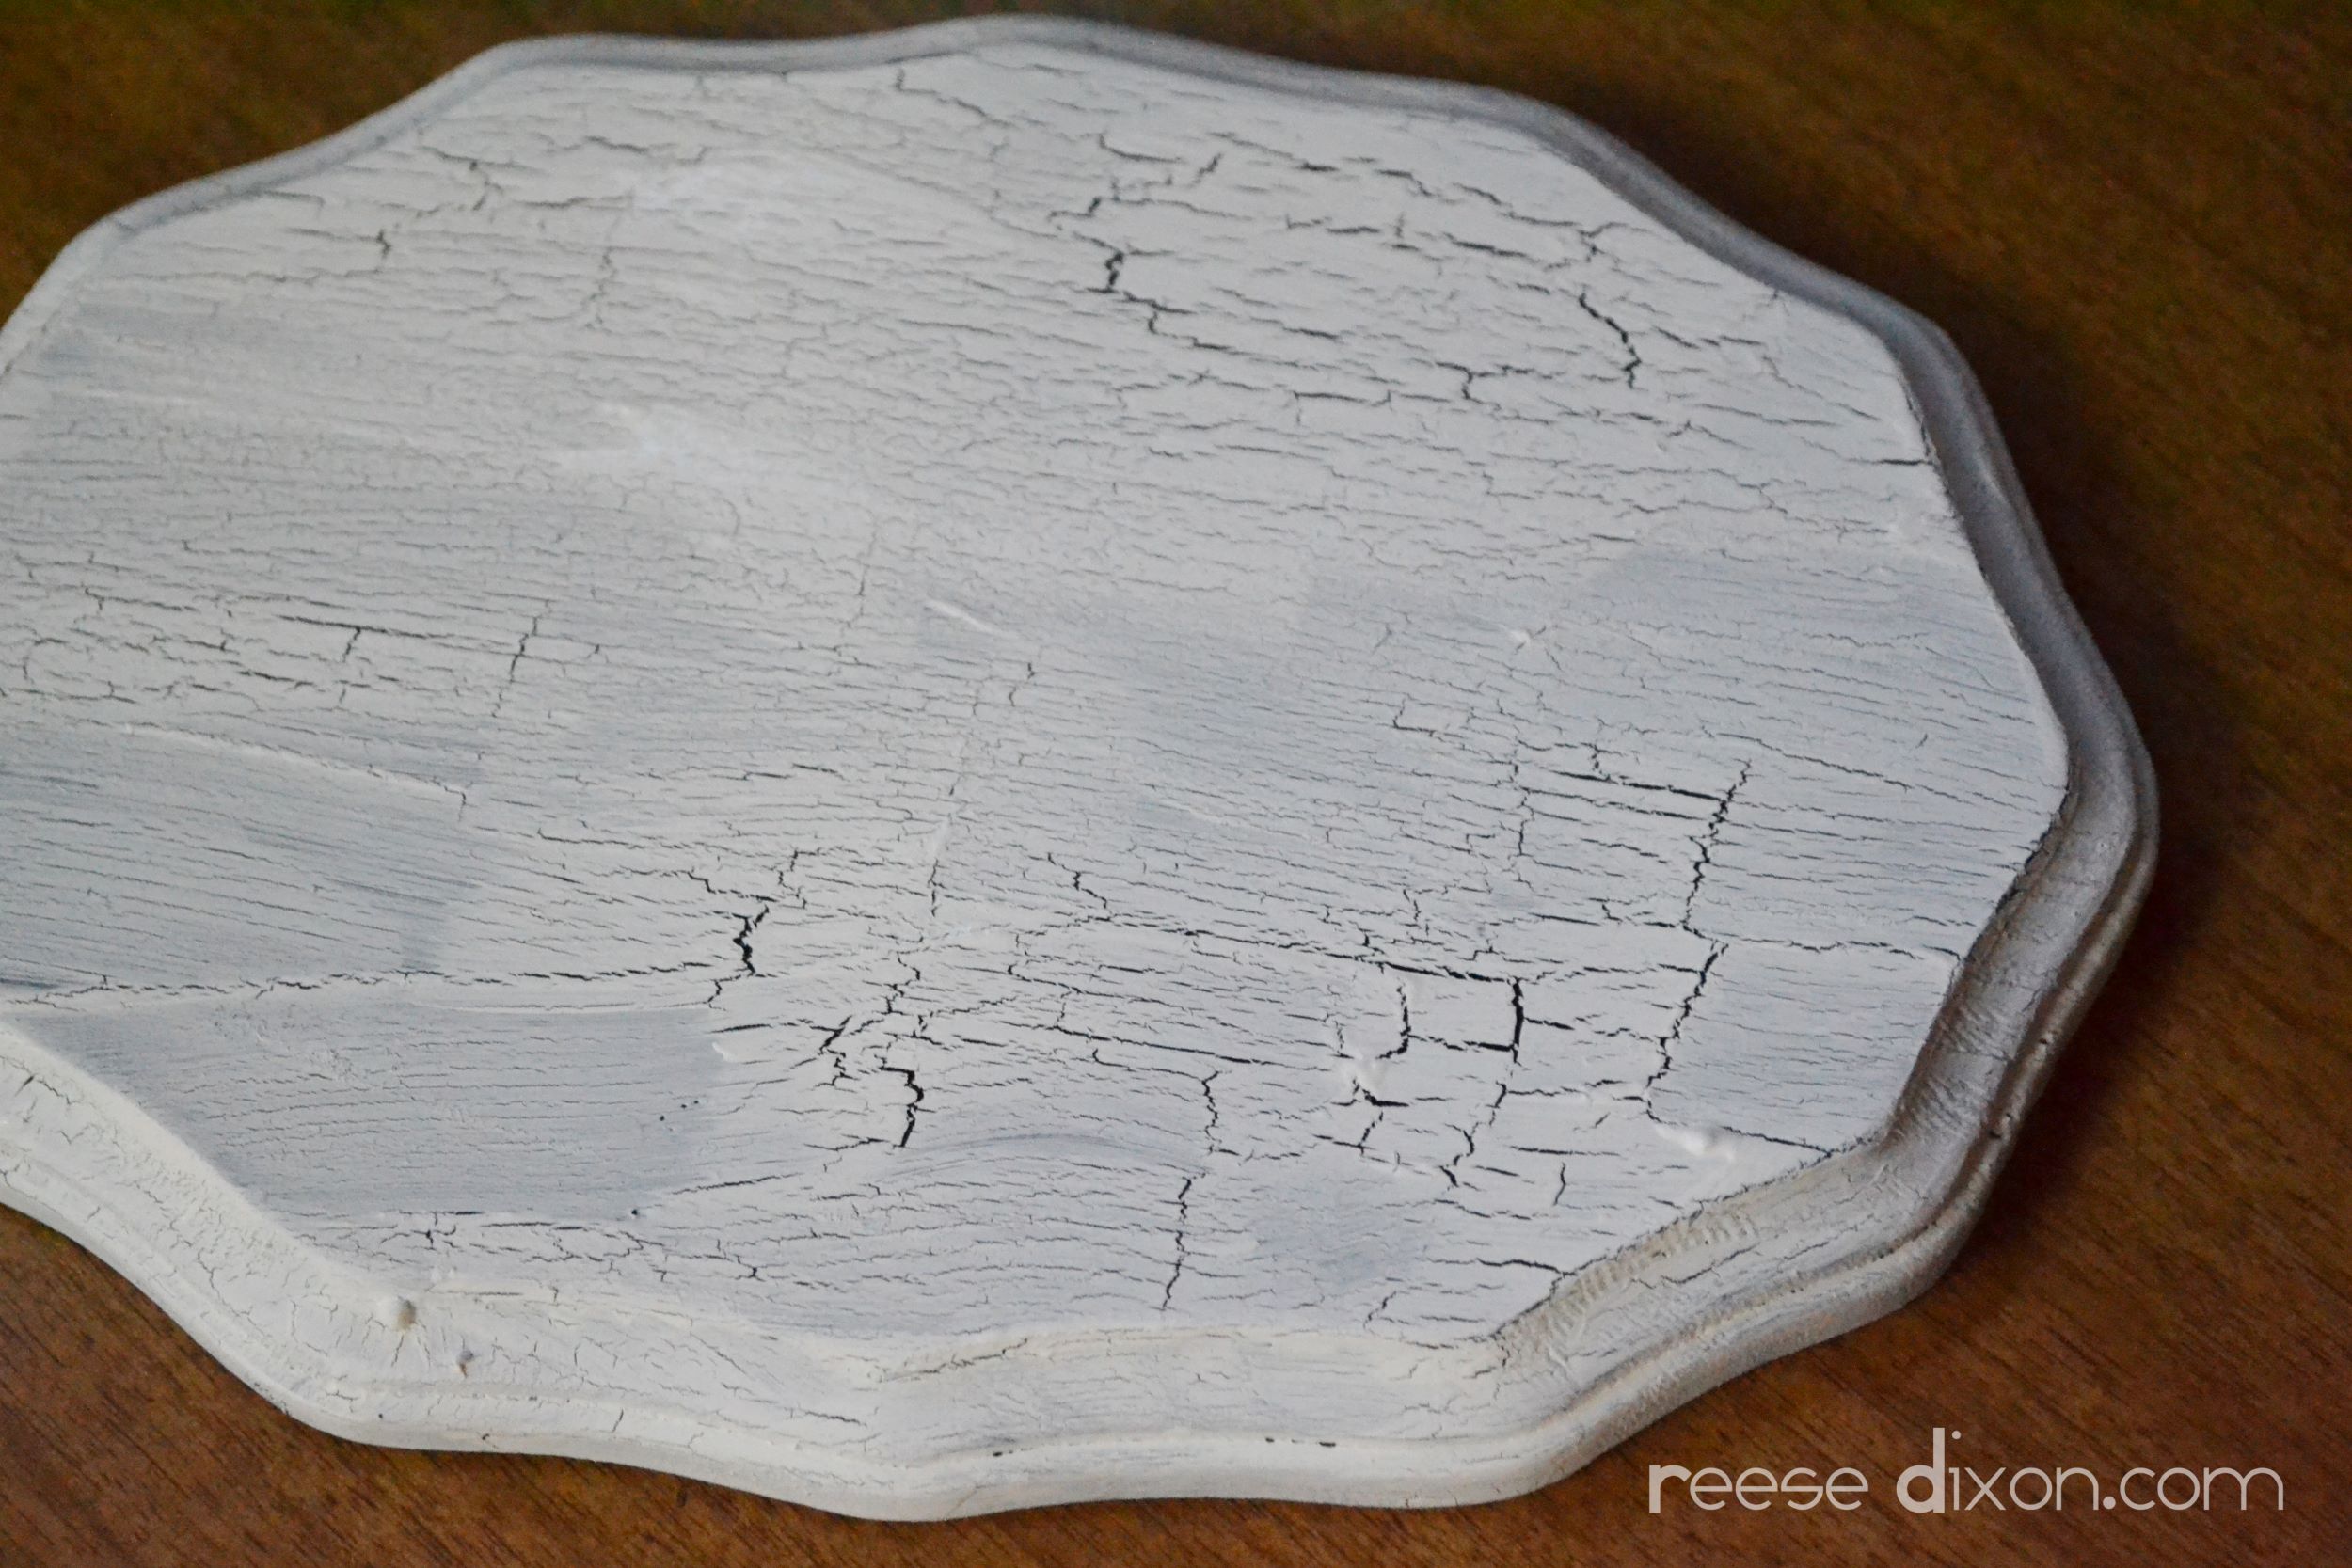
Meanwhile you can finish your sign. To get the best crackle effect, use a lot of paint and work quickly. You only get one coat so you need a heavy application, and once you start to see crackling happen you shouldn’t touch it. It won’t crackle twice so slap on your paint and leave it alone.
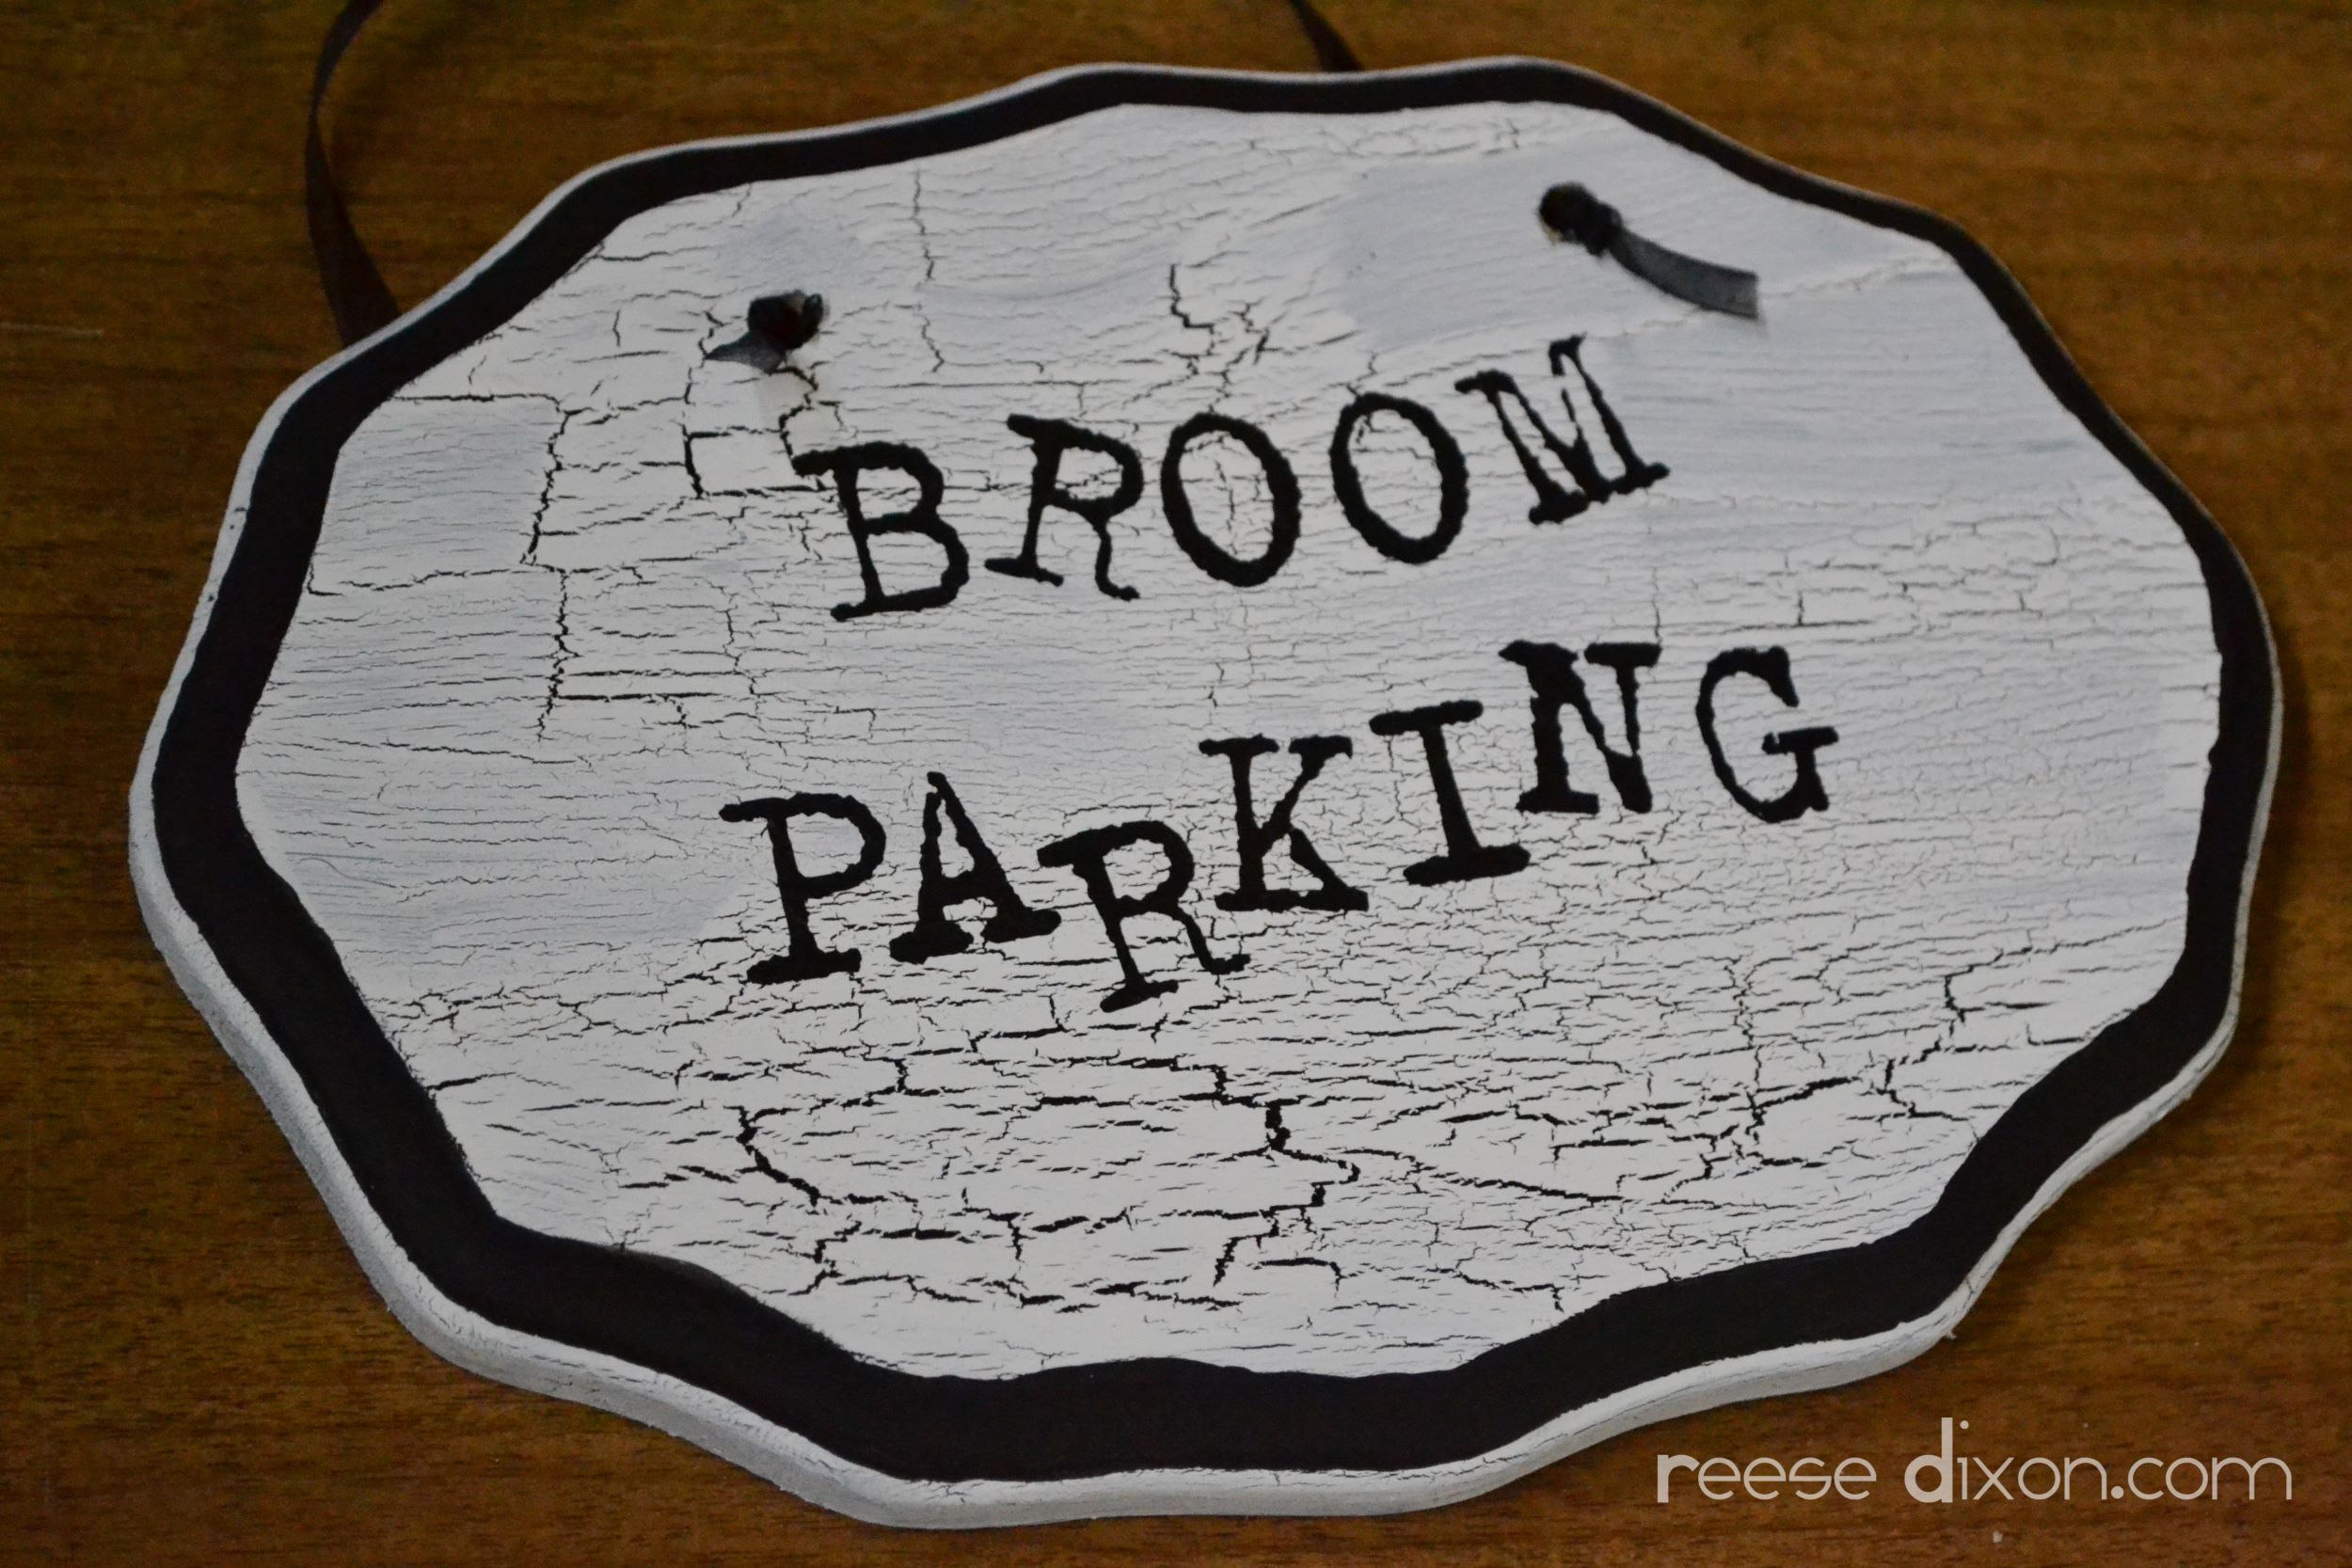
With the paint dry you can finish decorating the sign. I painted a black border, used rub-ons for my lettering, and then drilled a couple of holes through the top and used a ribbon to act as the hanger.
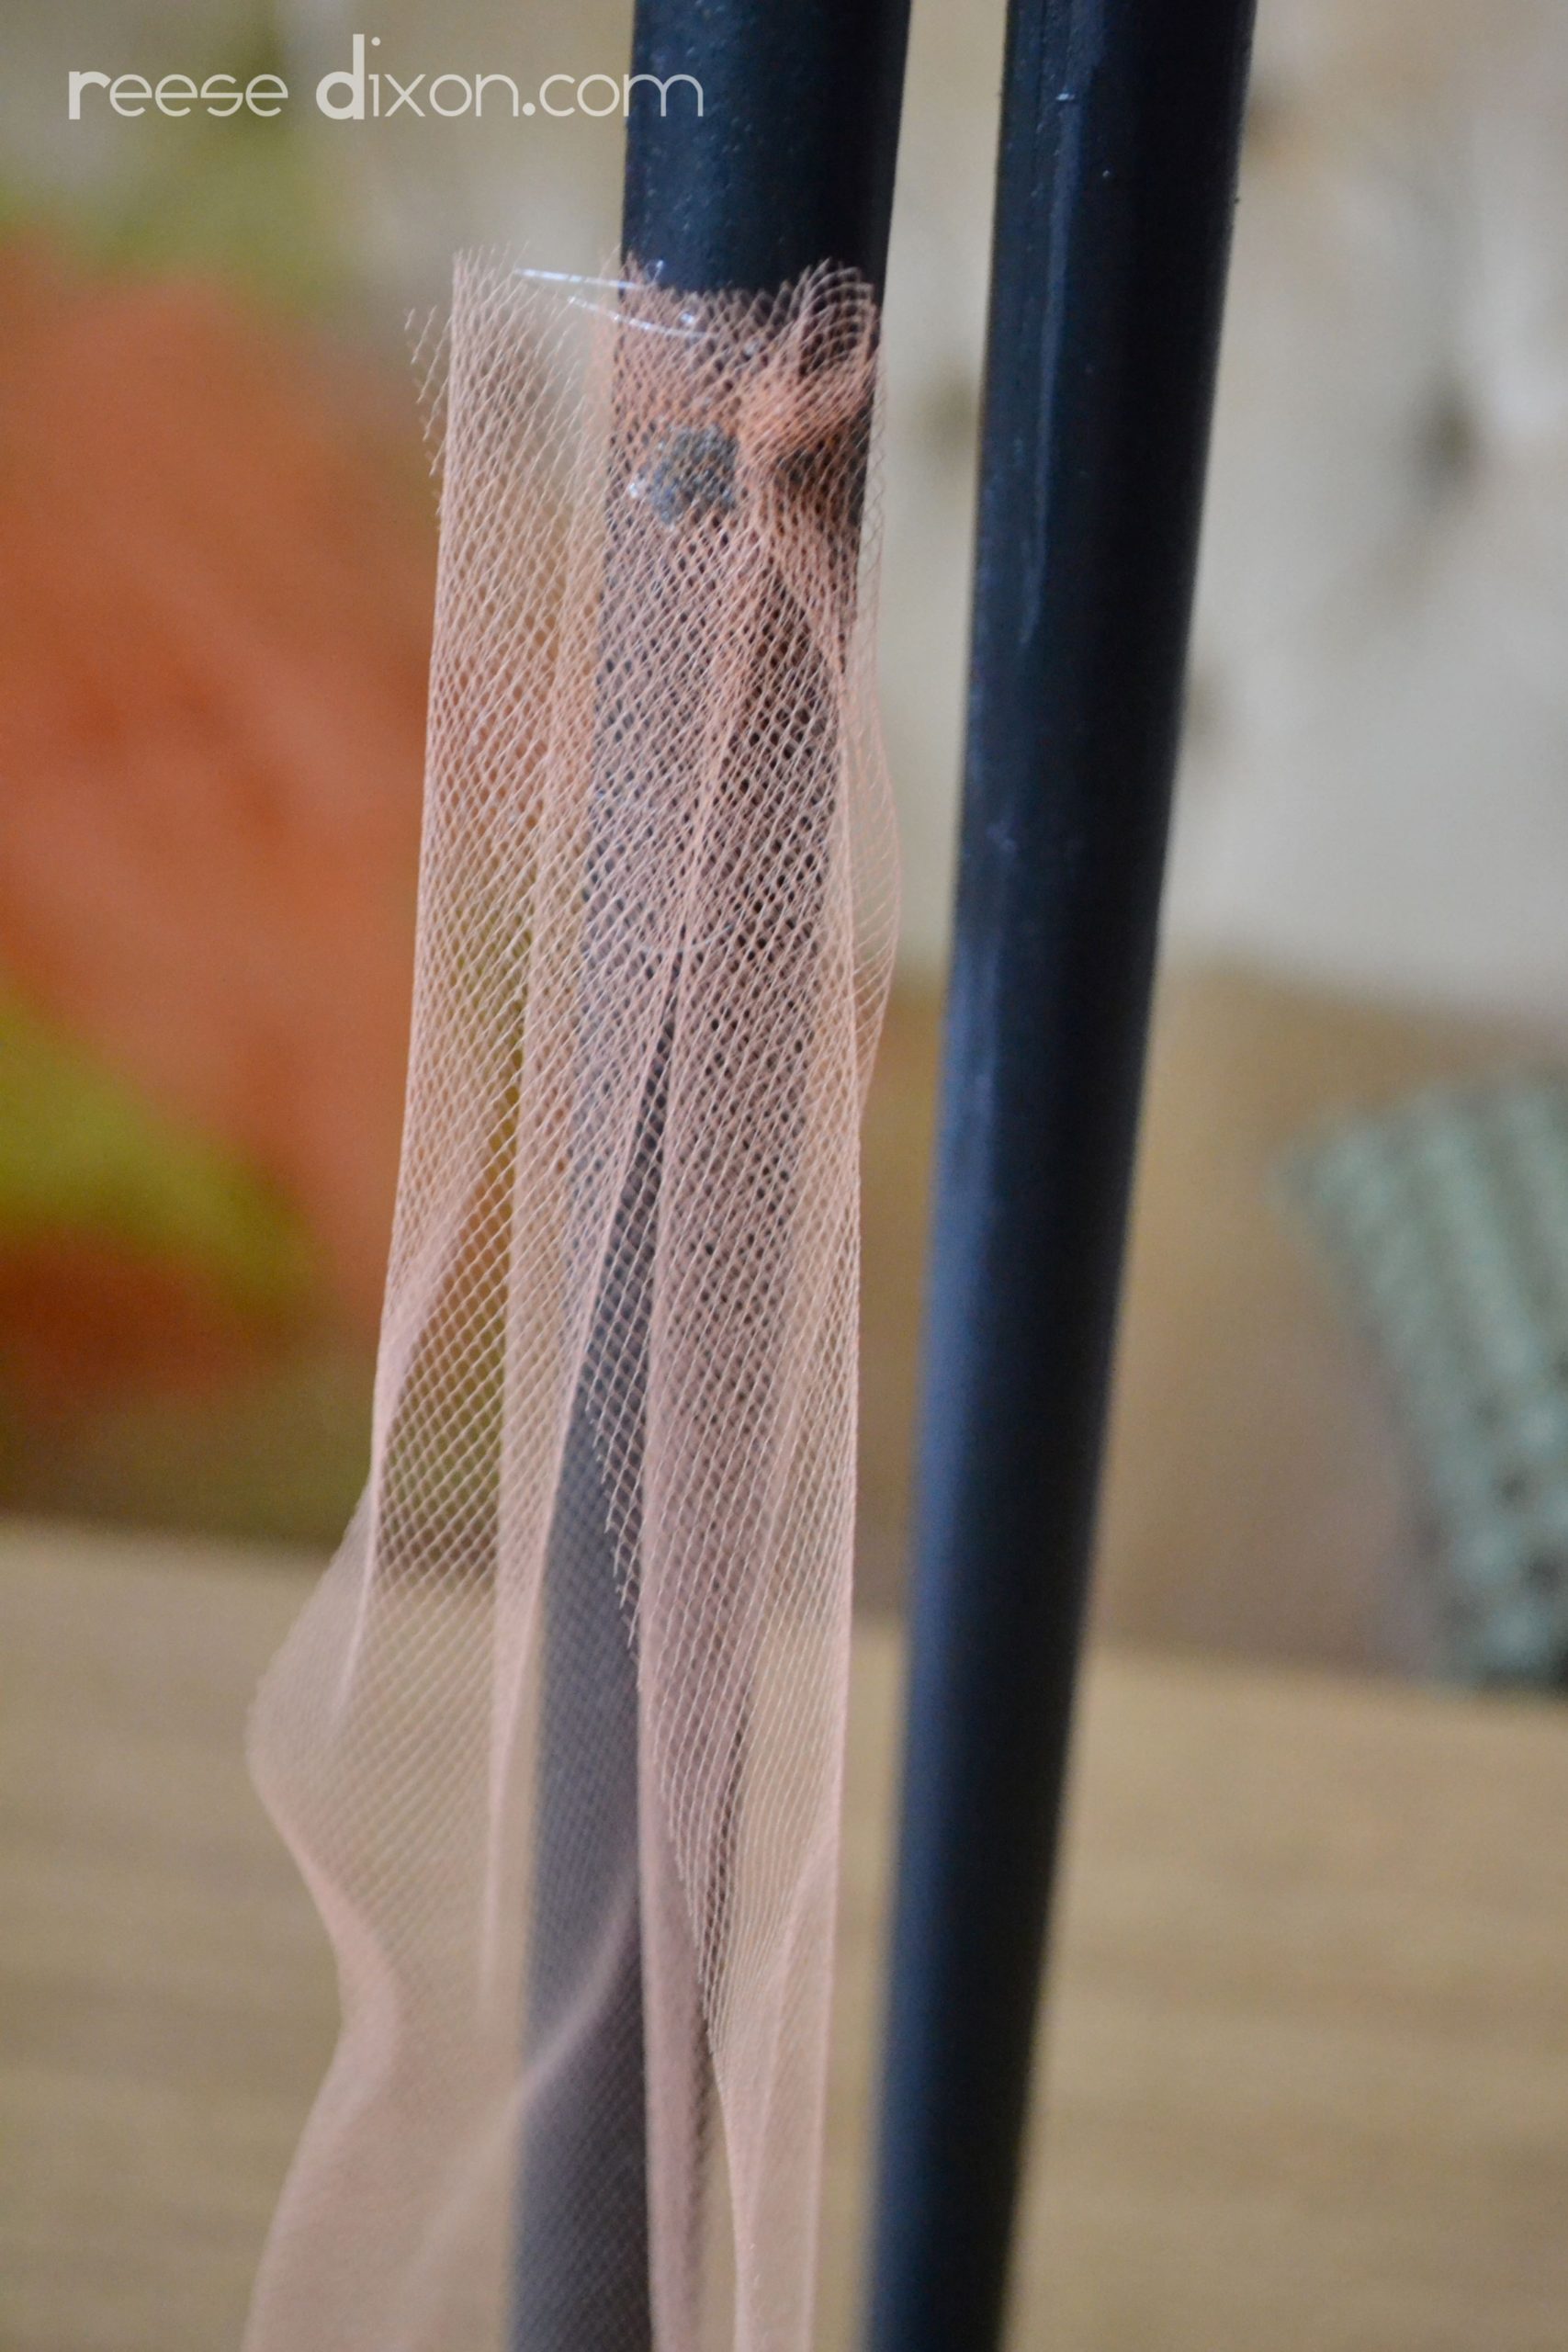
Cut your tulle into pieces roughly 18″ long. About 1/3 of the way up the broomstick, start hot gluing the tulle around to act as the bristles. Be very careful with the hot glue, it will pop right through that tulle and burn the crud out of your hands. Put pressure above and below the glue until it’s cool enough to touch. Keep adding tulle all around the broomstick, mixing the colors as you go.
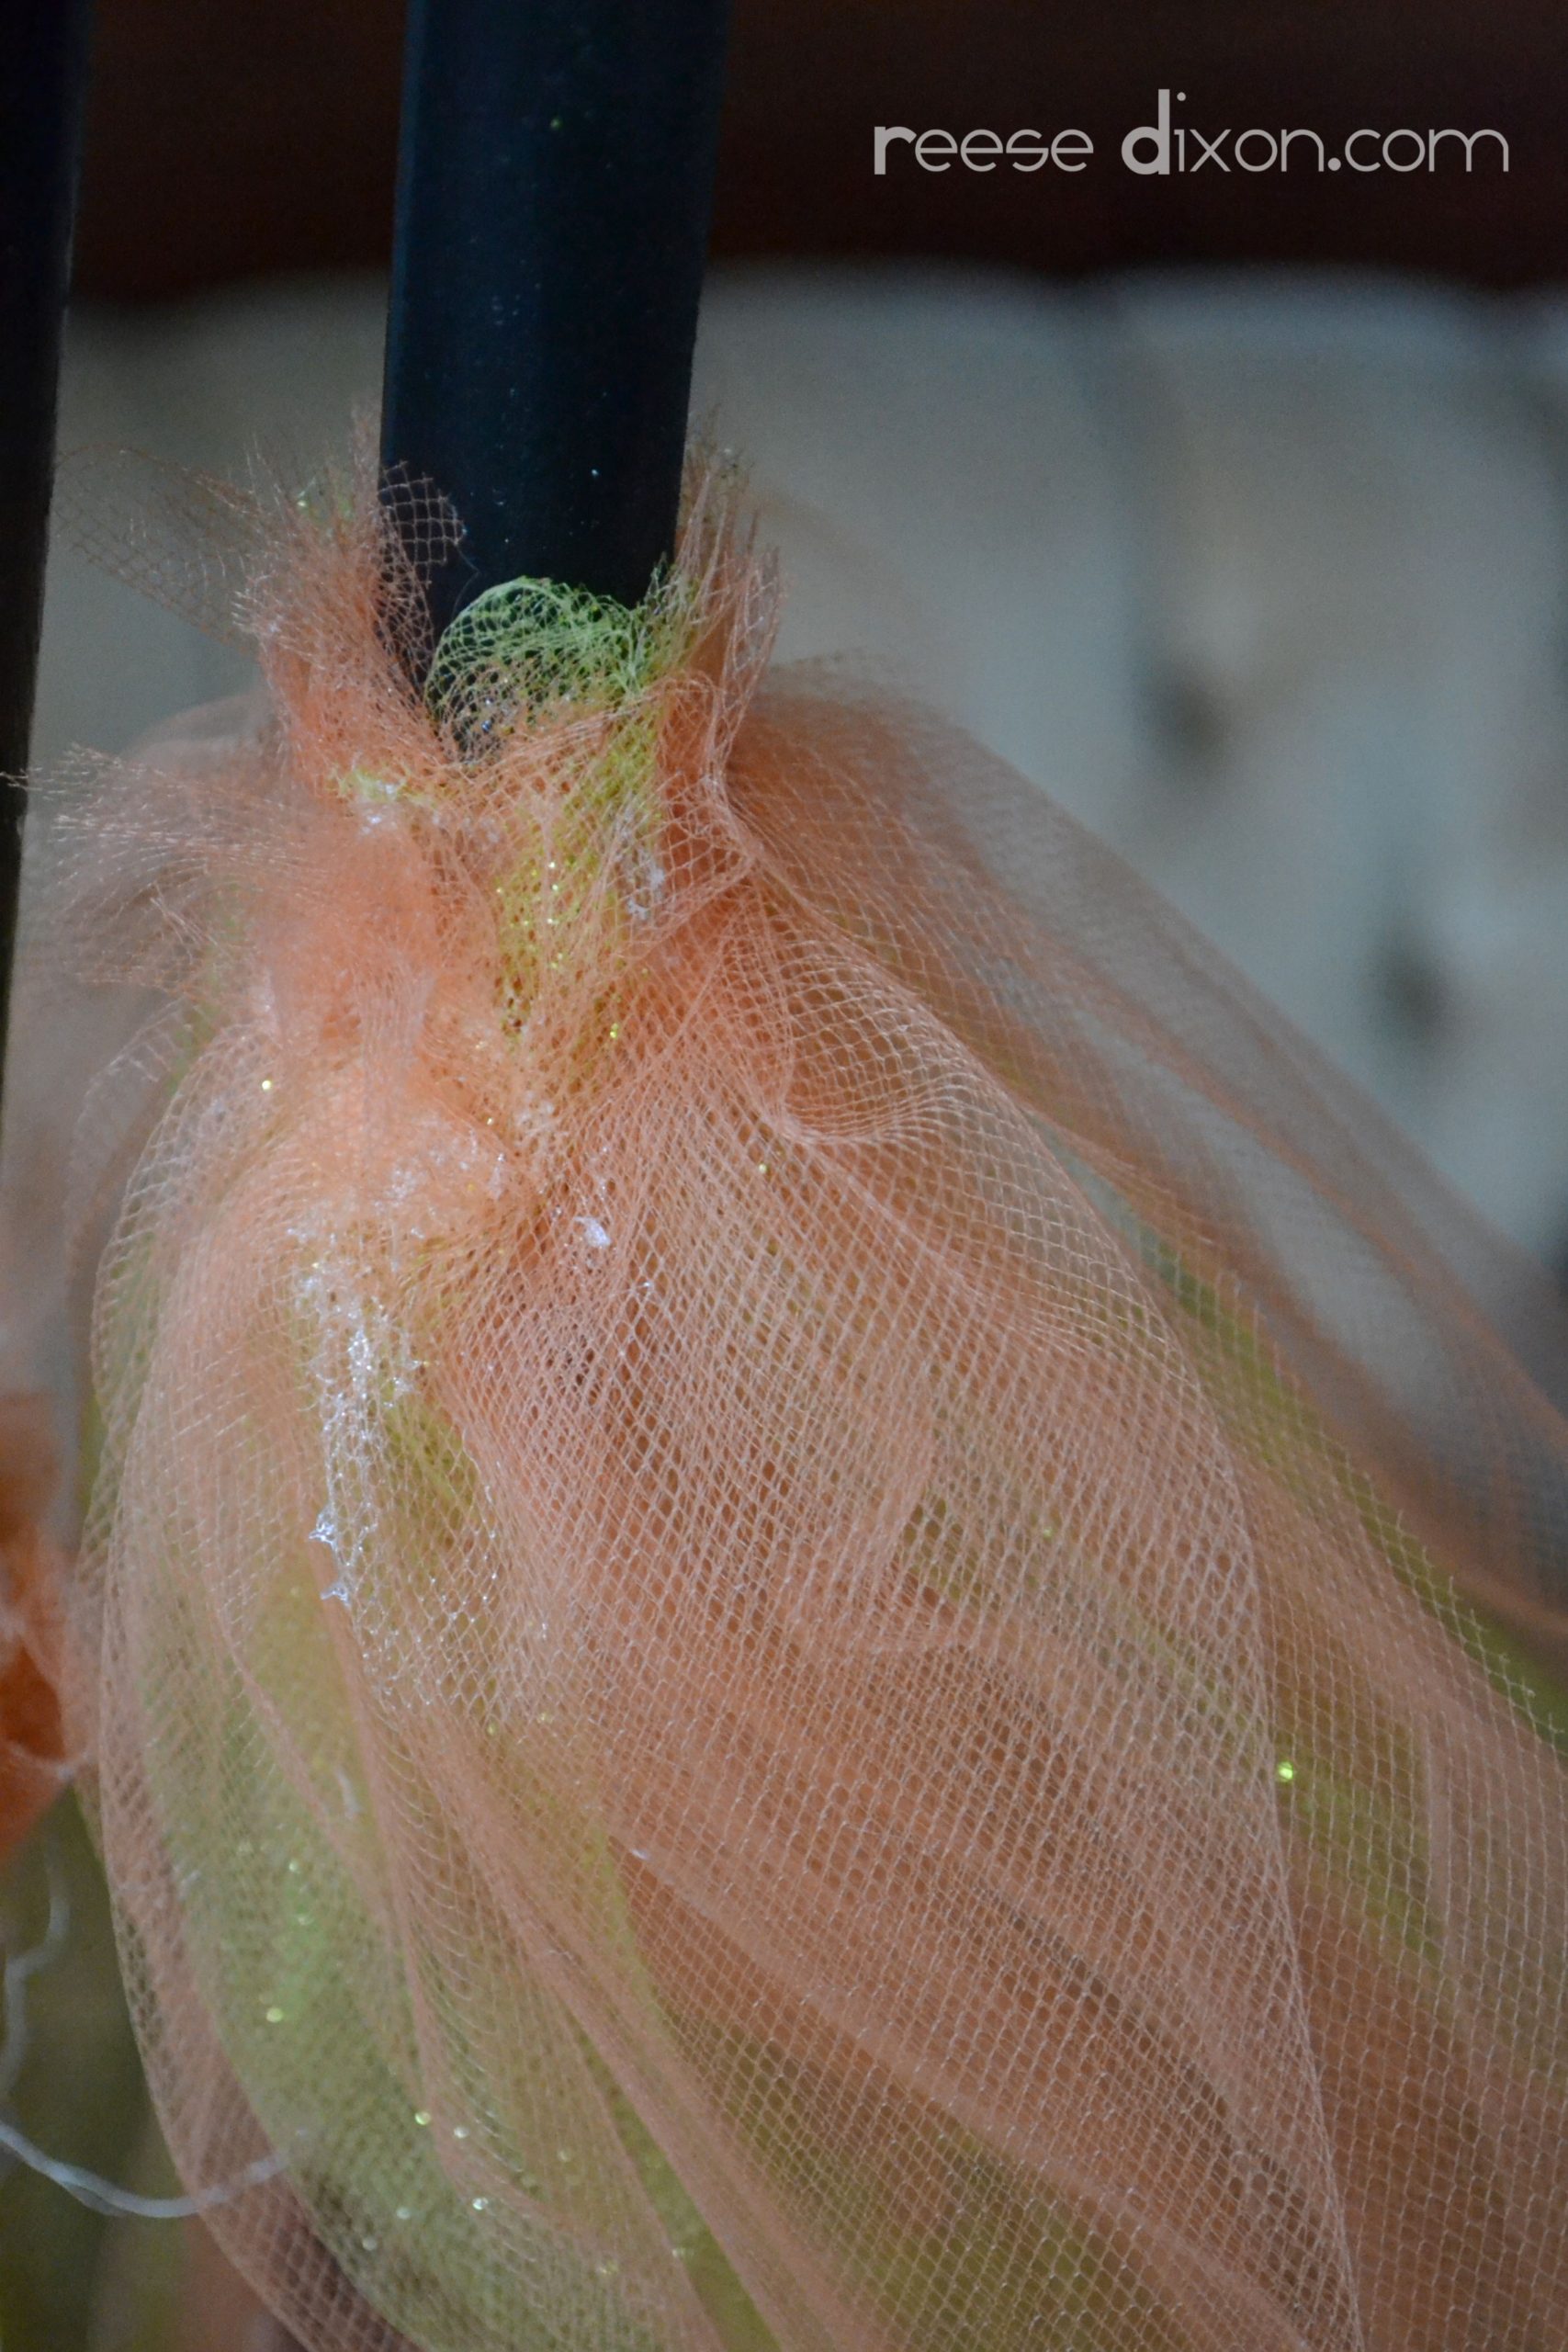
Keep adding layers until you have some good volume, and the stick can’t be seen. If it get’s too bulky around the top, add some pieces underneath just a little lower down.
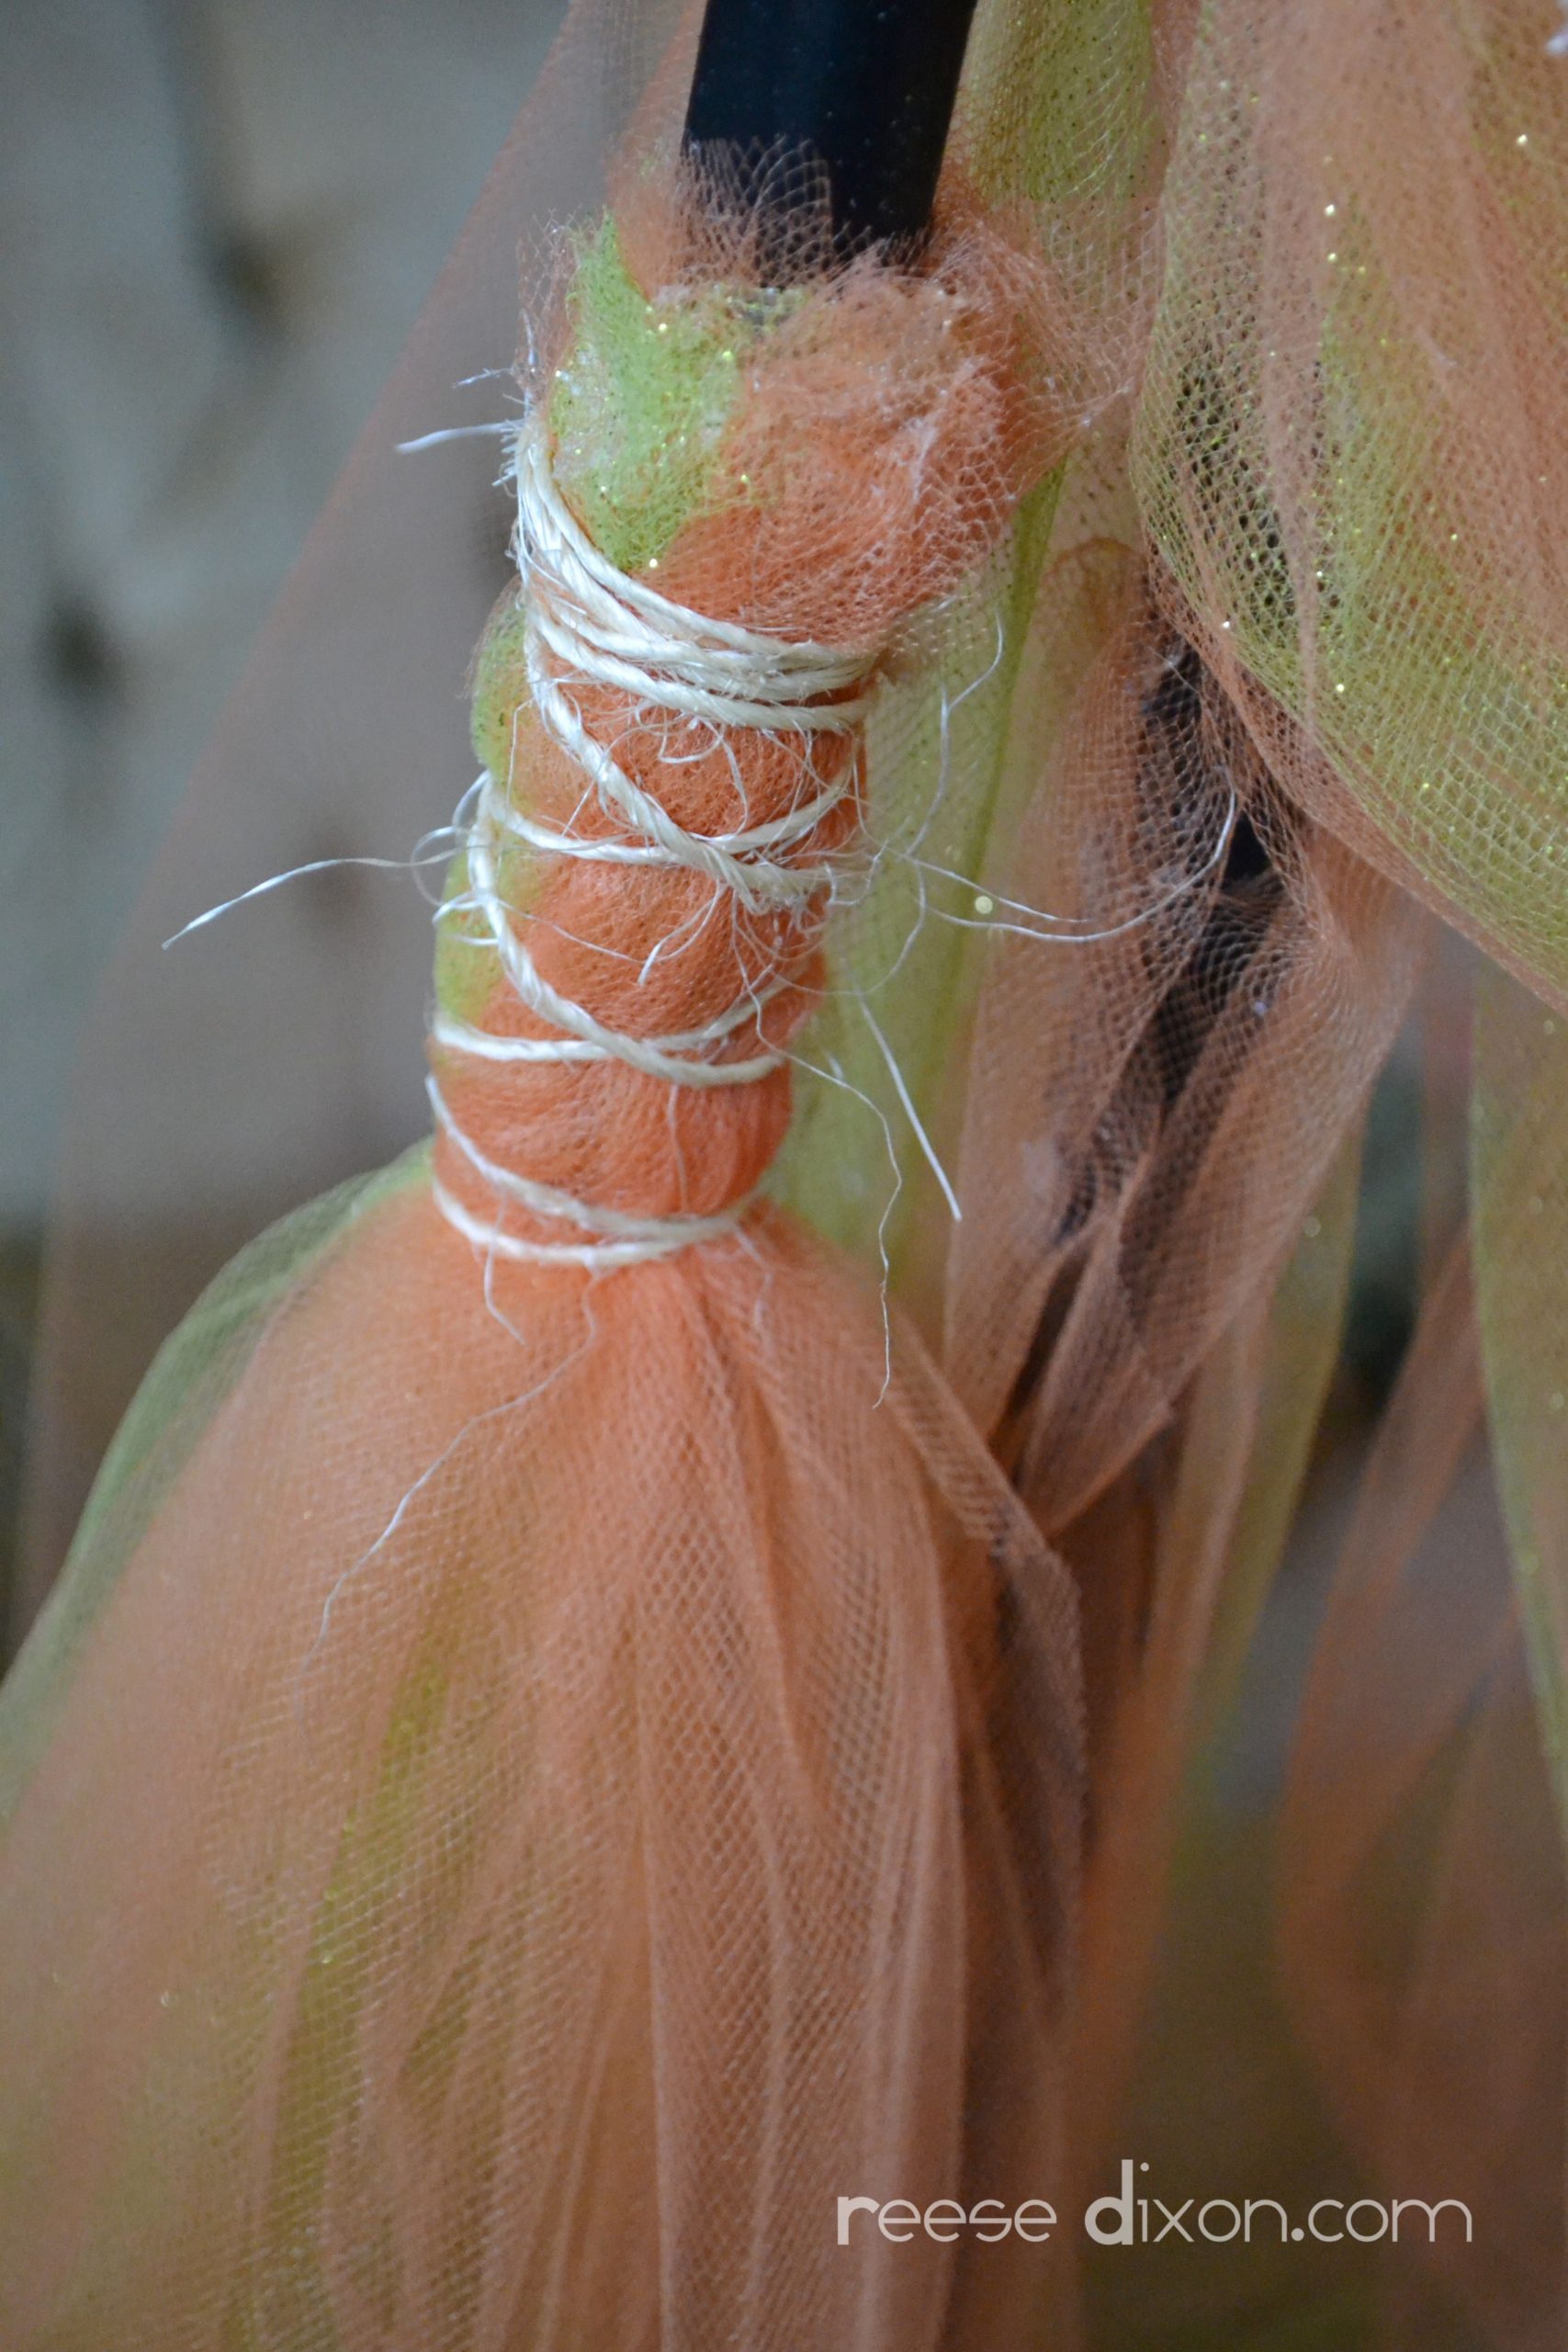
Glue one end of a length of twine to the top of your tulle and wrap it around a bunch of times, then glue the other end to the tulle. Use more hot glue to glue the sign in place by first gluing the ribbon on to the top, and then gluing the back of the plaque onto the broomsticks.
Anything confusing? Well then here, watch this video I made for you!

What an awesome idea!!!
Cute! I love anything to do with witches 😉
nice post
Keep adding layers until you have some good volume, and the stick can’t be seen. If it get’s too bulky around the top, add some pieces underneath just a little lower down.
Read more at cua nhua cao cap
Read more at cua nhua dai loan
Read more at cua nhua gia go
Read more at cua nhua composite