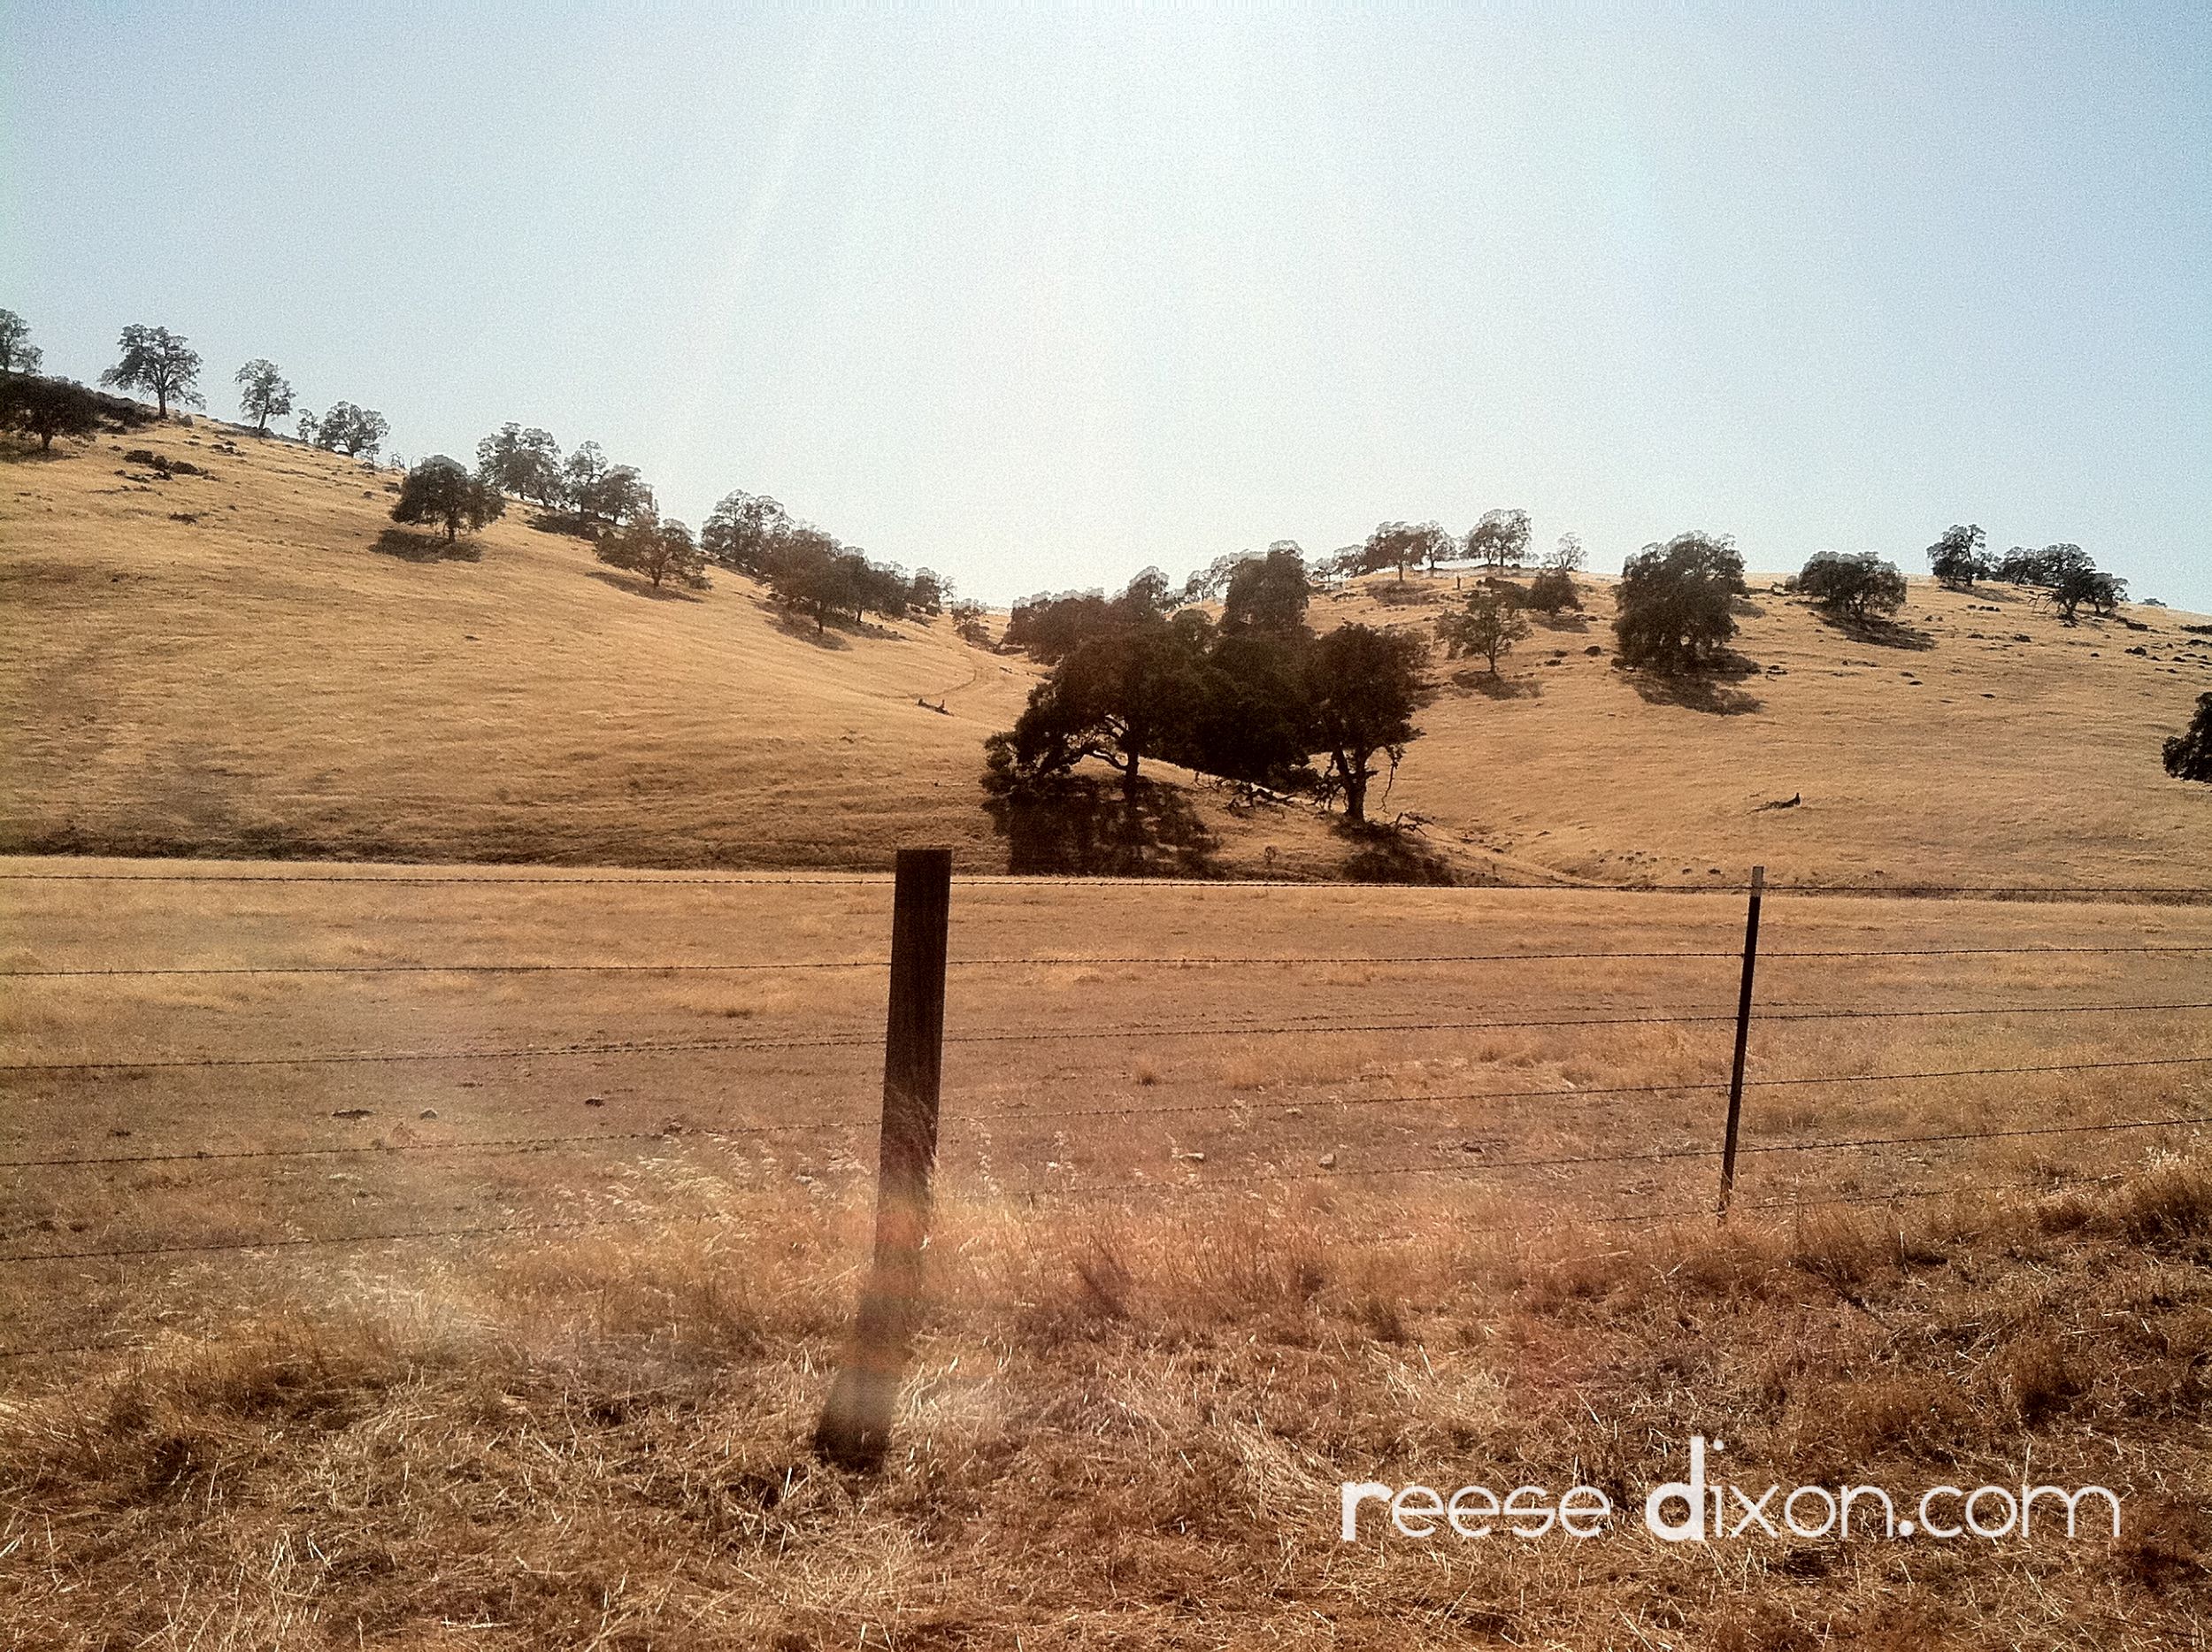
You may have noticed that I’ve started putting my website address on all of my photos. This was something I’ve kind of been avoiding, partly because of the amount of work, but also because it felt a bit pretentious to me. I’m hardly a professional photographer after all. But my crafty blogging friends have convinced me. I’ve certainly had my pictures lifted, and I know of bloggers whose photos have been used for somebody else’s whole plagiarized life. But what really convinced me is that now that we have Pinterest, a photo can take on a life all its own, and it’s helpful to know where it came from.
There are many ways to do this, and the best method will depend on your priorities. If the goal is speed working with a whole bunch of photos, you should look into how to make a Photoshop action. This will allow you to batch process your photos and get the same watermark on each photo without a whole bunch of clicking.
When I thought about watermarking a photo, I had two main considerations. I wanted to be able to control where the watermark was placed, and I wanted to easily control the color. Since so many of my photos are craft tutorials, I didn’t want a watermark right across the middle that would hide details or distract from what I was showing. I also wanted to be able to change the transparency and the color so that if I took a picture on a white background or a dark background, I could still get the watermark to show up.
I found the perfect solution for me was to make my watermark a brush. I can change the size, the color, the opacity, the placement, with one click I can make my watermark work for every individual photo.
I use Photoshop CS4, but the process should be similar in most photo editing software, including GIMP.
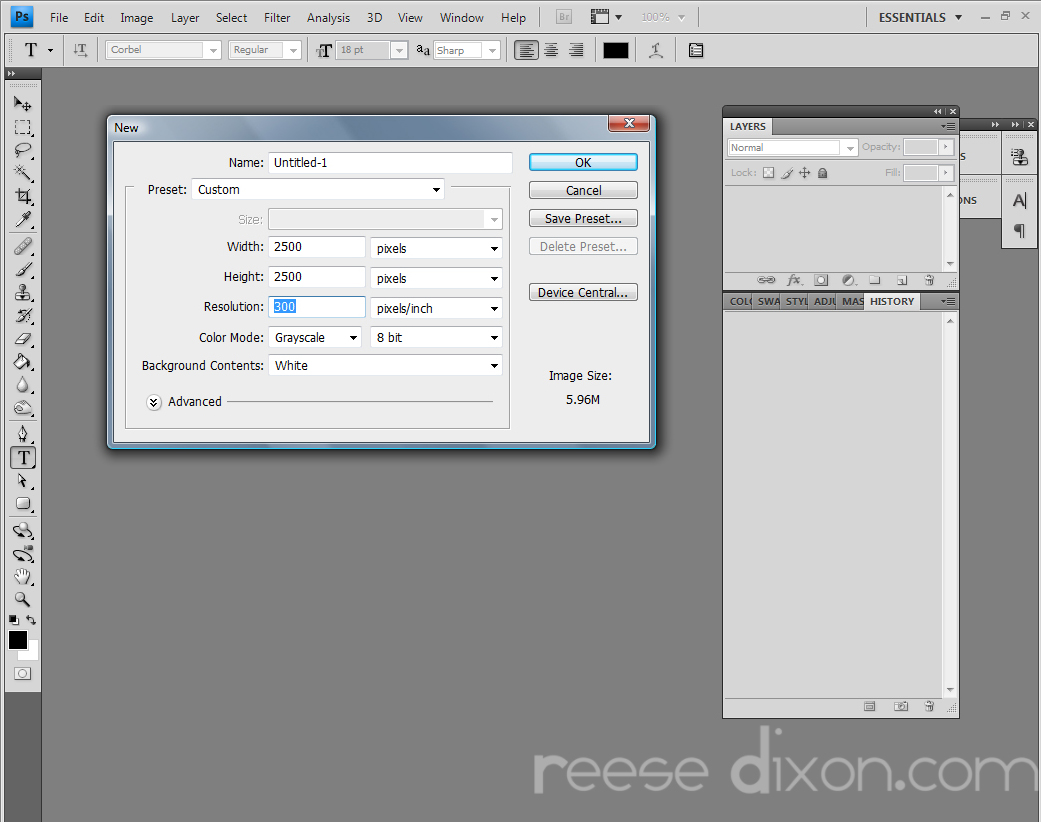
The first step is to make a high resolution image that you can make your brush from. A brush can be as big as 2500 pixels by 2500 pixels, and it’s always better to make a brush way bigger than you think you’ll need so that you’ll never get stuck with a brush that looks crappy when it’s too big.
Create a new document 2500 pixels wide and 2500 pixels high set at a resolution of 300 pixels per inch, with a white background and set in grayscale.
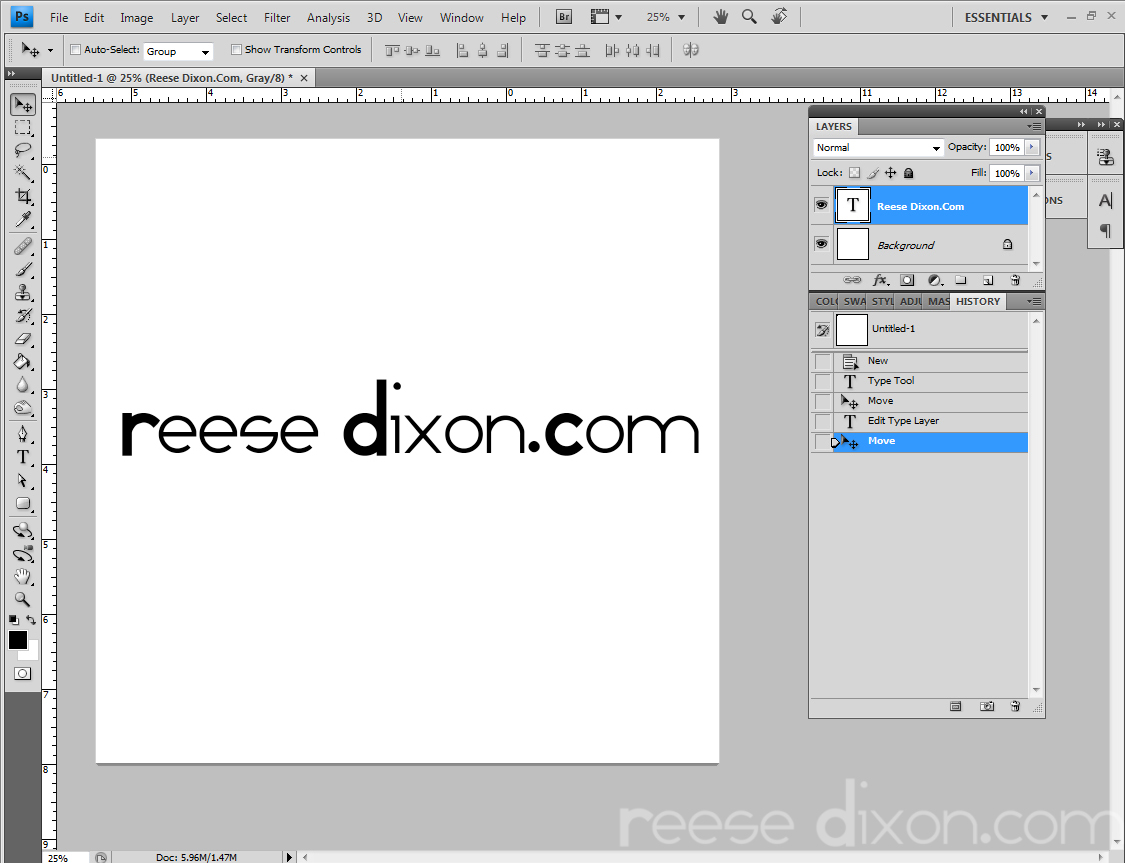
Design the image you want to use as a watermark. I just used a simple text address, but you could design a logo or whatever you want. It will look best if you do it in as close to black and white as possible.
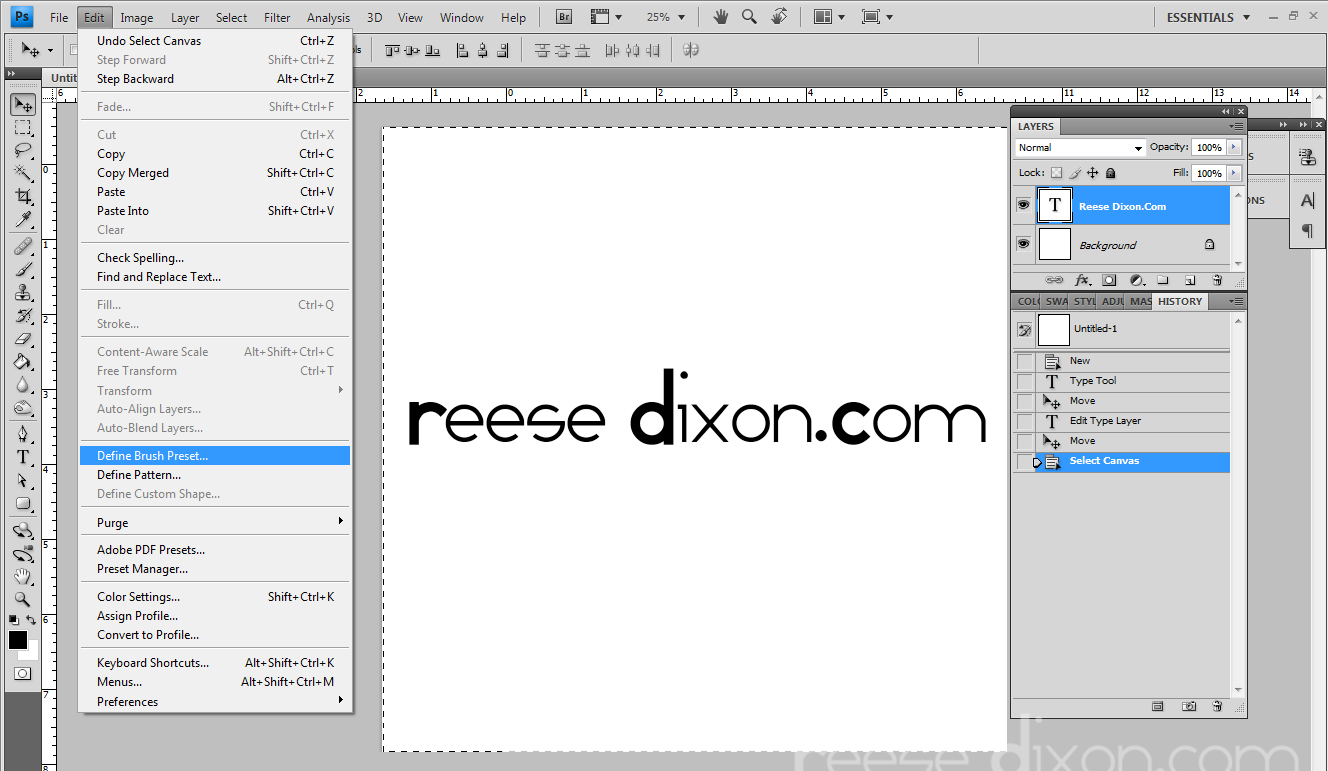
From the Edit menu, select Define Brush Preset, and give your brush a name. This will automatically take anything in your image that is black and make it a brush. If you have gray areas it will also include that in the brush, but at a lower transparency.
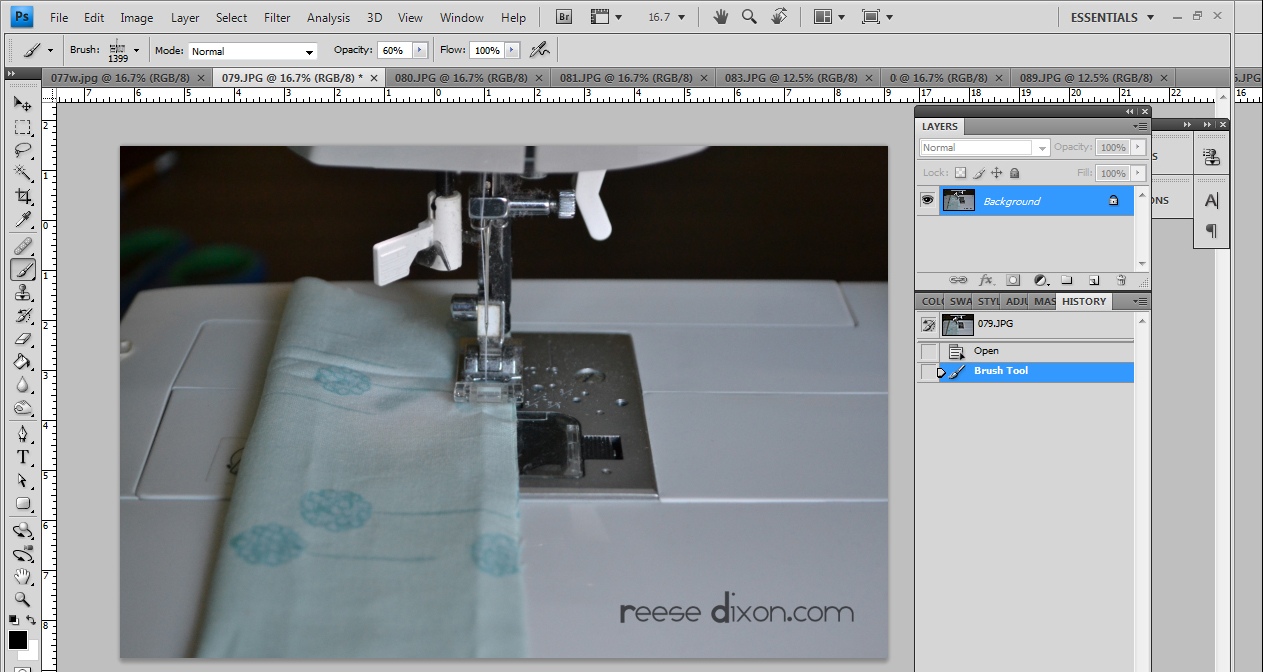
That’s all there is. Now to use it you just open your photo, make whatever changes you want to make to it, and then using the brush tool, select your watermark brush and stamp the watermark in whatever color, transparency, and place that works in that particular photo.
Make sure to save it as a different photo. I always add a w to the filename so that I’ve got the photos saved right next to each other, one with the watermark, and one without.


Thanks for this. I've had photos lifted many times and I started using a watermark a while back, but didn't know about the brush thing, so hopefully that'll save me a bit of time in future.
Thanks for the tip! I need to start doing this.