Last month I got this idea for making fall leaves out of melted crayons. I thought I could just use a cookie cutter and toss a bunch of crayon bits inside it, and after a few minutes in the oven I’d have a perfect leaf shape.
That didn’t work.
First I had to spend an entire day going to every store in town looking for leaf shaped cookie cutters. The metal ones let the wax seep right out the bottom so all I had was a lovely multi-colored puddle, and the plastic ones melted in the oven right along with the crayons. I tried every trick I could think of and nothing would work. onlyfabs lady_feet_78
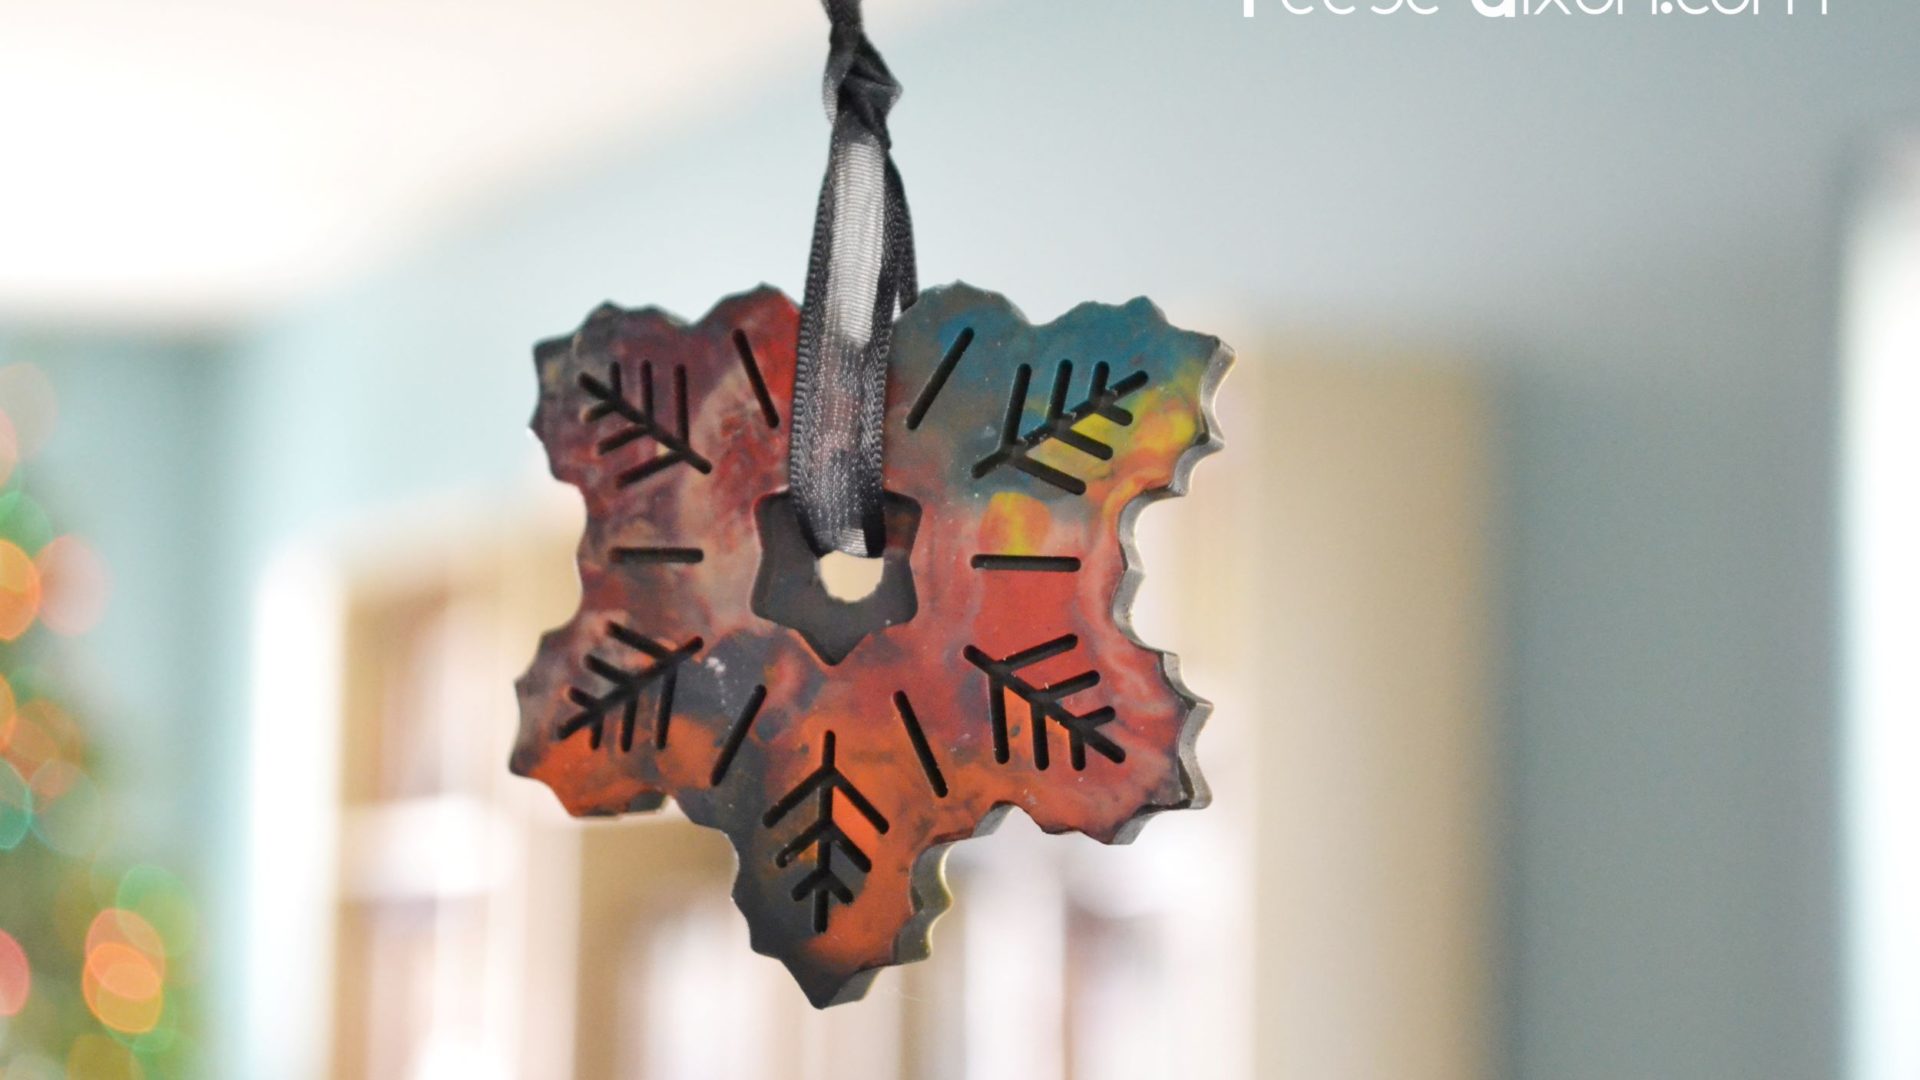
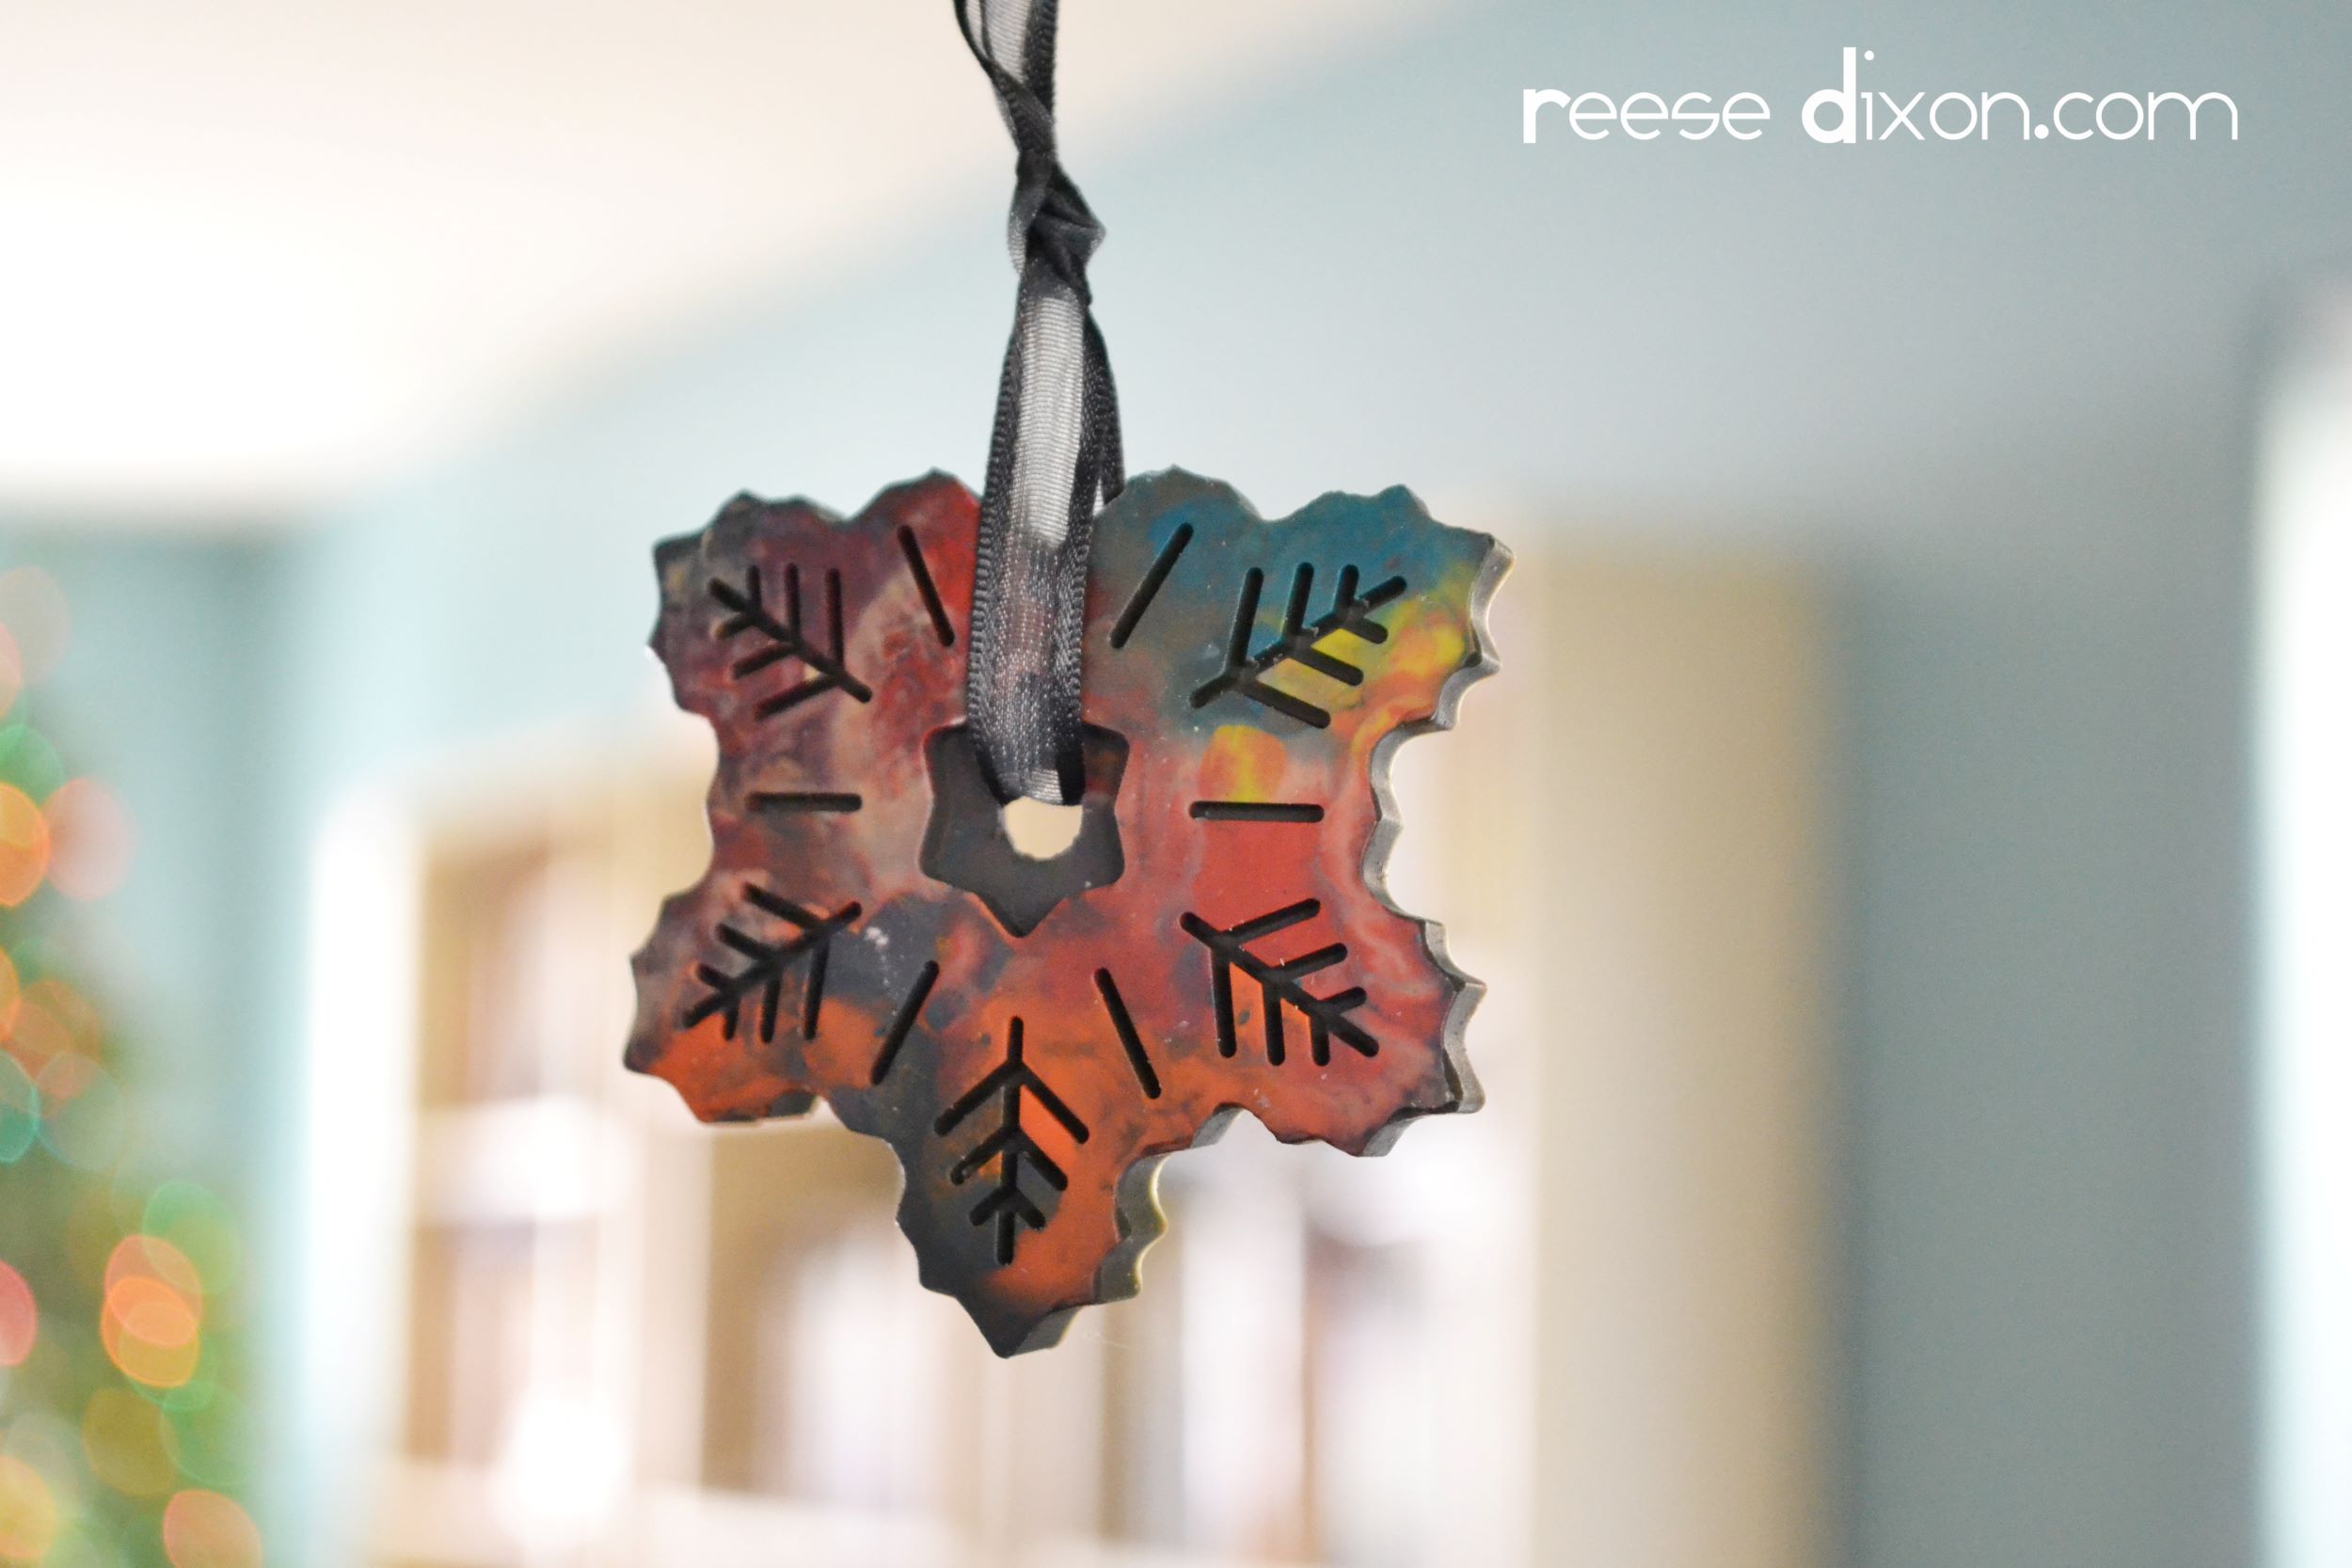
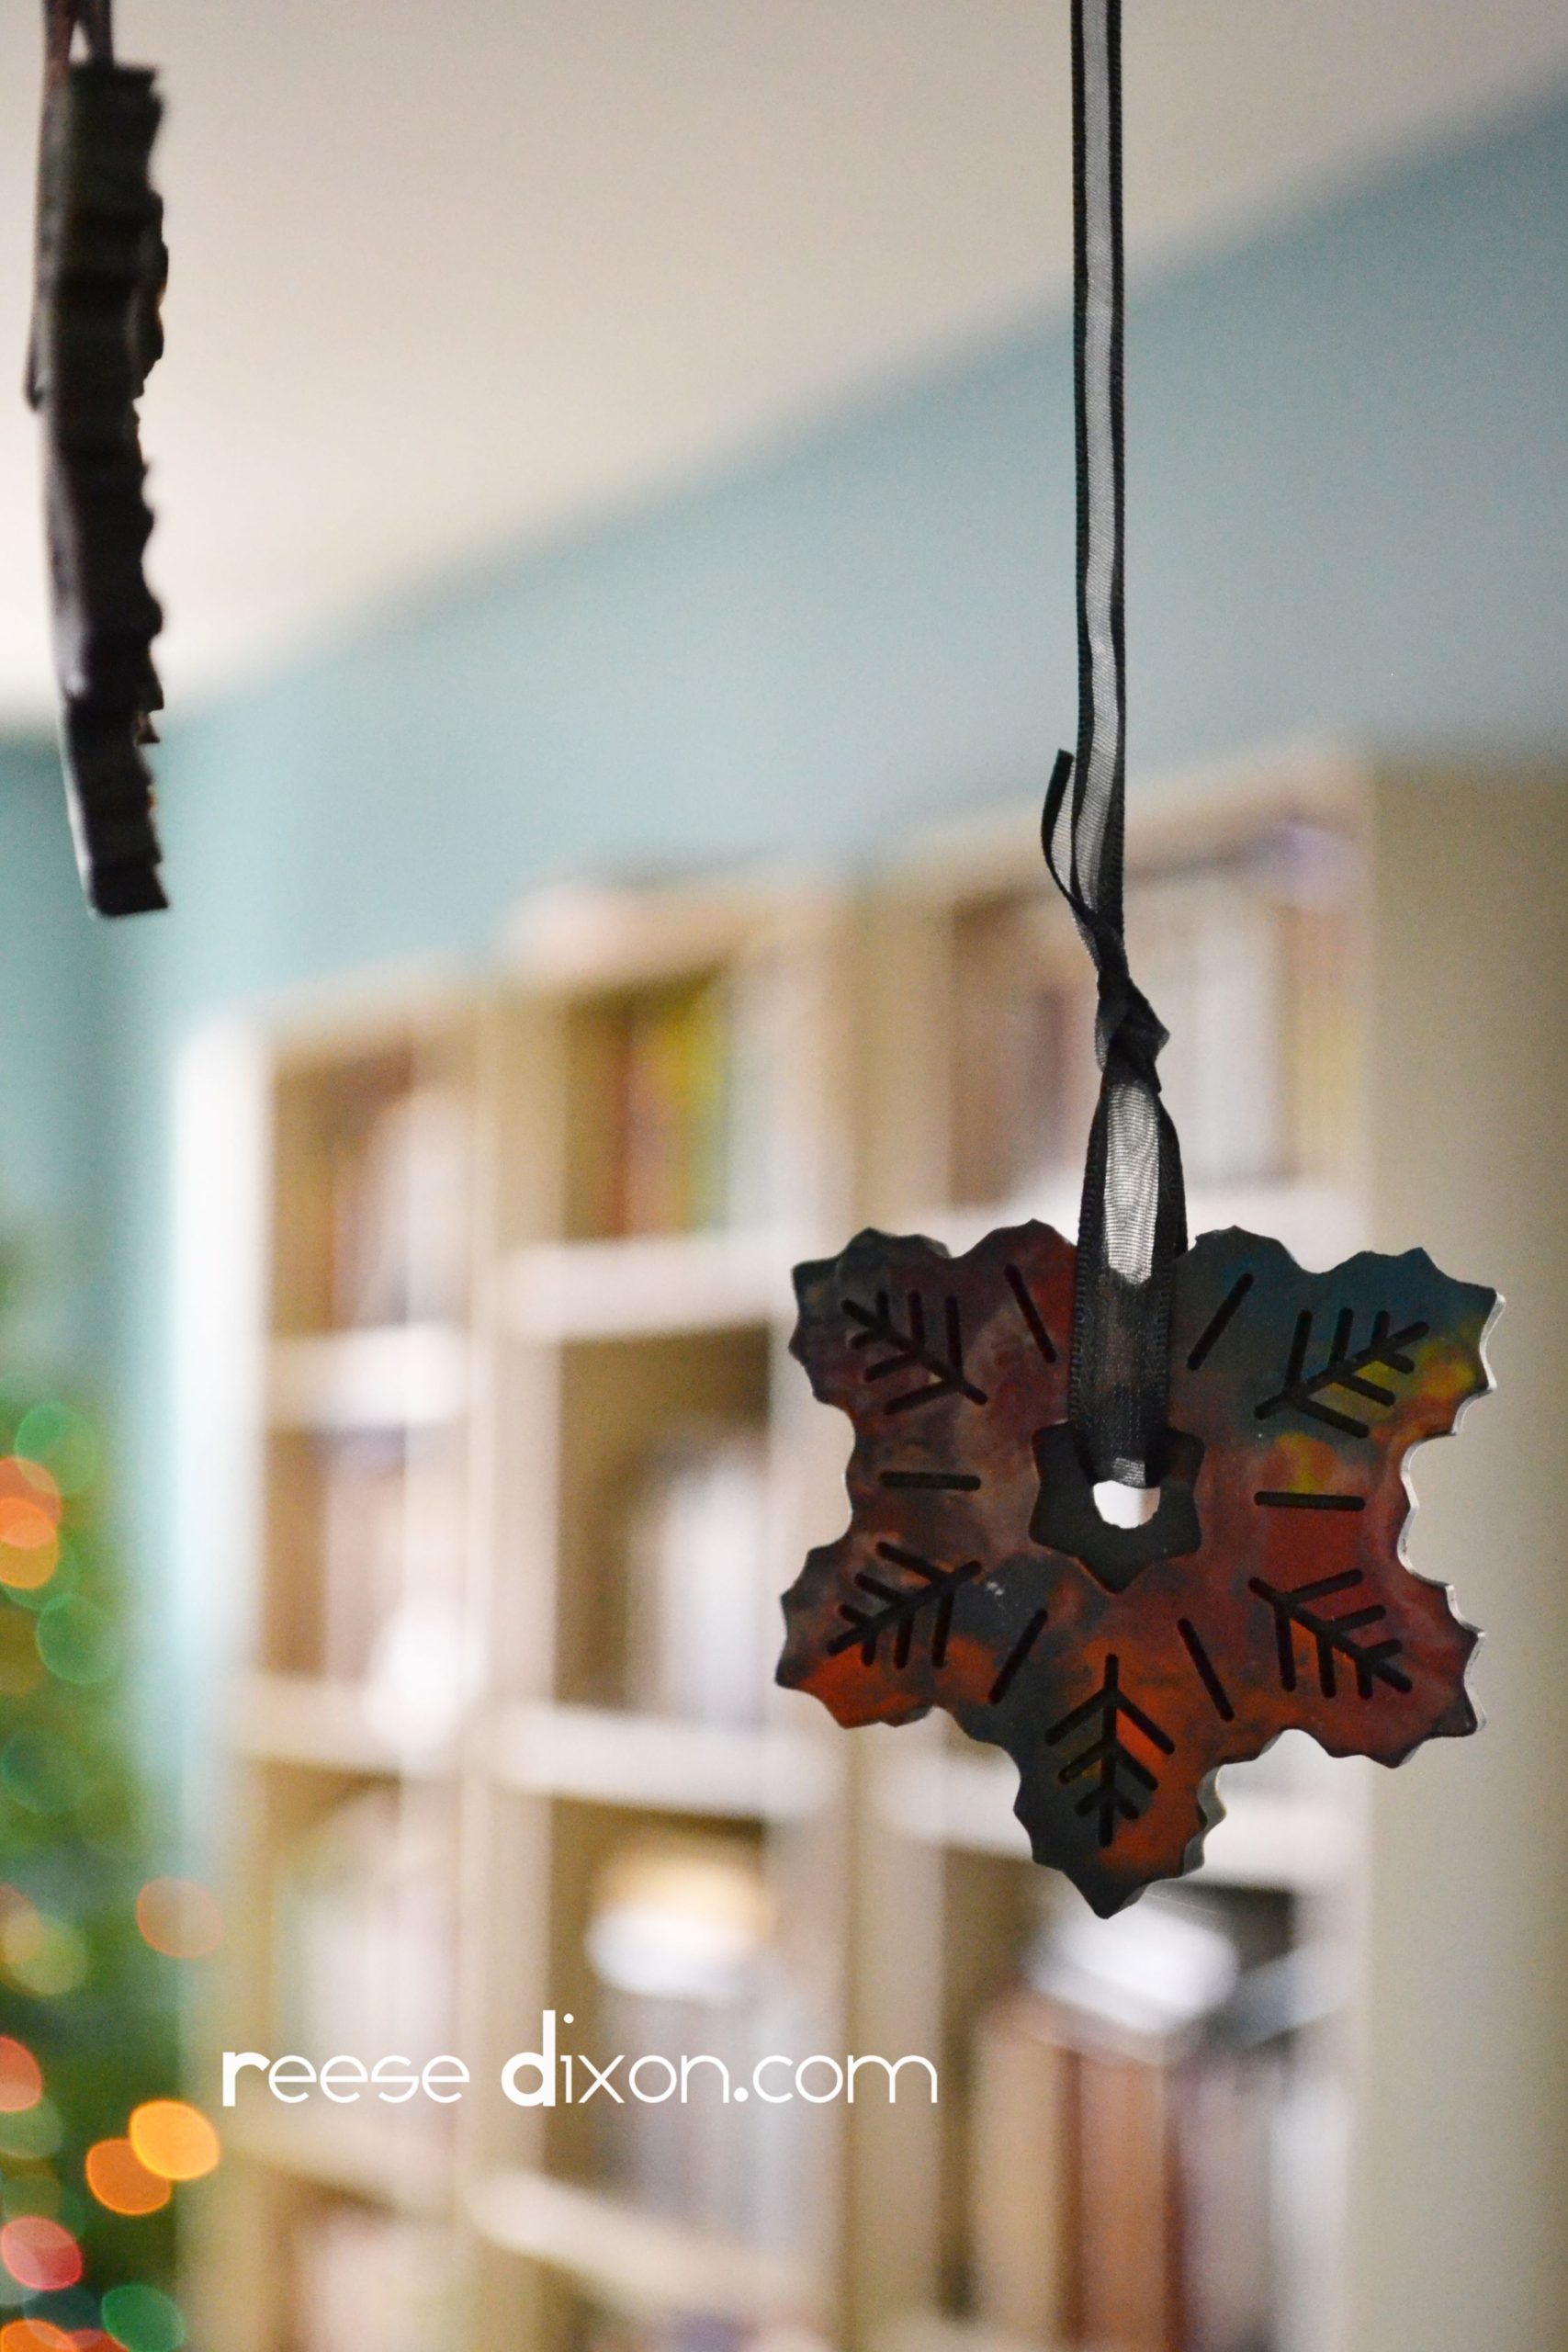
Finally, I saw a silicone snowflake mold in the Target dollar section. It occurred to me that if you took off one arm of the snowflake and used bright fall colors, what you’d get was something pretty darn close to a maple leaf. And without any of the problems I’d been struggling through for two straight days.
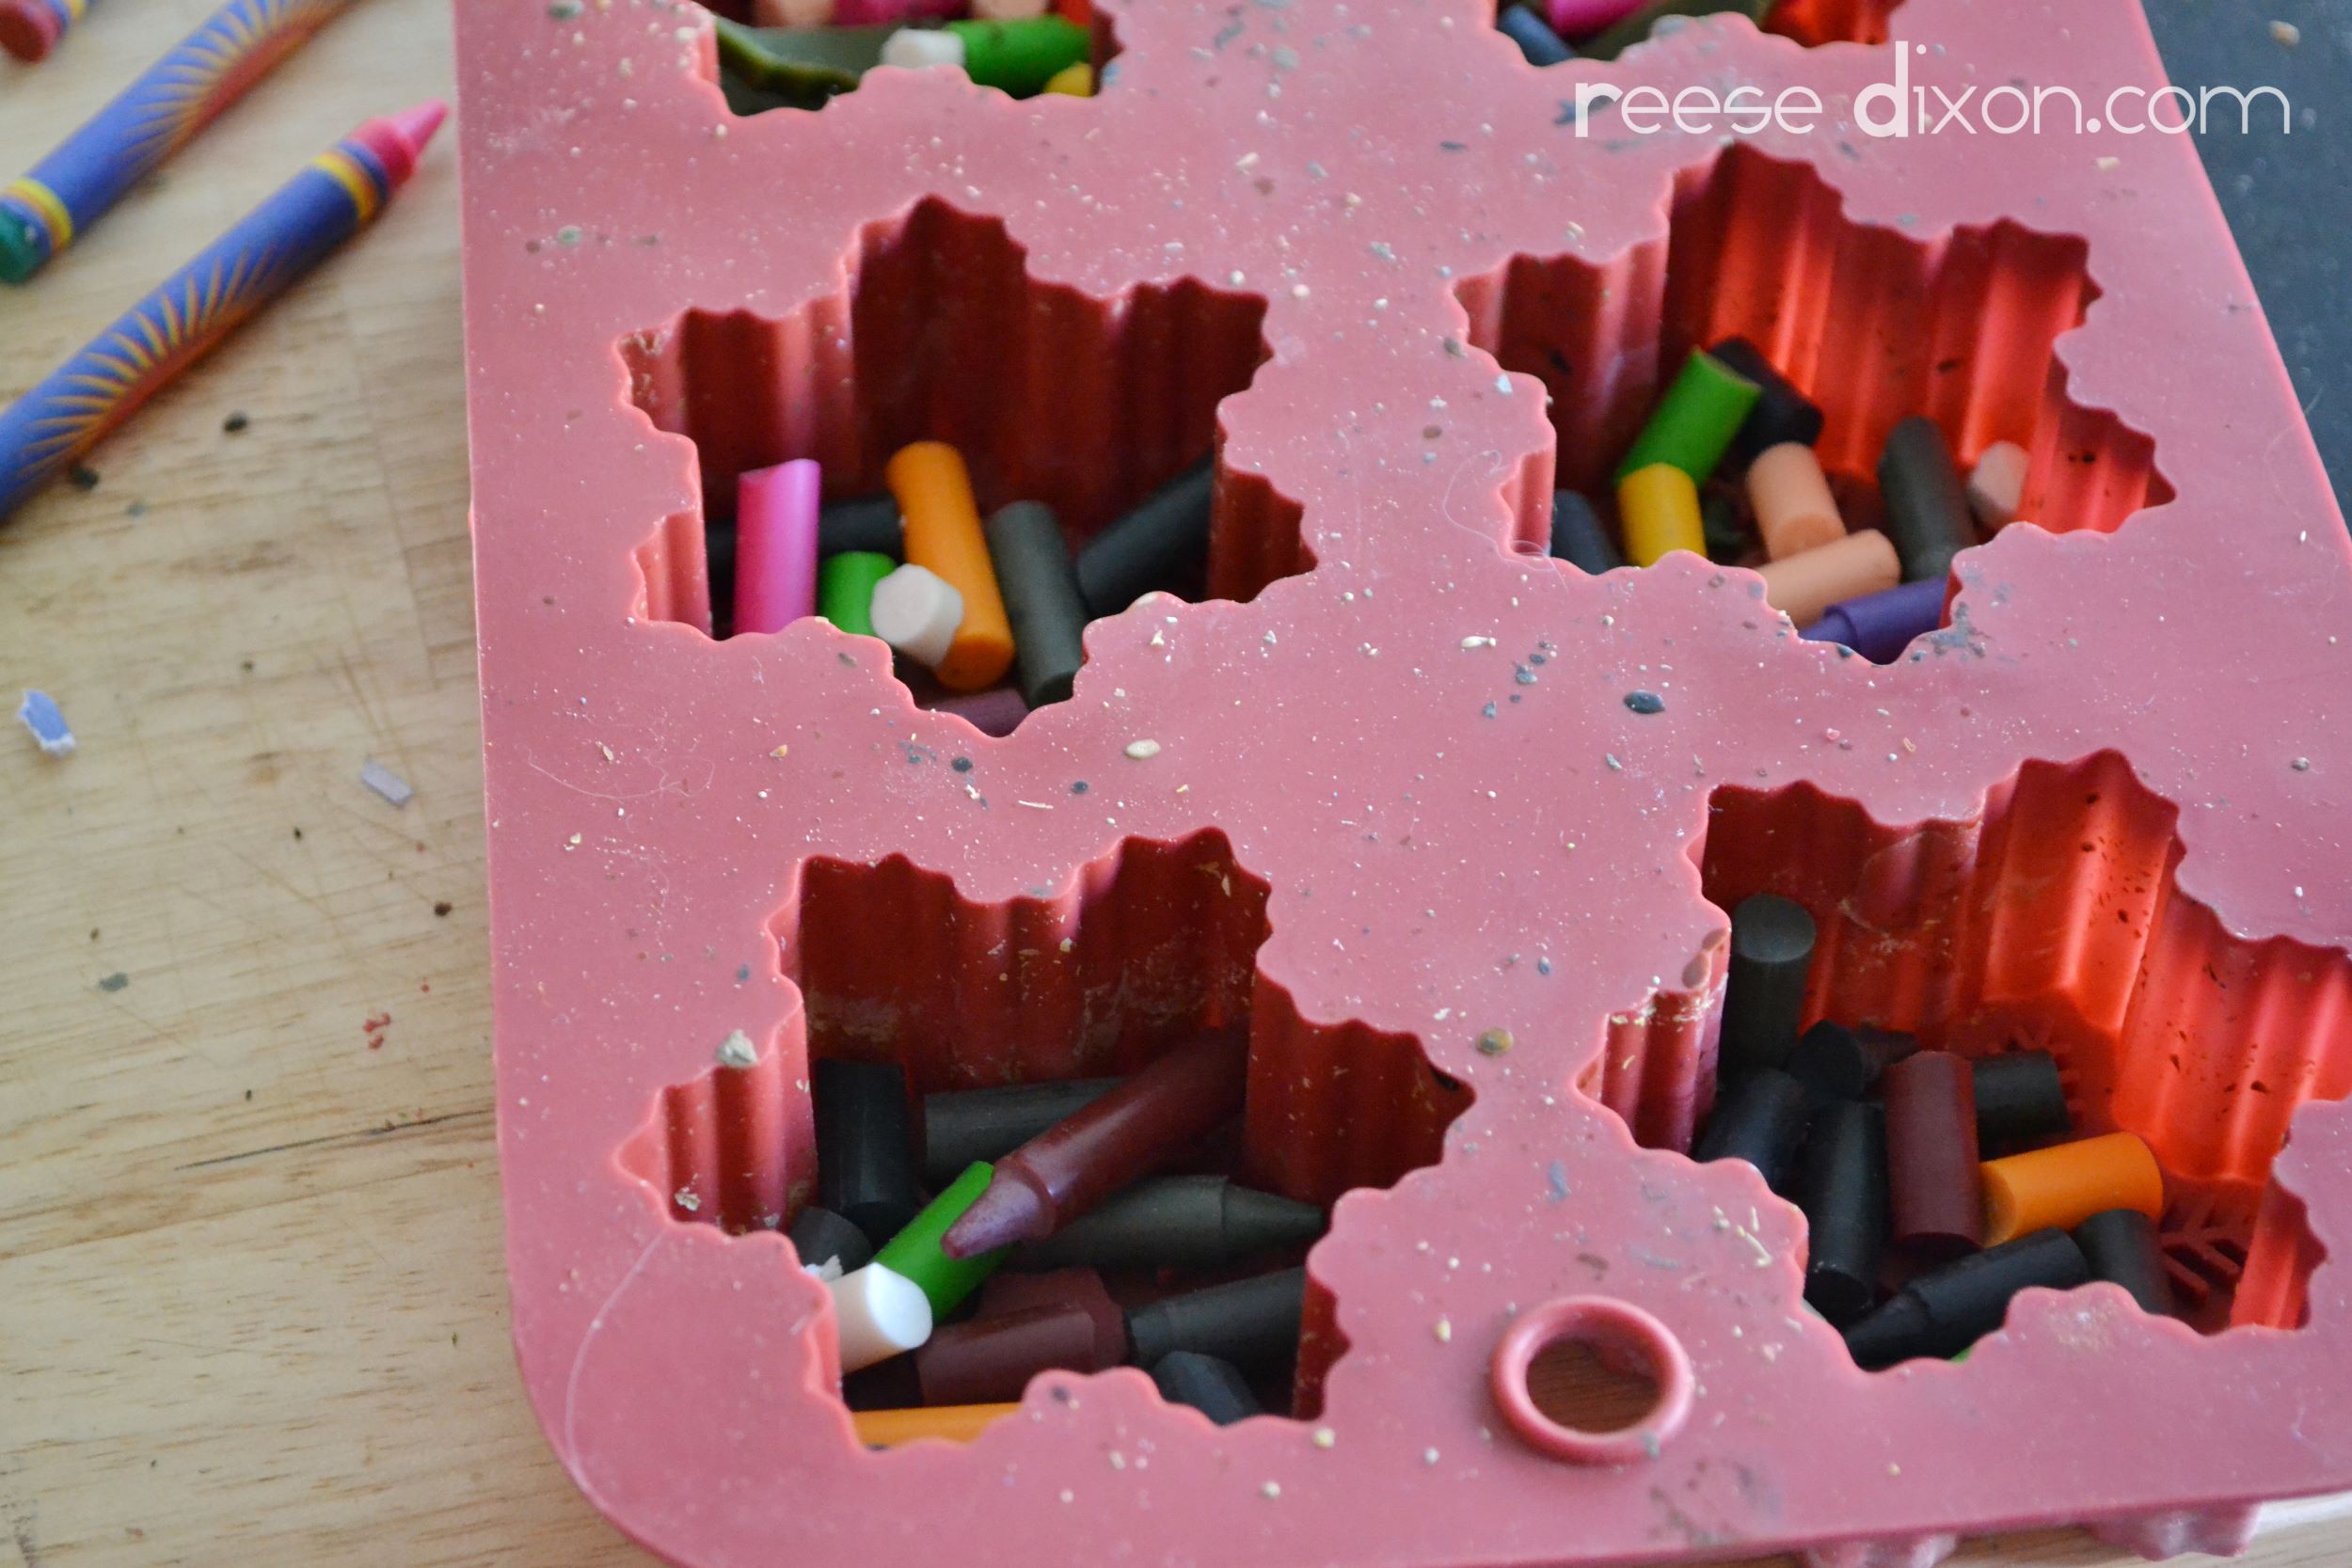
I broke up a ton of crayons I picked up at the good ‘ol dollar store, going for a big range of colors. I loved how these looked with just a subtle pop of purple or pink amidst all the traditional browns and reds. The thicker you make these the more stable they’ll be, but you need at least enough wax to come up over the top of the snowflake design in the bottom. Heat in the oven until melted.
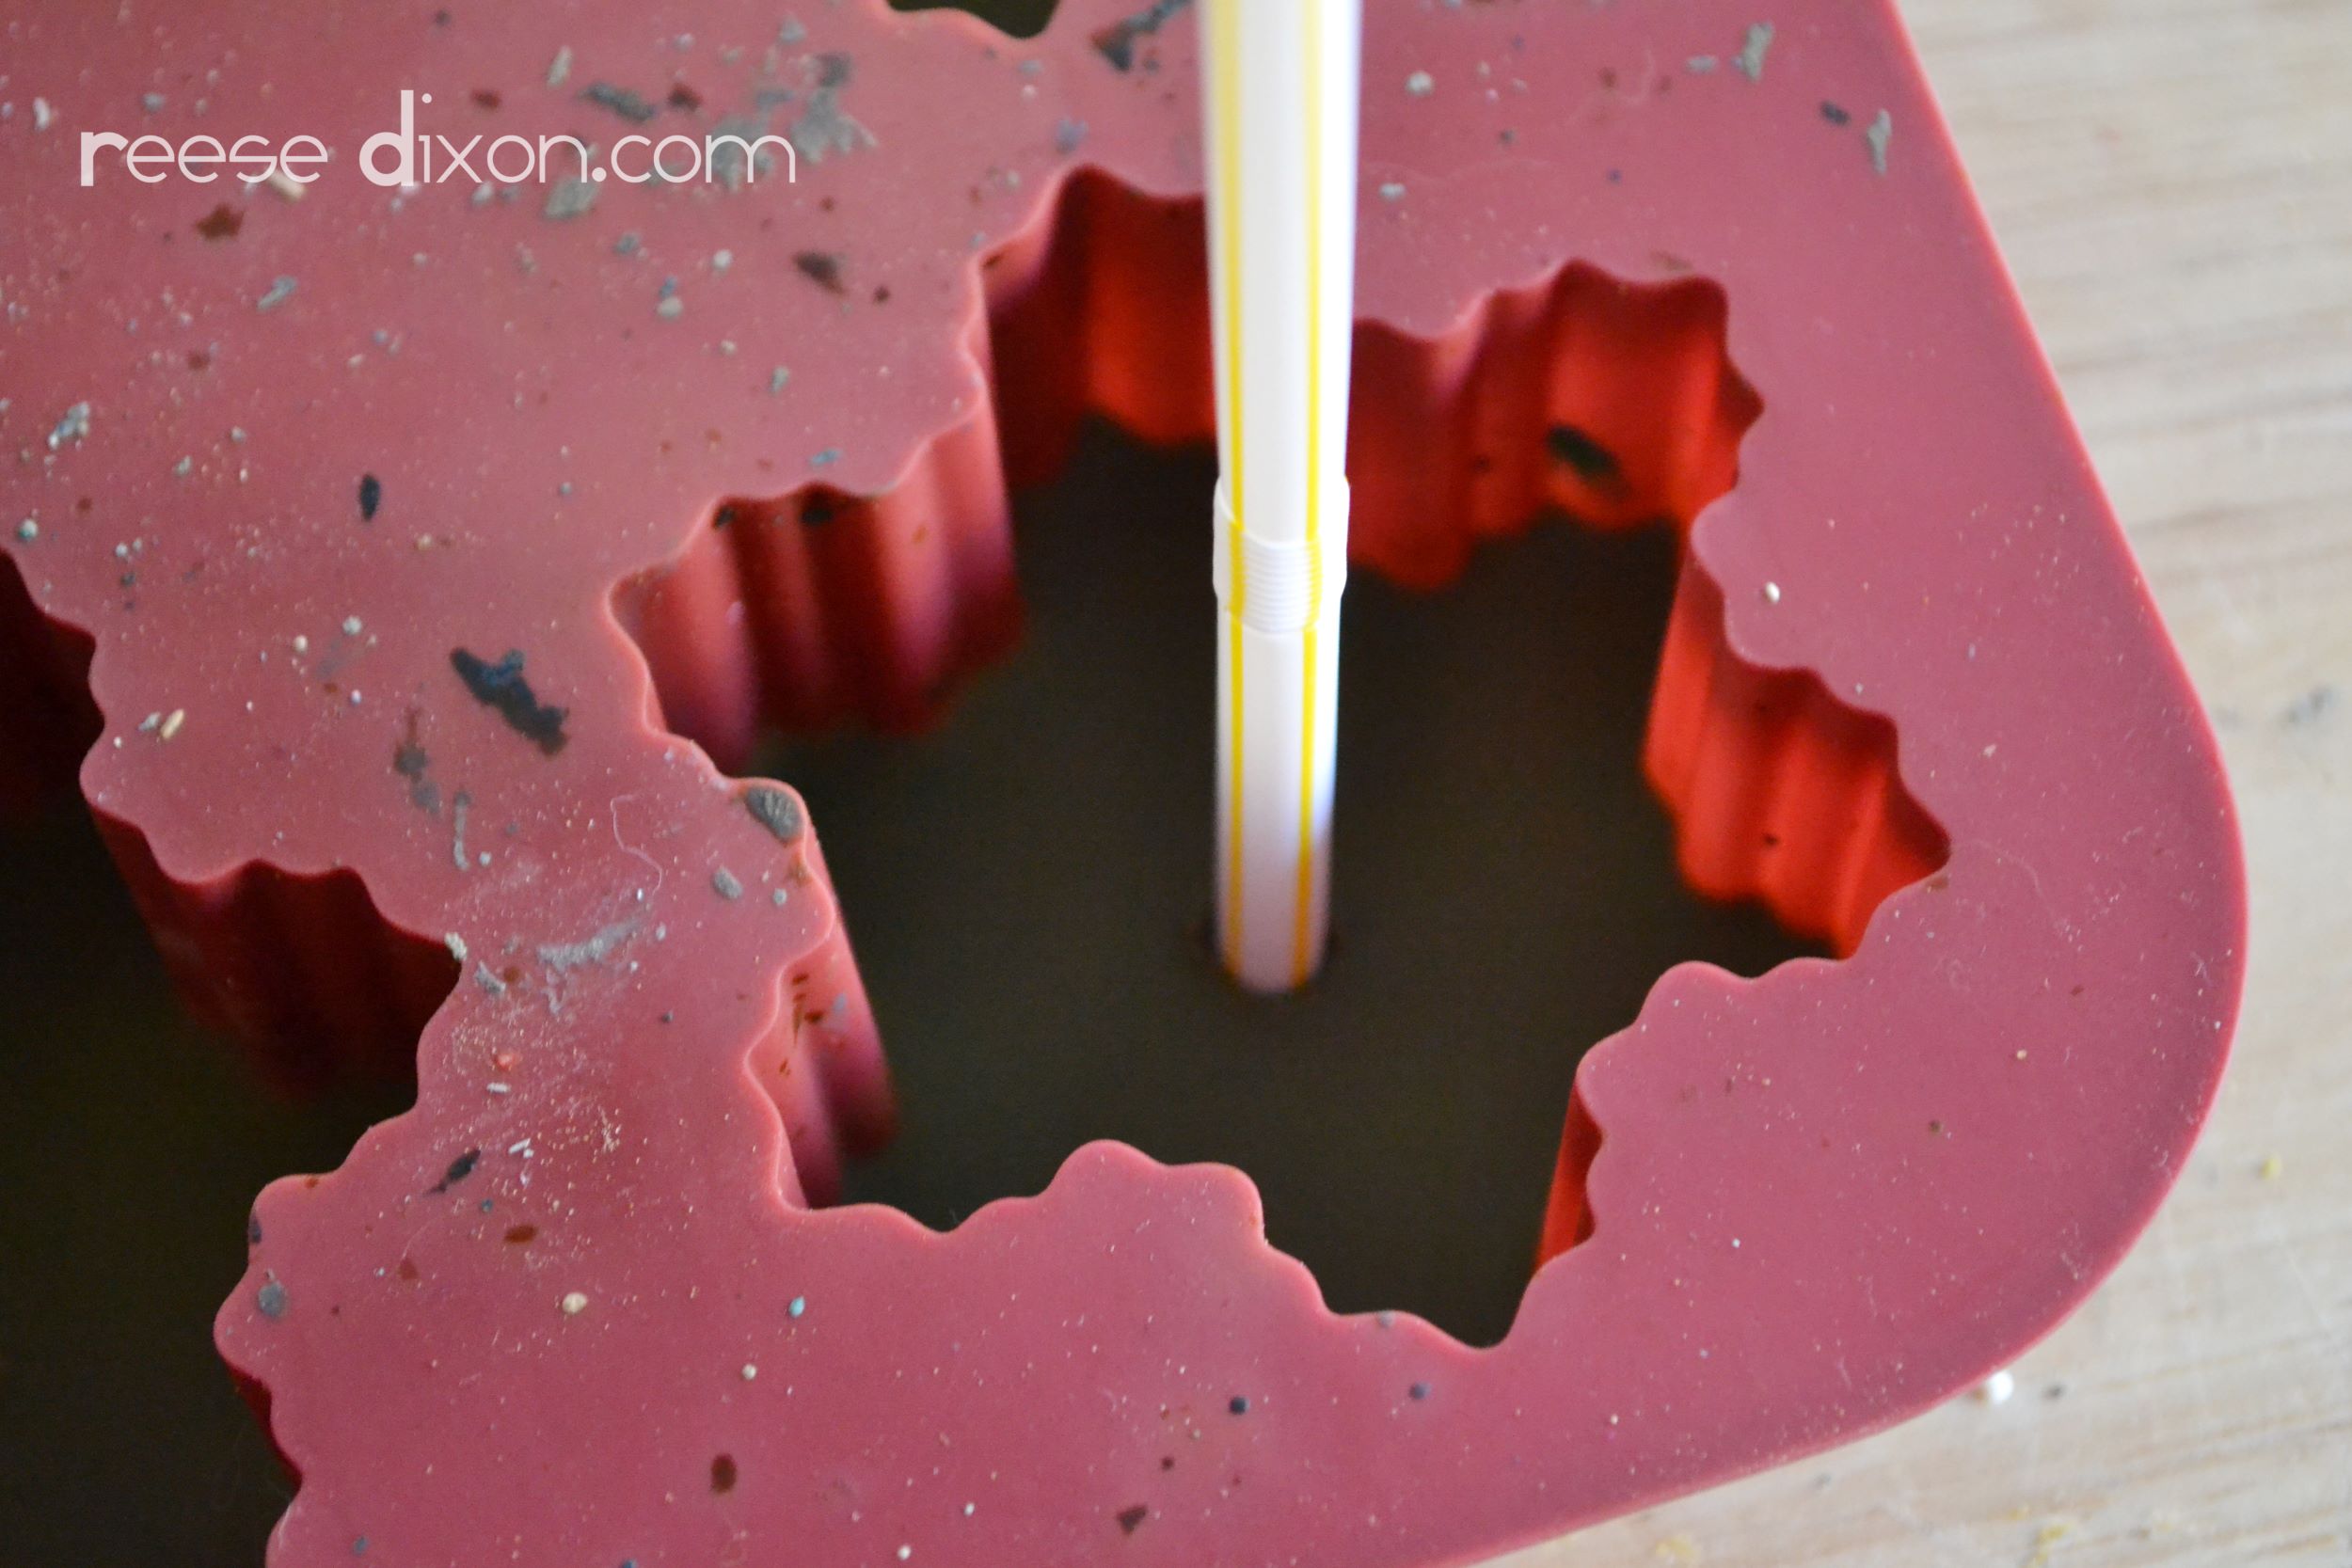
Take the mold out of the oven and, just as the wax is beginning to set, make a hole for hanging by sticking a drinking straw in the middle. I got the best results by starting early and twisting the straw. This gave me a clean edge without the cracking that came if the wax was getting too hard.
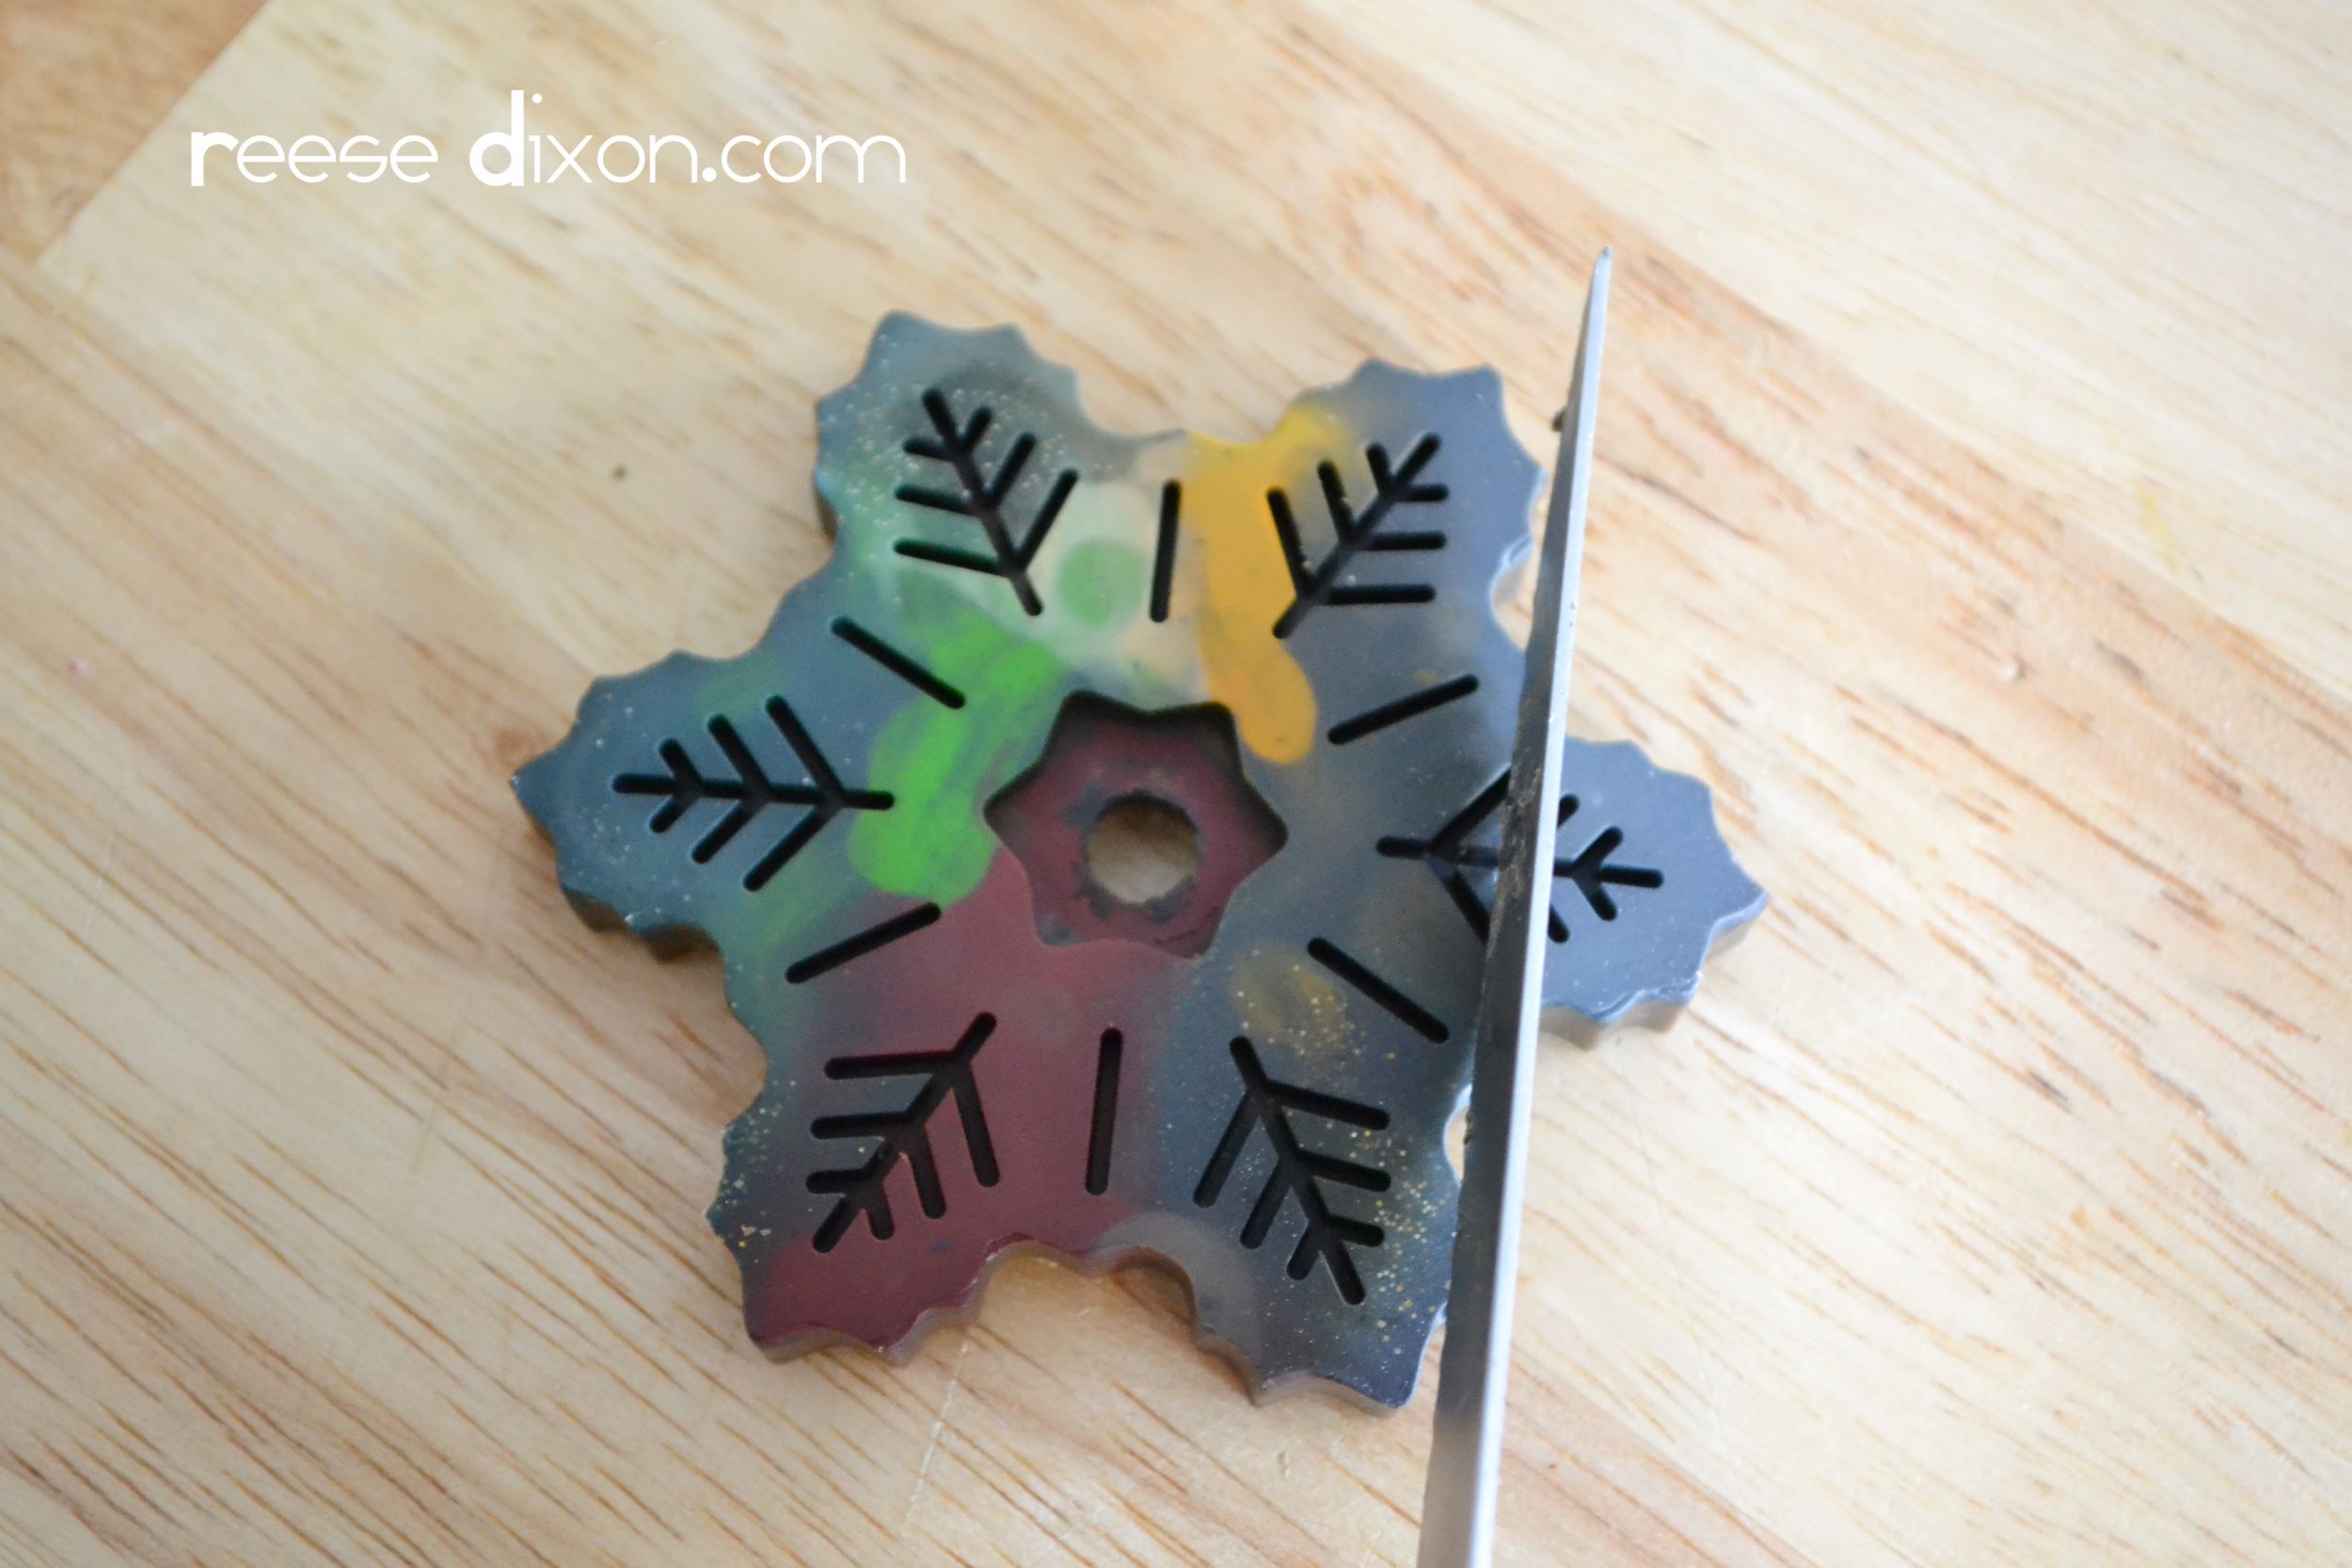
To remove one of the snowflake arms you just have to cut across it. Wax does like to shatter, so this may take a couple of tries before you get the feel for it. If it cracks, you can always remelt it. I also found it easier to cut when I placed the front of the snowflake onto the cutting board. It seemed to come out of the mold ever so slightly bent, and pushing against that bend would break it right in half. Pushing into it made it a breeze. You could also try heating your knife up a bit.
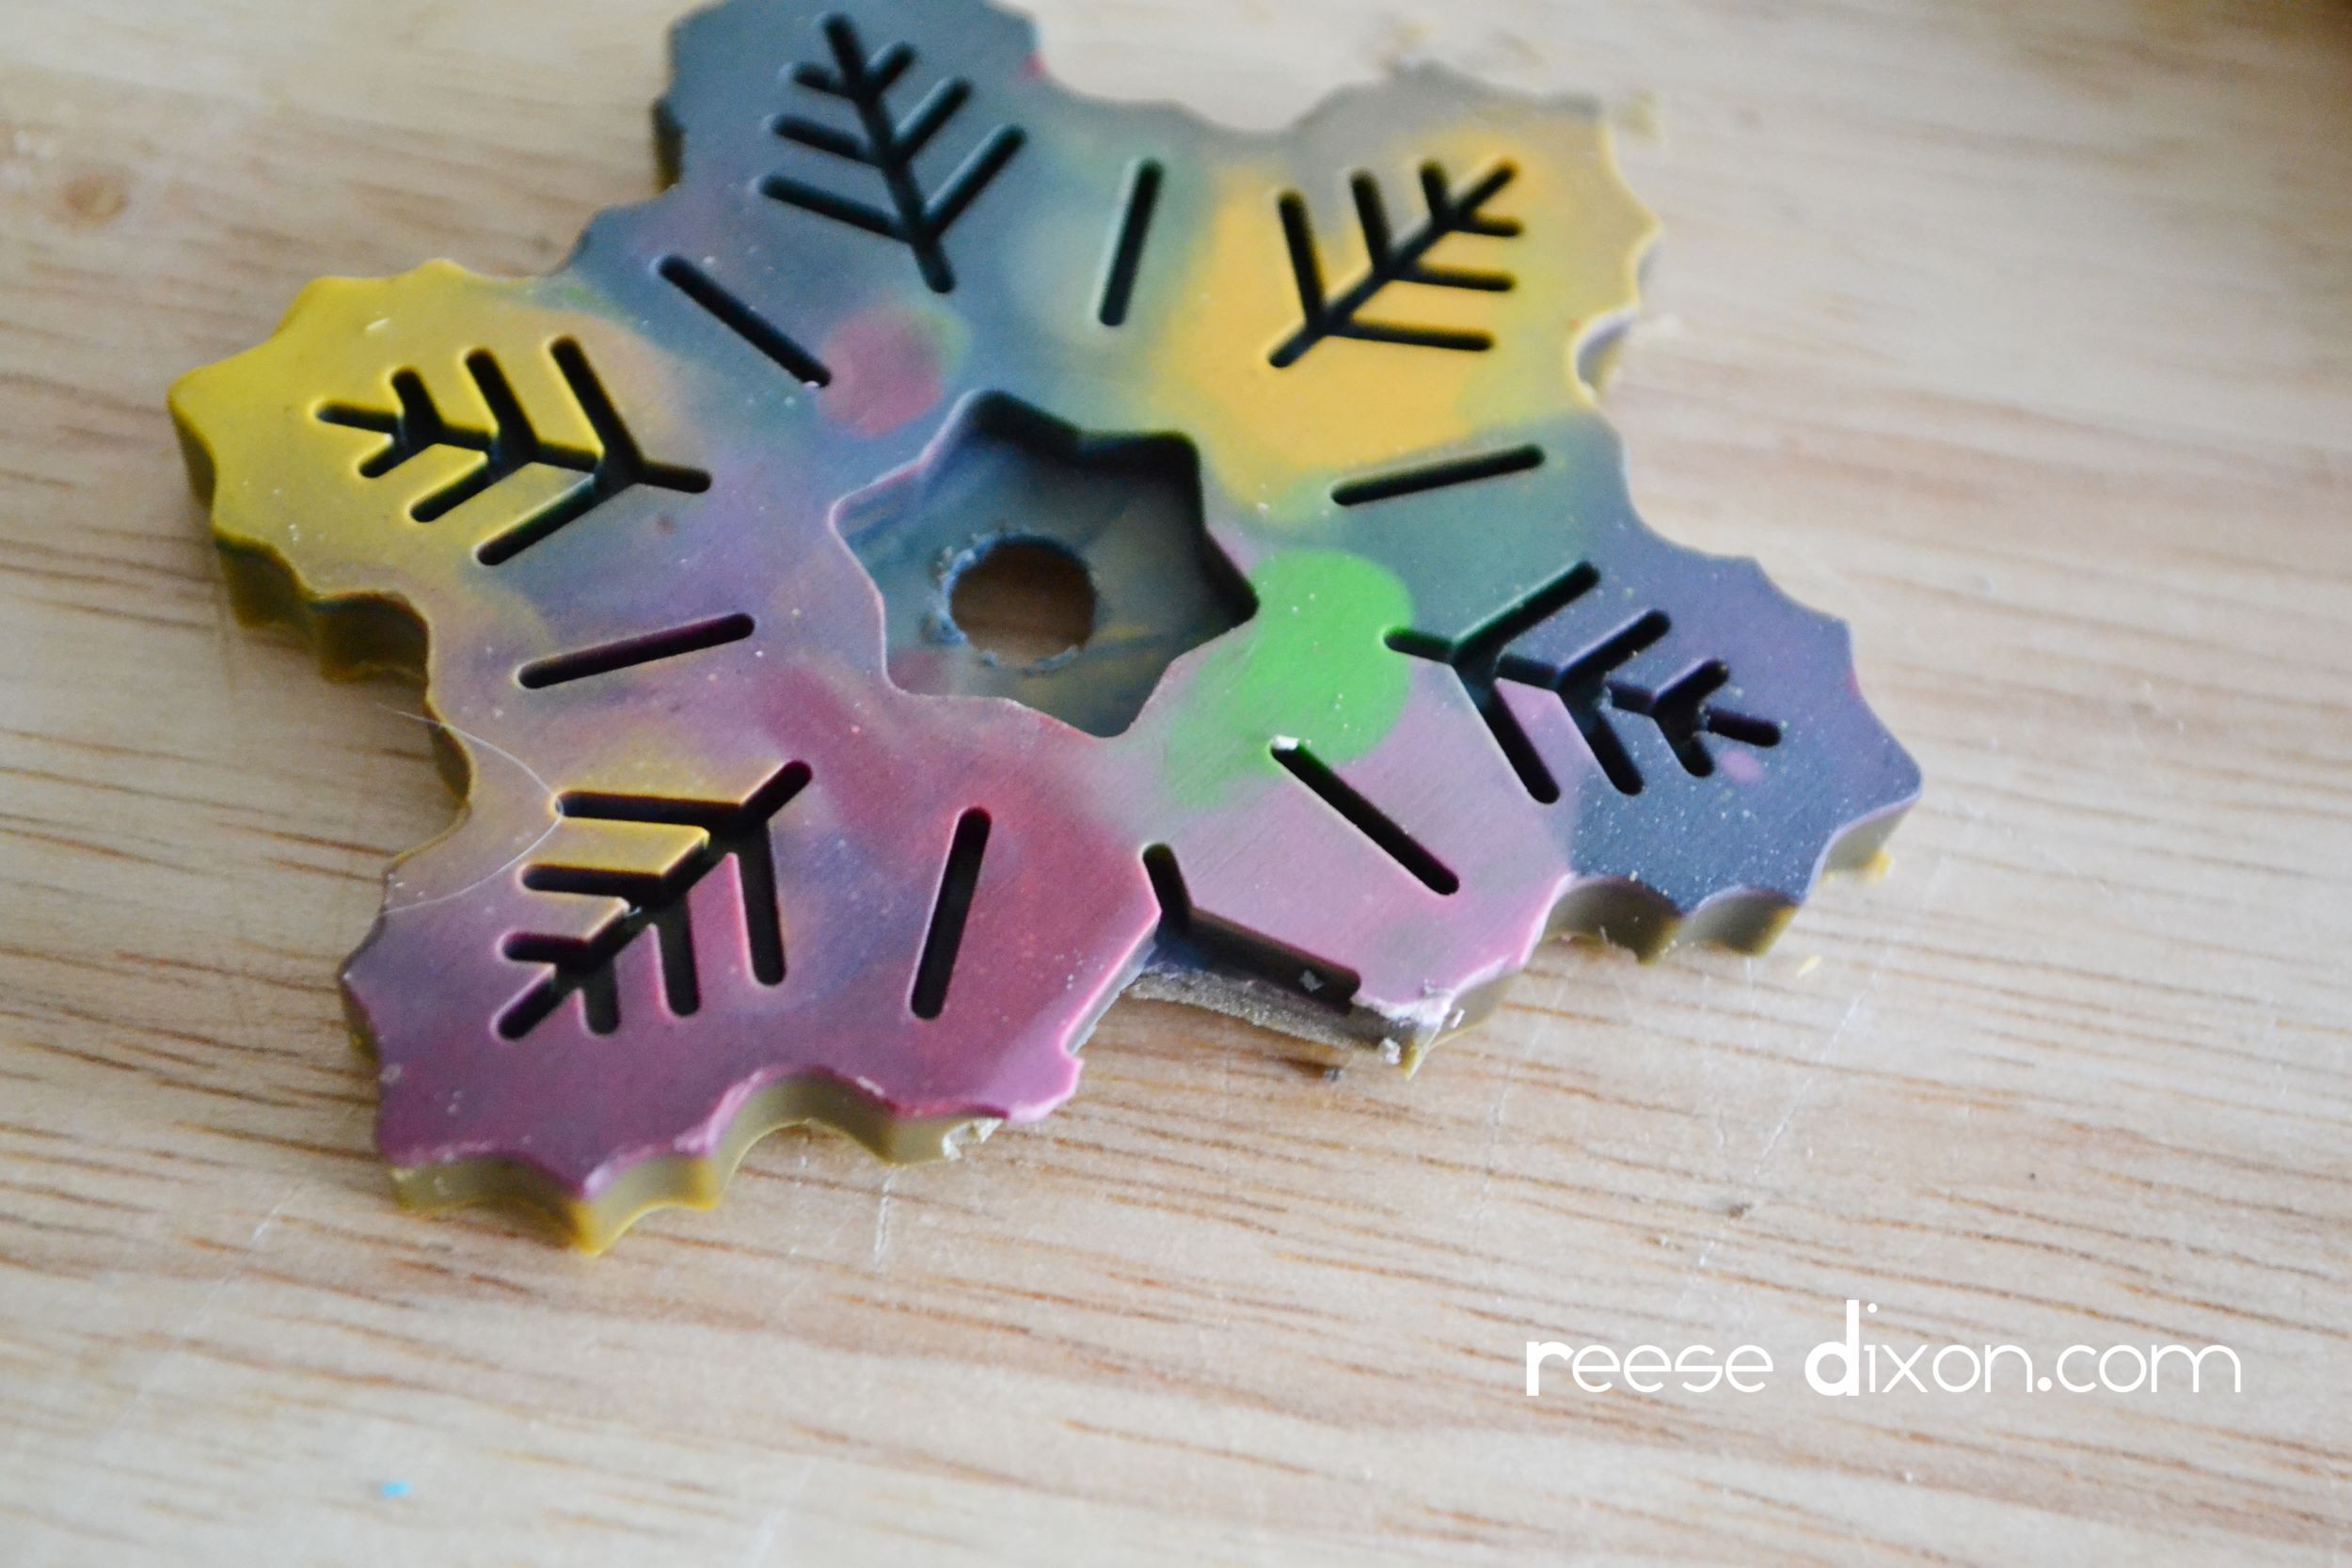
To really emphasize that leaf shape, I cut further into the snowflake to make a V where the stem would be. To avoid the breaking, I found it best to hold it in my hand like when I was a kid whittling soap and push the knife towards the center of that V. Luckily this mold provides handy score marks, so it came off easily.
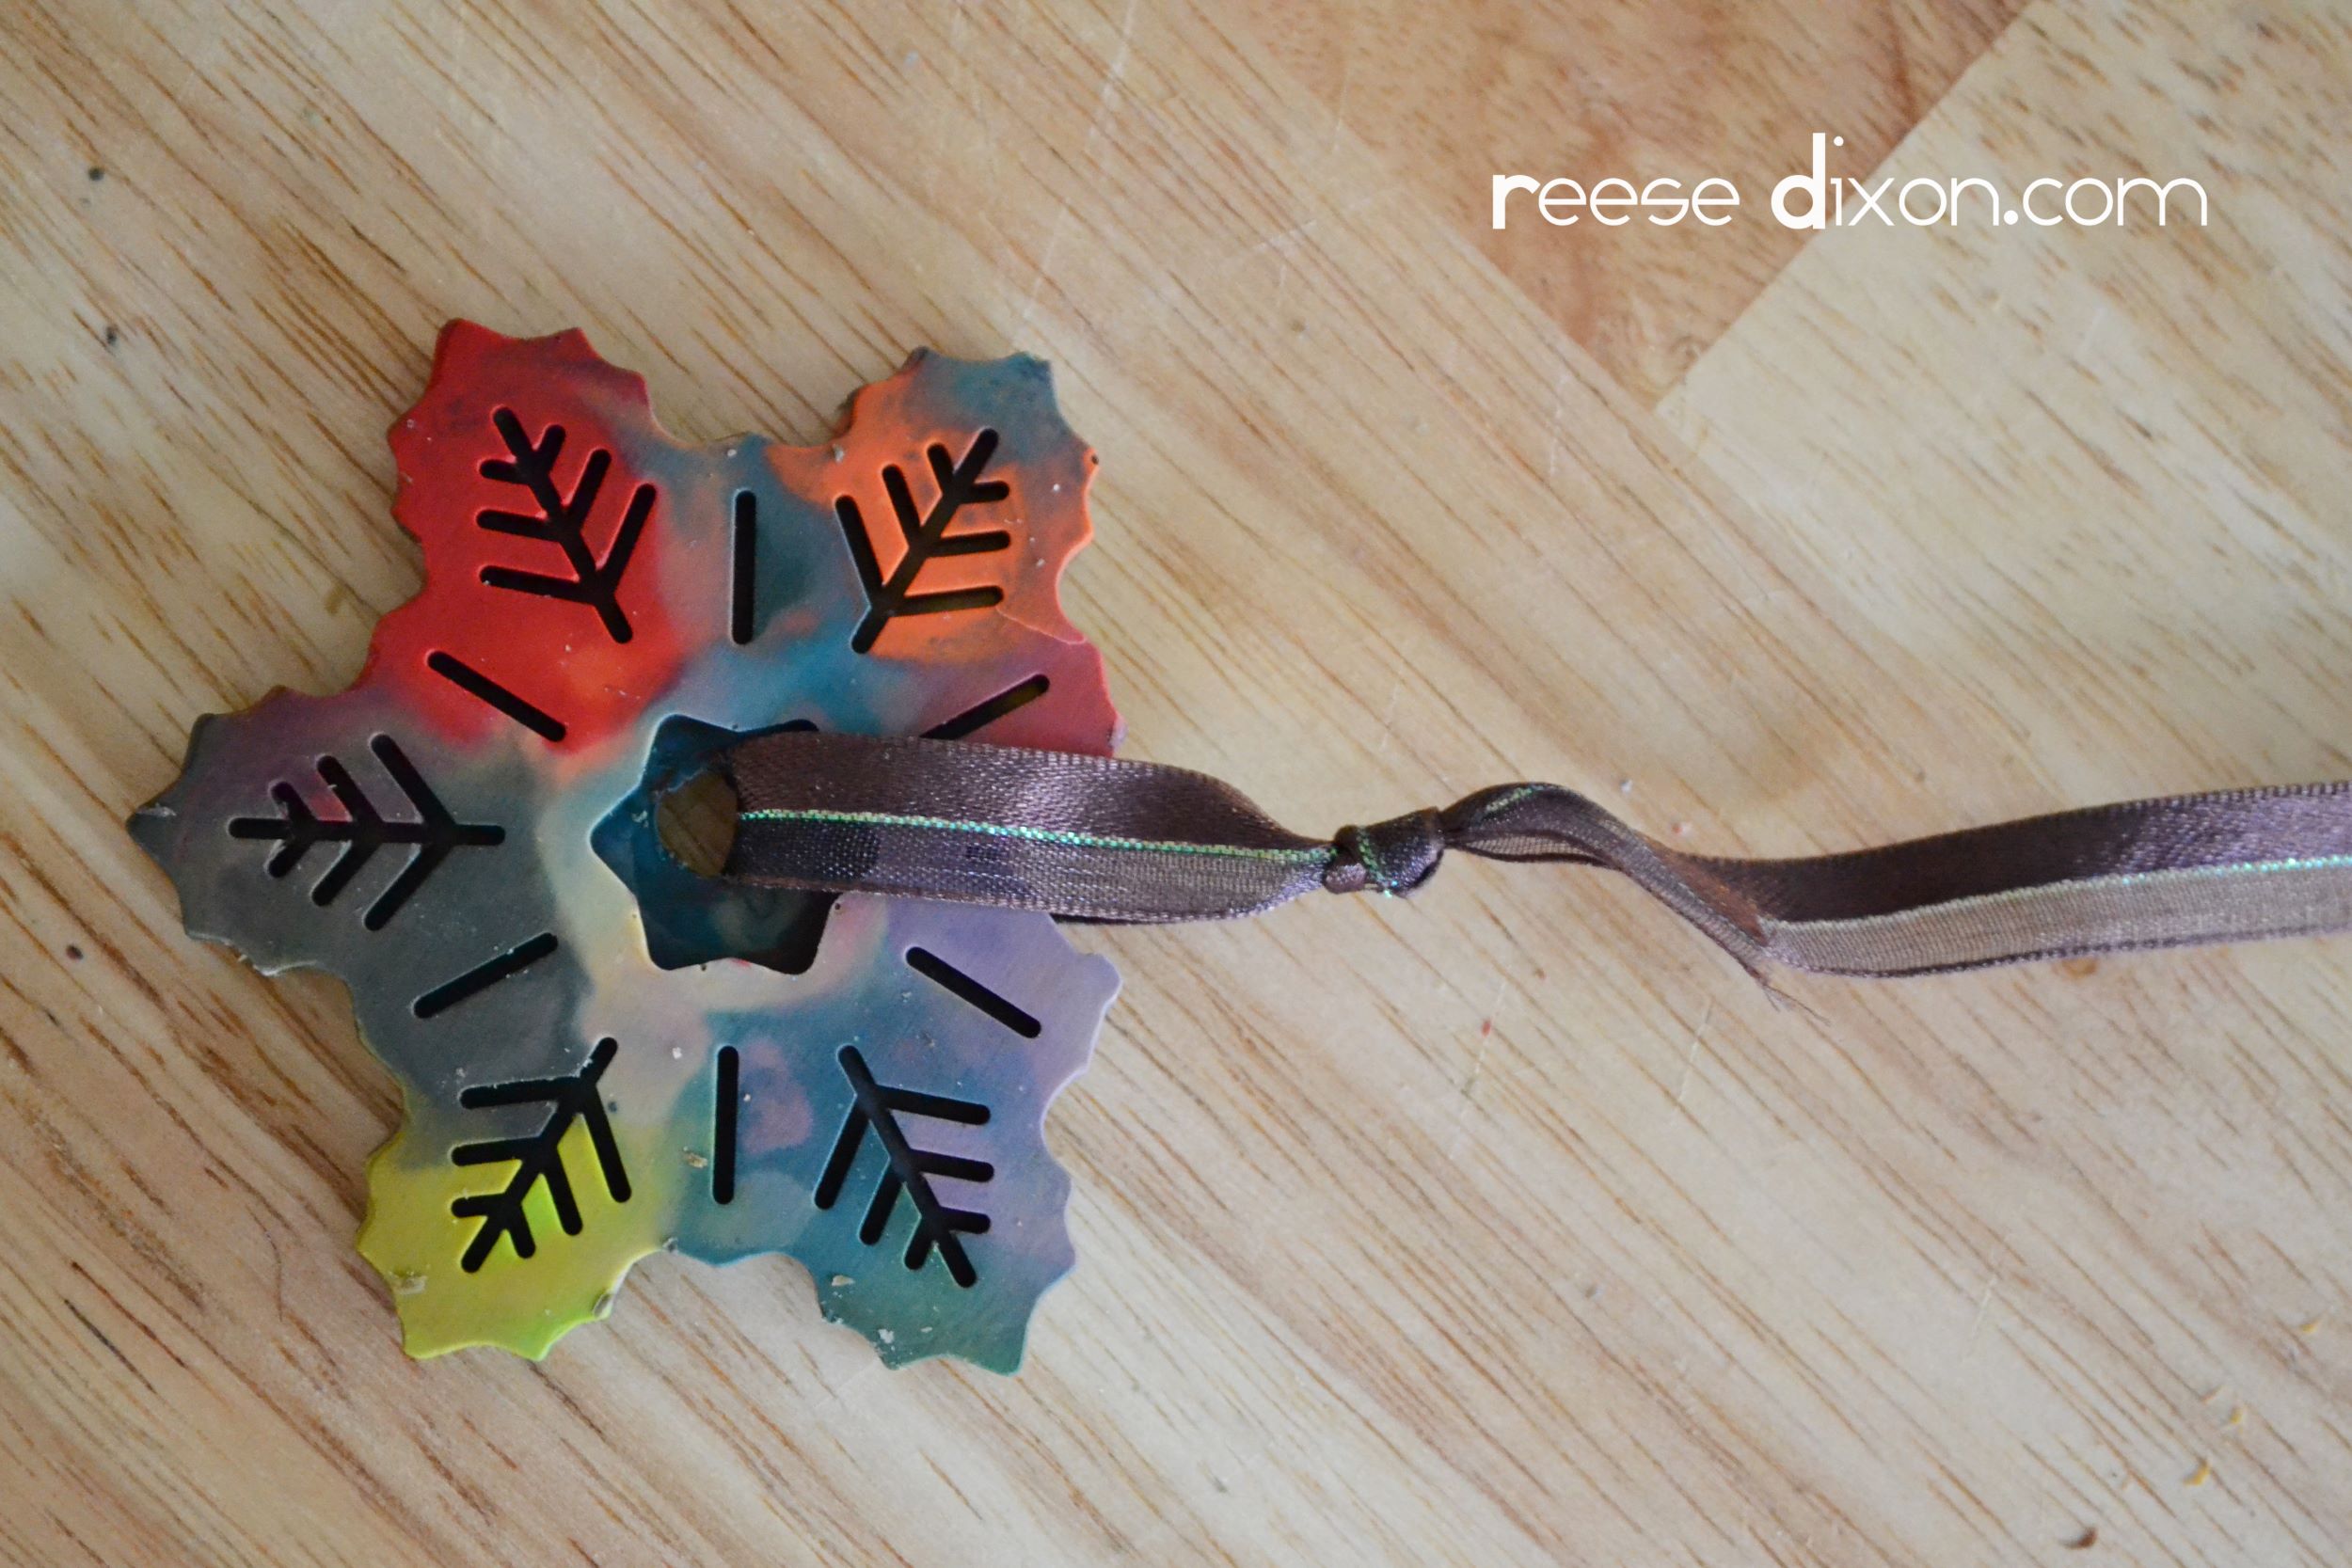
I went for a brown ribbon on most of them so it would mimic a stem, but I varied a few of them with magenta for a little variety, and I cut the lengths at all different levels so they’d hang as if they were all falling from different heights.
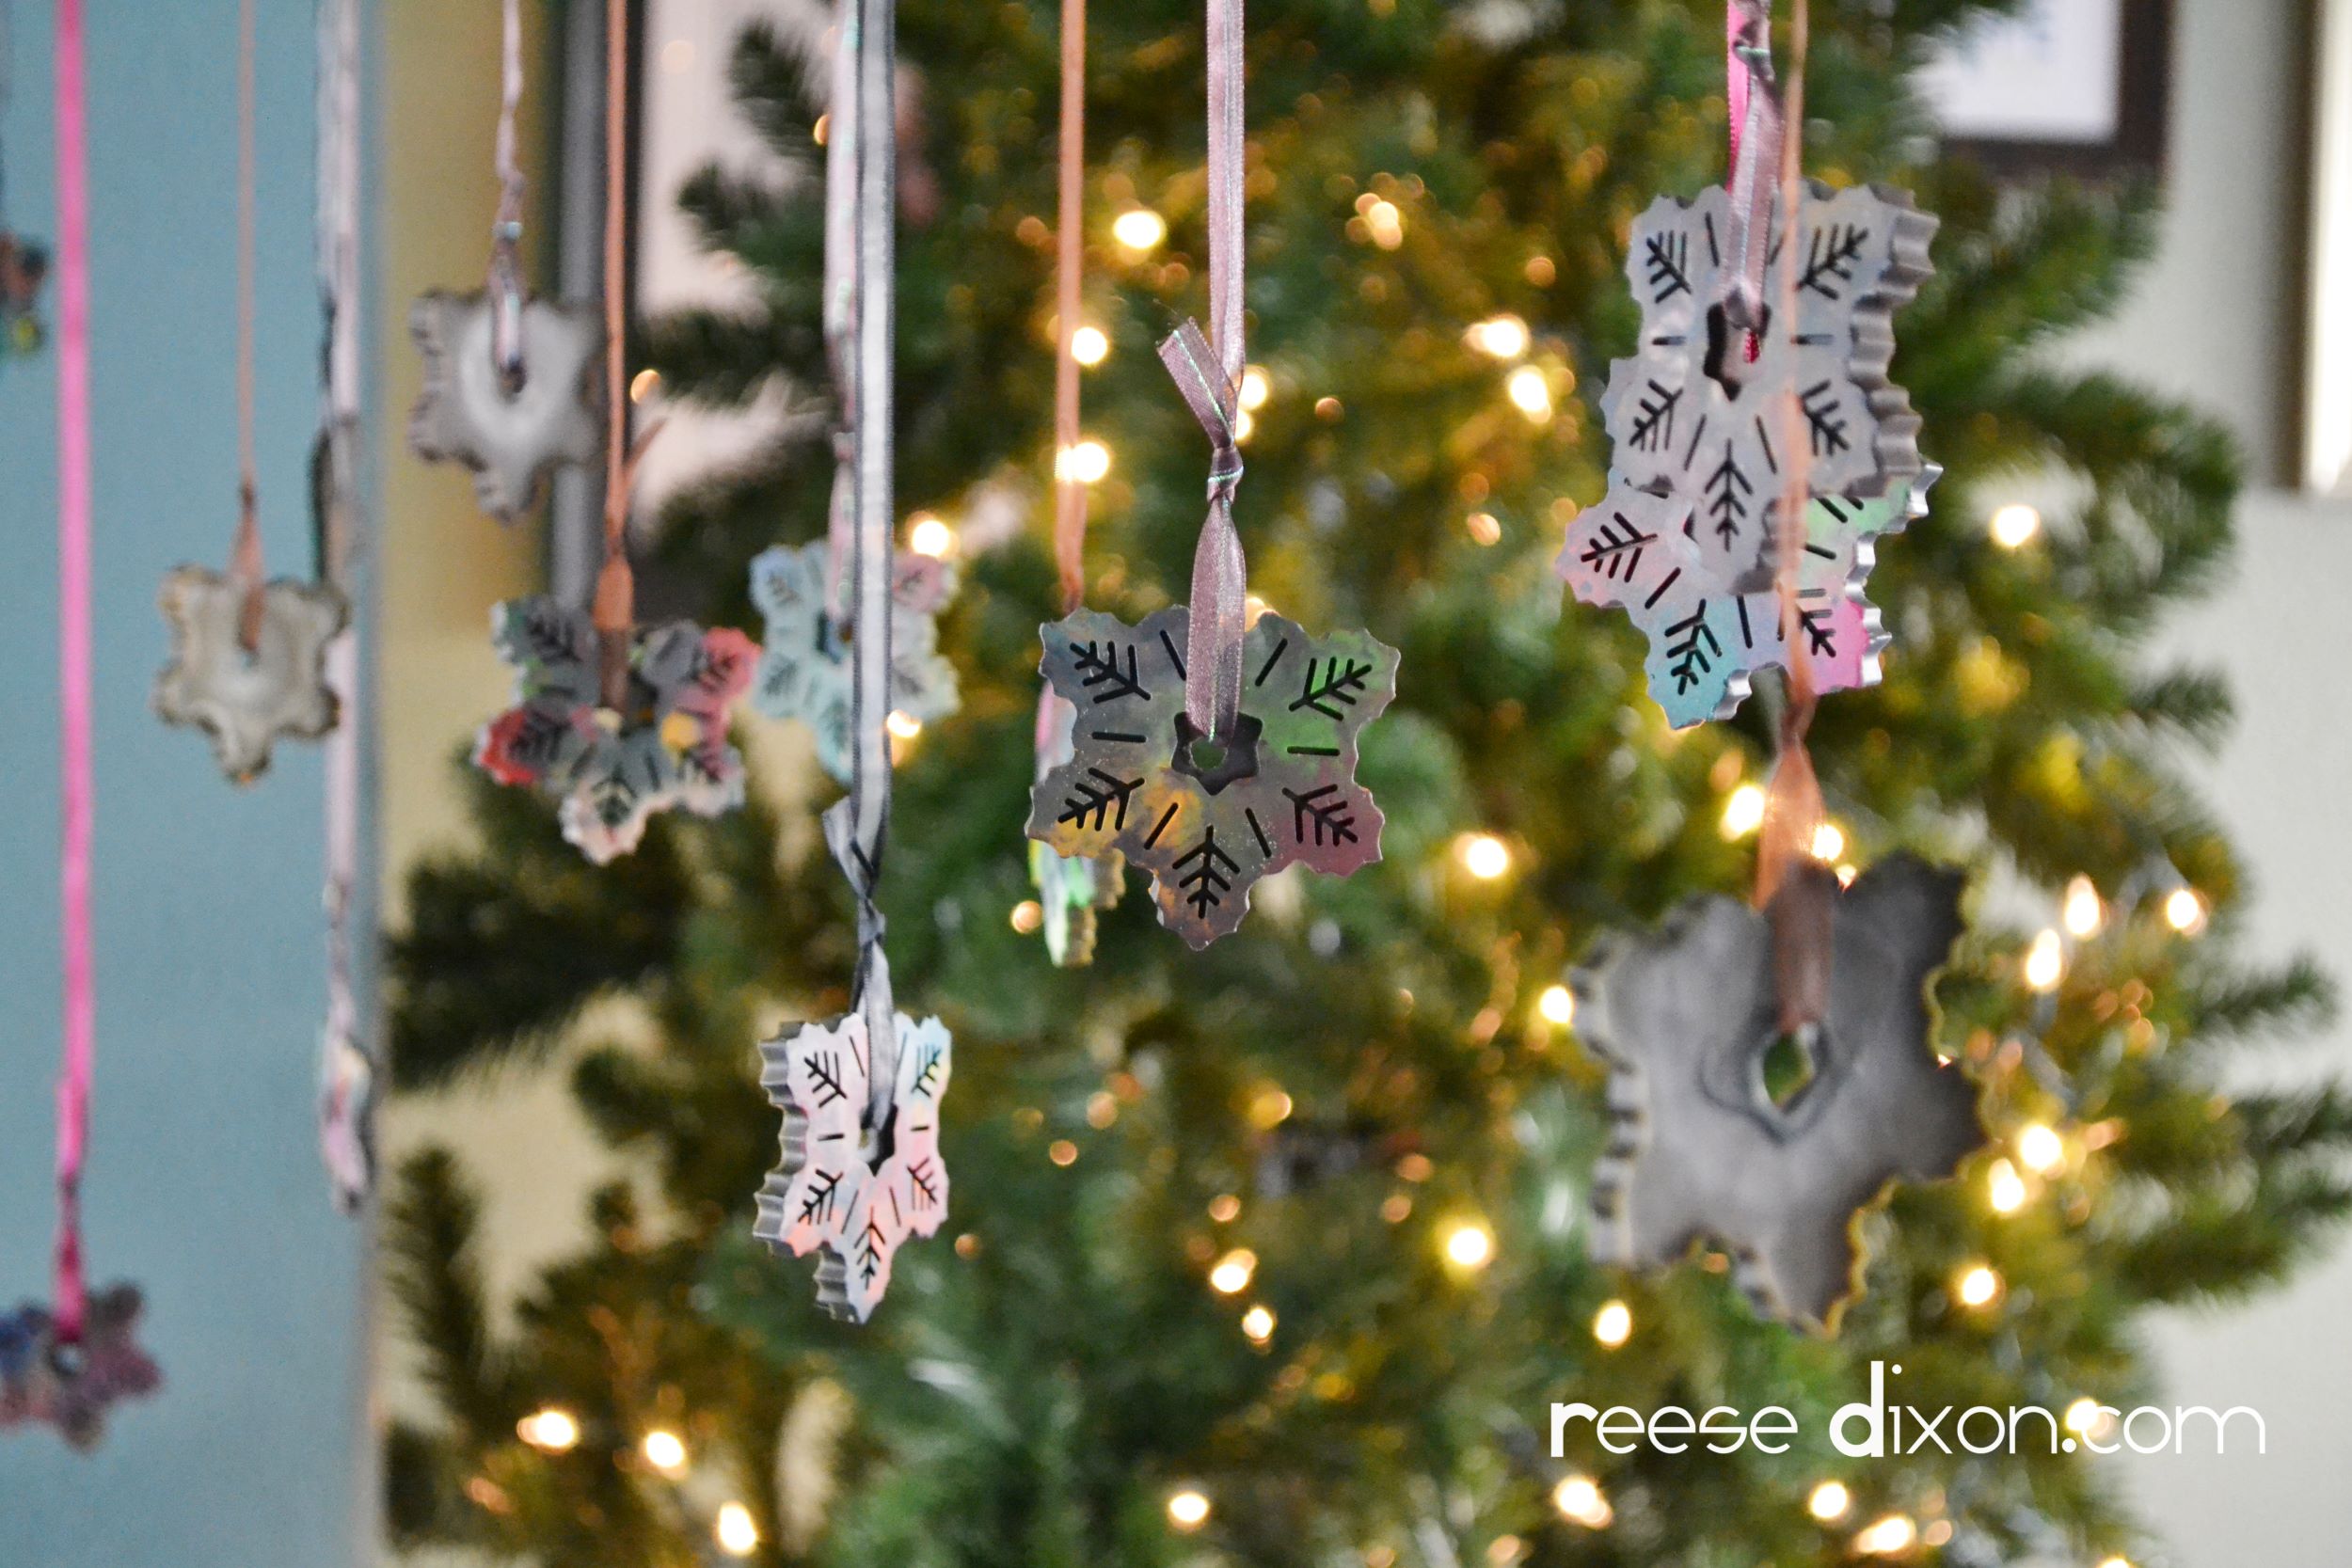
You could display these a million and one ways, hanging from a door, a mantle, or even piled in a bowl, but I used them to fill up the passthrough between my dining room and kitchen. In the background you can see the Halloween tree mid-clean up. I think next year I might make a Thanksgiving tree just so I can leave that tree up from October to January.
This project did not come together anywhere near as smoothly in reality as it did in my head, but I still managed to bend that wax to my will and give this holiday a little attention in between the big blockbusters of Halloween and Christmas.


Very cool. And you can re-use your mold with blue and white for Christmas snowflakes!
Heat your knife in cup of very hot water before cutting, should solve cracking. Love these.
Uh oops reading on iPhone missed you saying this… Sowwy
This is cute!
What's even better is that when you're sick of these guys, you can give them to Atti so he can color with them (if he won't have them, I will. I love to color)! Cheap and easy to upcycle!
How do you create on your web site your Work In Progress updates (% completed)
Each one is a different image I put in myself. I've got a system so it doesn't take too long, but I haven't found a widget yet.