Sewing is crazy hard for the full figured woman. Most patterns get sized as if a larger woman was larger in the exact same way that smaller women are smaller. So there’s not much accounting for curves, or shape, let alone differences in curve or shape. The poor pattern designers can only do so much to account for how different we’re all shaped, but if you’re someone like me, who is a fuller figured woman in exactly one part of my body, then it’s a nightmare to try to follow sewing patterns. If a pattern fits my ridiculously large rack, then it is a sack on the rest of me. If it fits me in the butt, it binds my poor boobs until they look in danger of popping.
A couple of months ago I spent a day with my friend Jan who designs sewing patterns and is most known for her aprons. I love aprons in theory, but every one I’ve made has just bugged me. They pull at my neck, they ride up and don’t sit right on my waist, I end up tugging on them so much I’ve ripped more than one. But I really do love the look and functionality of them, so I always go back and make another one, hoping that will be the one that fits comfortably enough to wear all day as I flit about the house cooking and cleaning and humming to myself, probably while I wear pearls and high heels. In my imagination anyway. These days it would be more likely to be a snot guard. But still. Totally worth it.
After a day with Jan I left so inspired. She is just such a generous friend, and I left her house with every pattern she’s ever designed and enough fabric to double my stash. She motivated me to not only give aprons another try (take a look at this one! That’s next on my “to make” list.) but to really unleash my creativity and try some designing of my own.
I wanted to come up with the worlds most basic apron. Something that someone who had never sat down at a sewing machine could make, but something that was totally customizable so it could fit, without a whole lot of math or measurements, the curviest of the curvies and the slenderest of the slenders. I was actually thinking of Enrichment Nights at church, where we often do a craft project but it has to be something that any age or skill level would be interested in. I think this fits the bill.
Plus it’s reversible, so you have even more opportunities to use all those fabulous coordinating fabrics out there.
You’ll need:
2 fabrics for the skirt – 1/2 yd each for most, otherwise just buy what fabric you’ll need to wrap around your waist
2 fabrics for the bodice – a fat quarter will be enough for most, otherwise, just buy what you need to cover your torso
Contrasting fabric – 1/2 yard
2 cute buttons
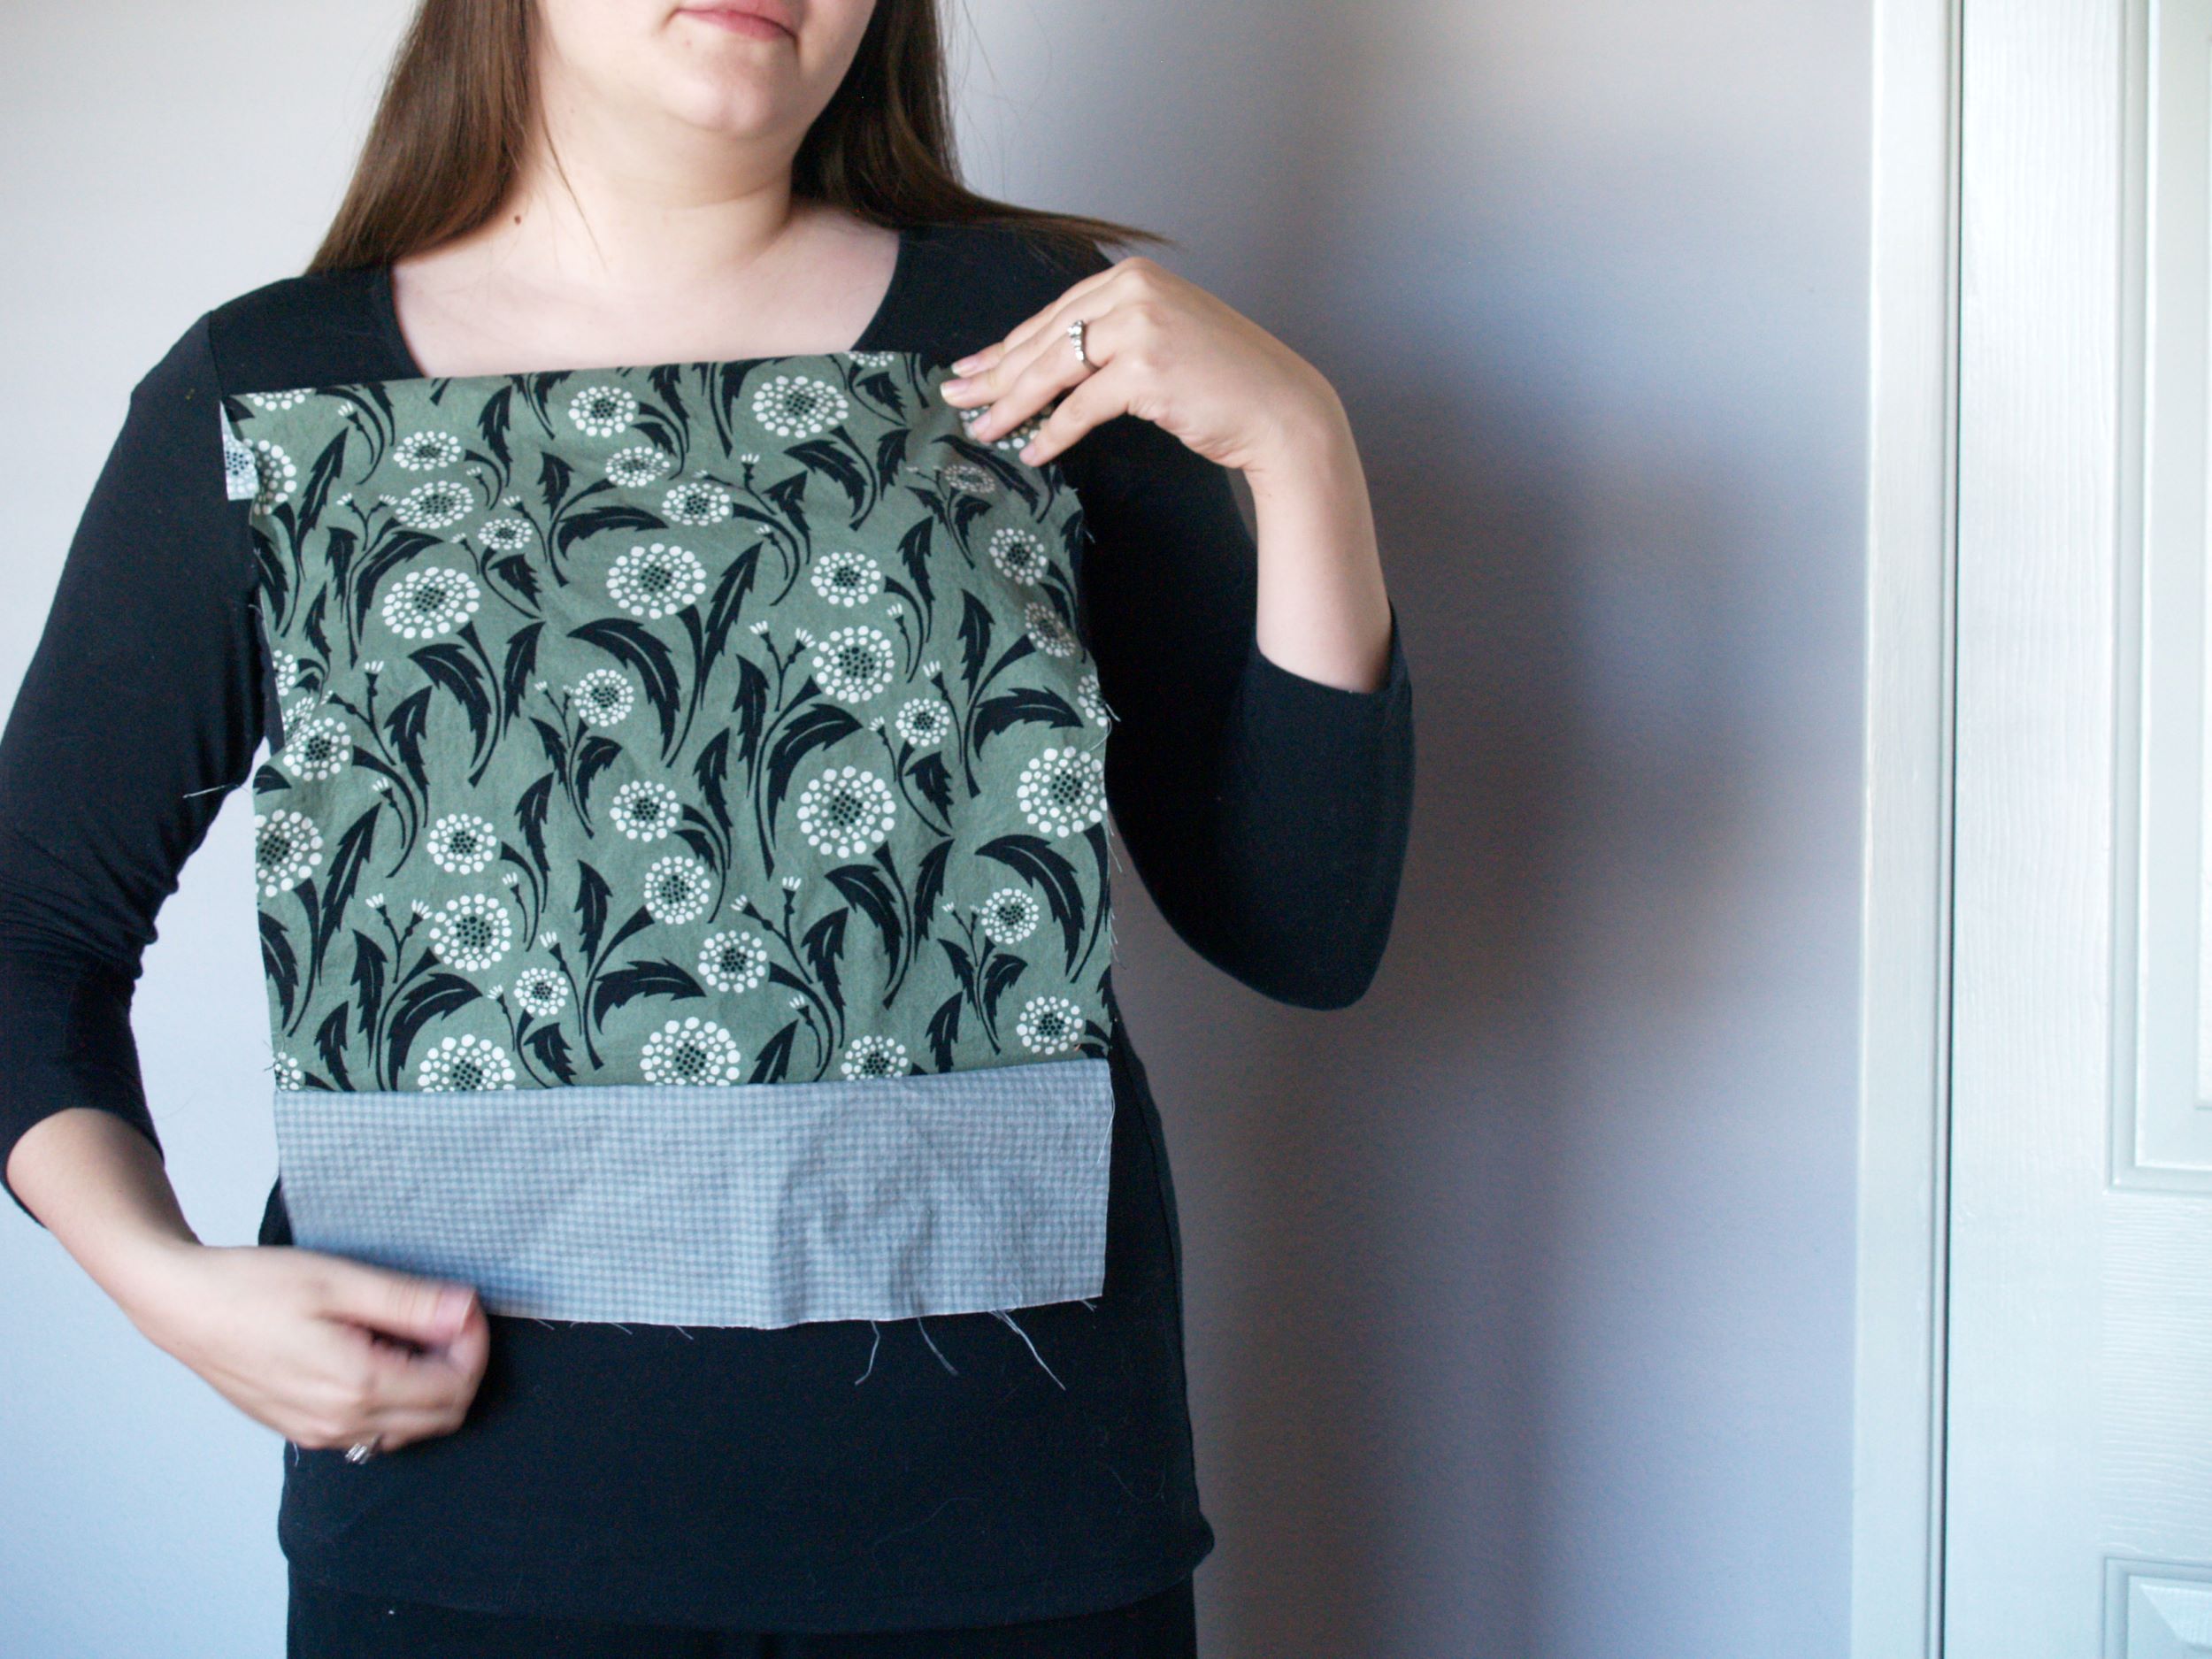
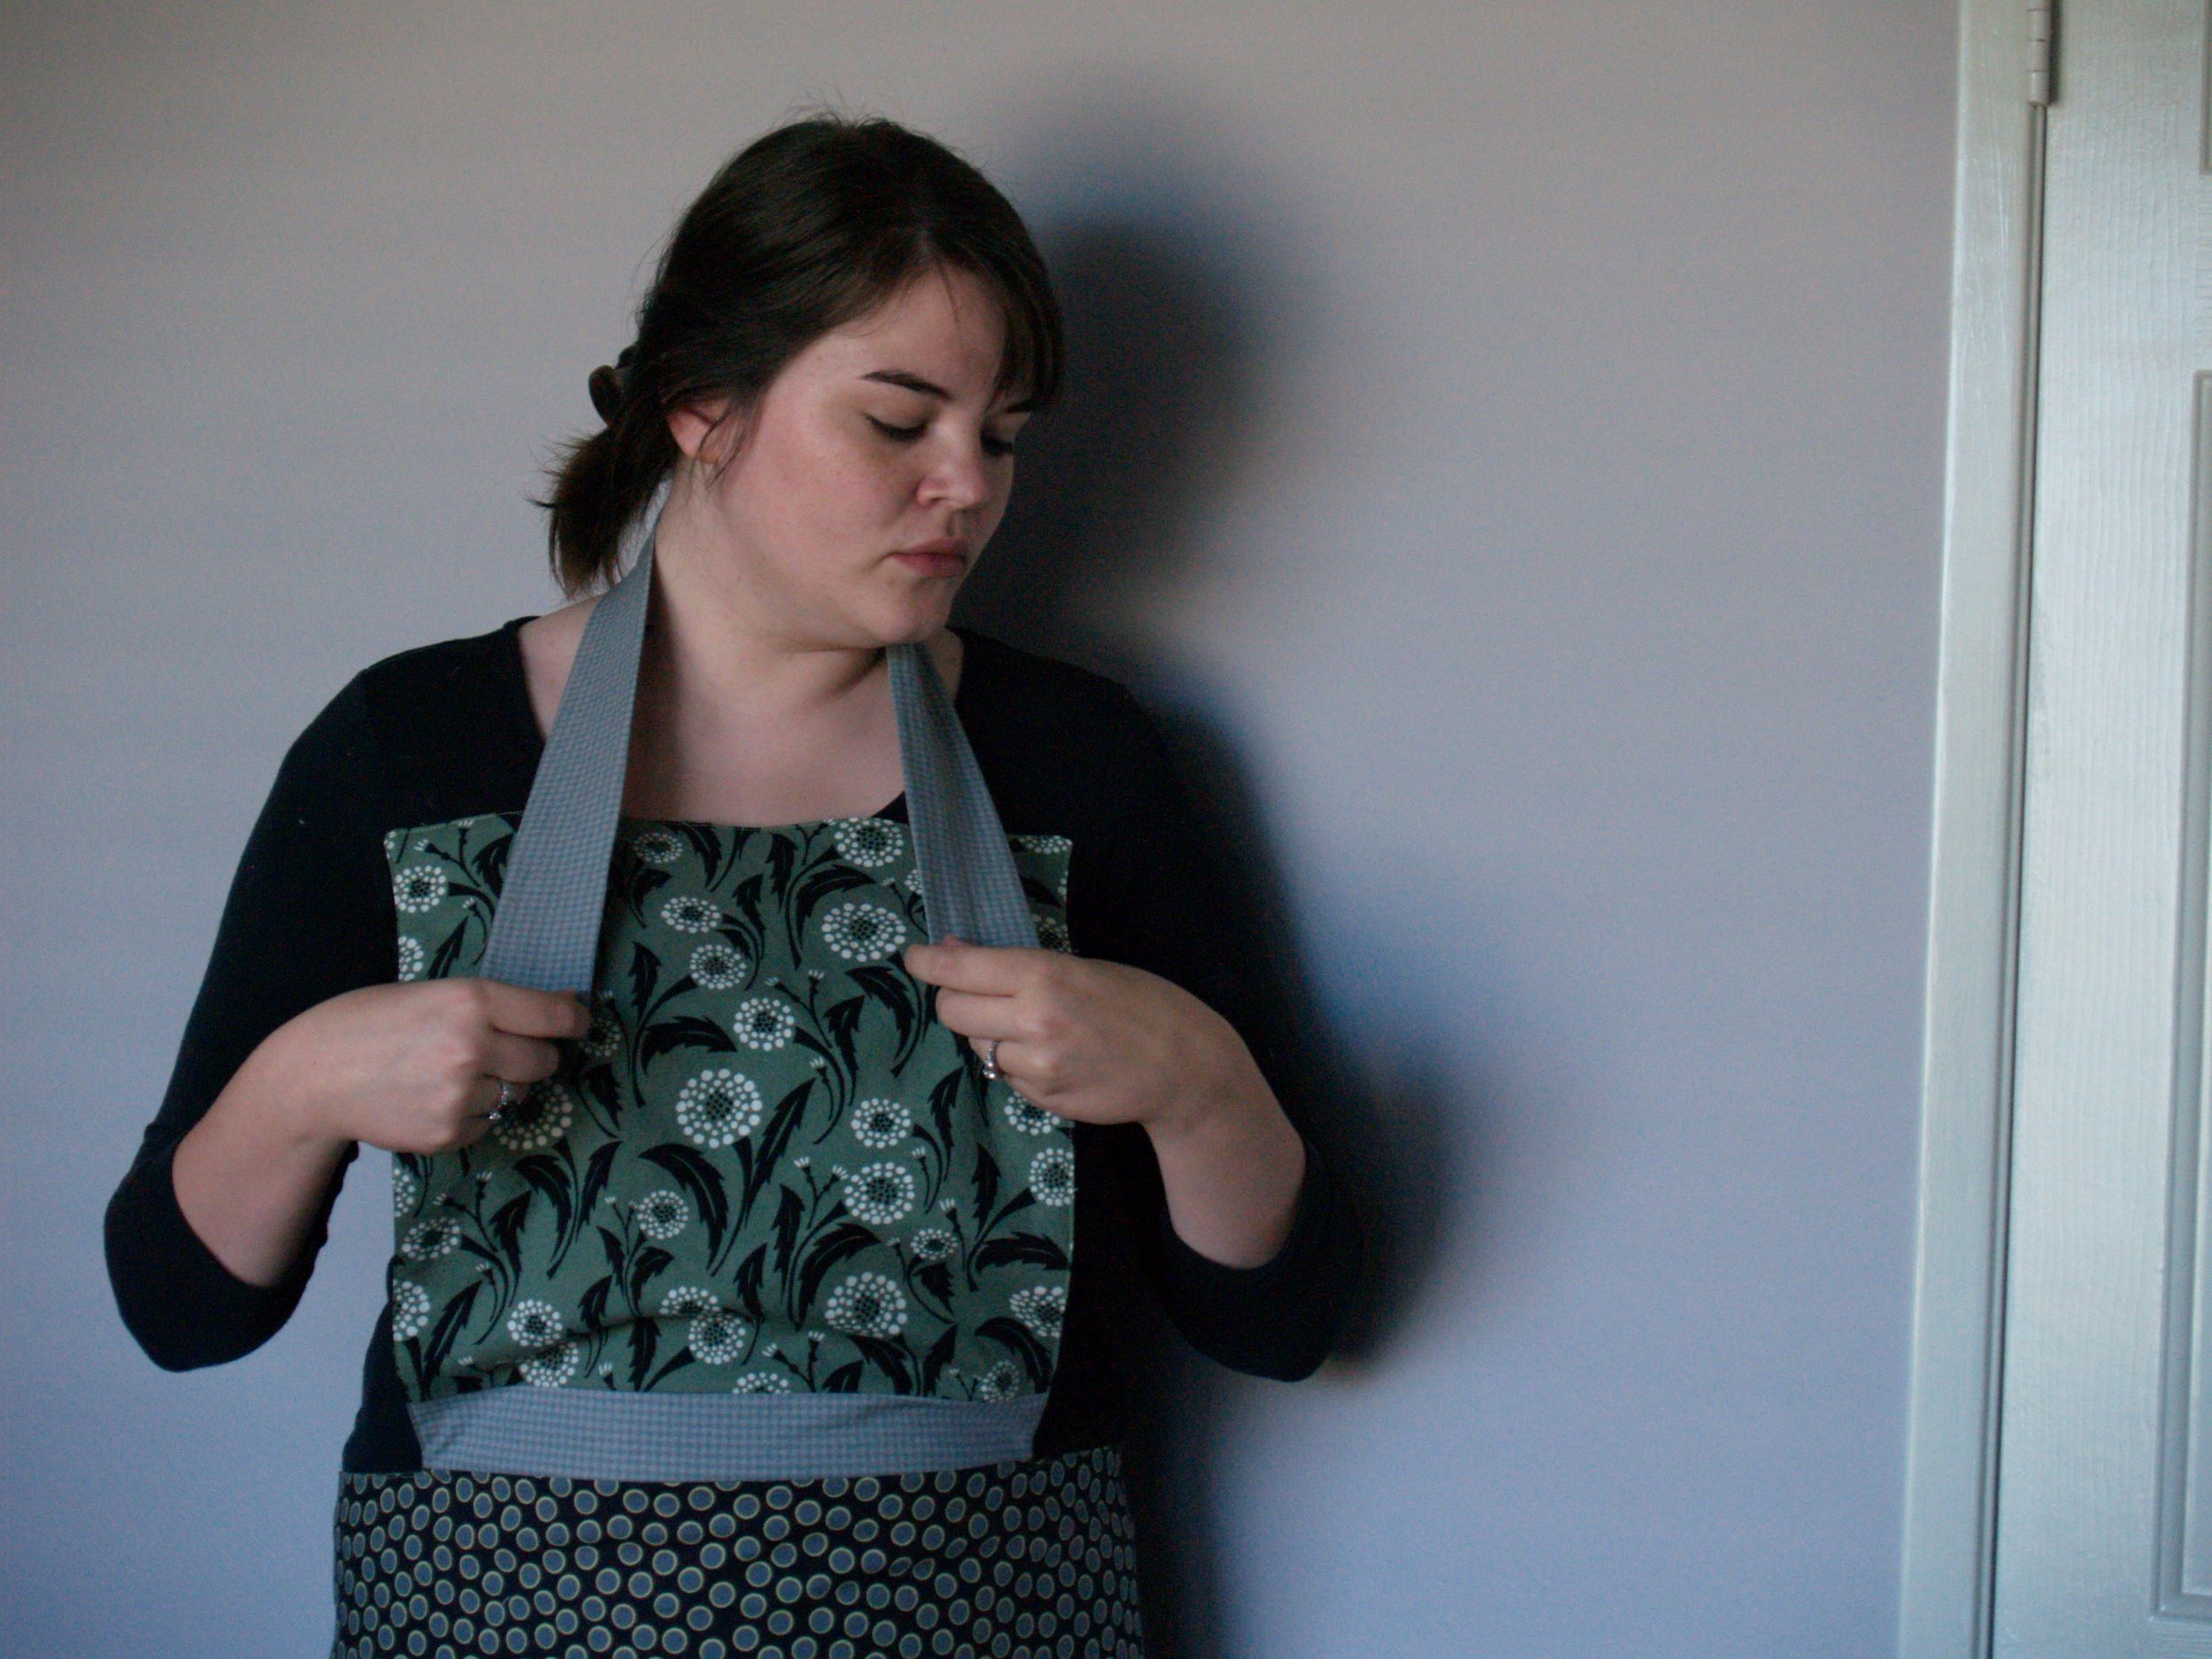
1. Cut your bodice fabrics to the size that will cover you. I cut mine to be 16″ x 14″, and then I cut a piece of the contrasting fabric to 14″ x 3″ and sewed those together. I wanted another way to get more fabric options in there, but I also wanted to create a visual waistline since a one piece garment over large breasts just makes the whole of you look big.
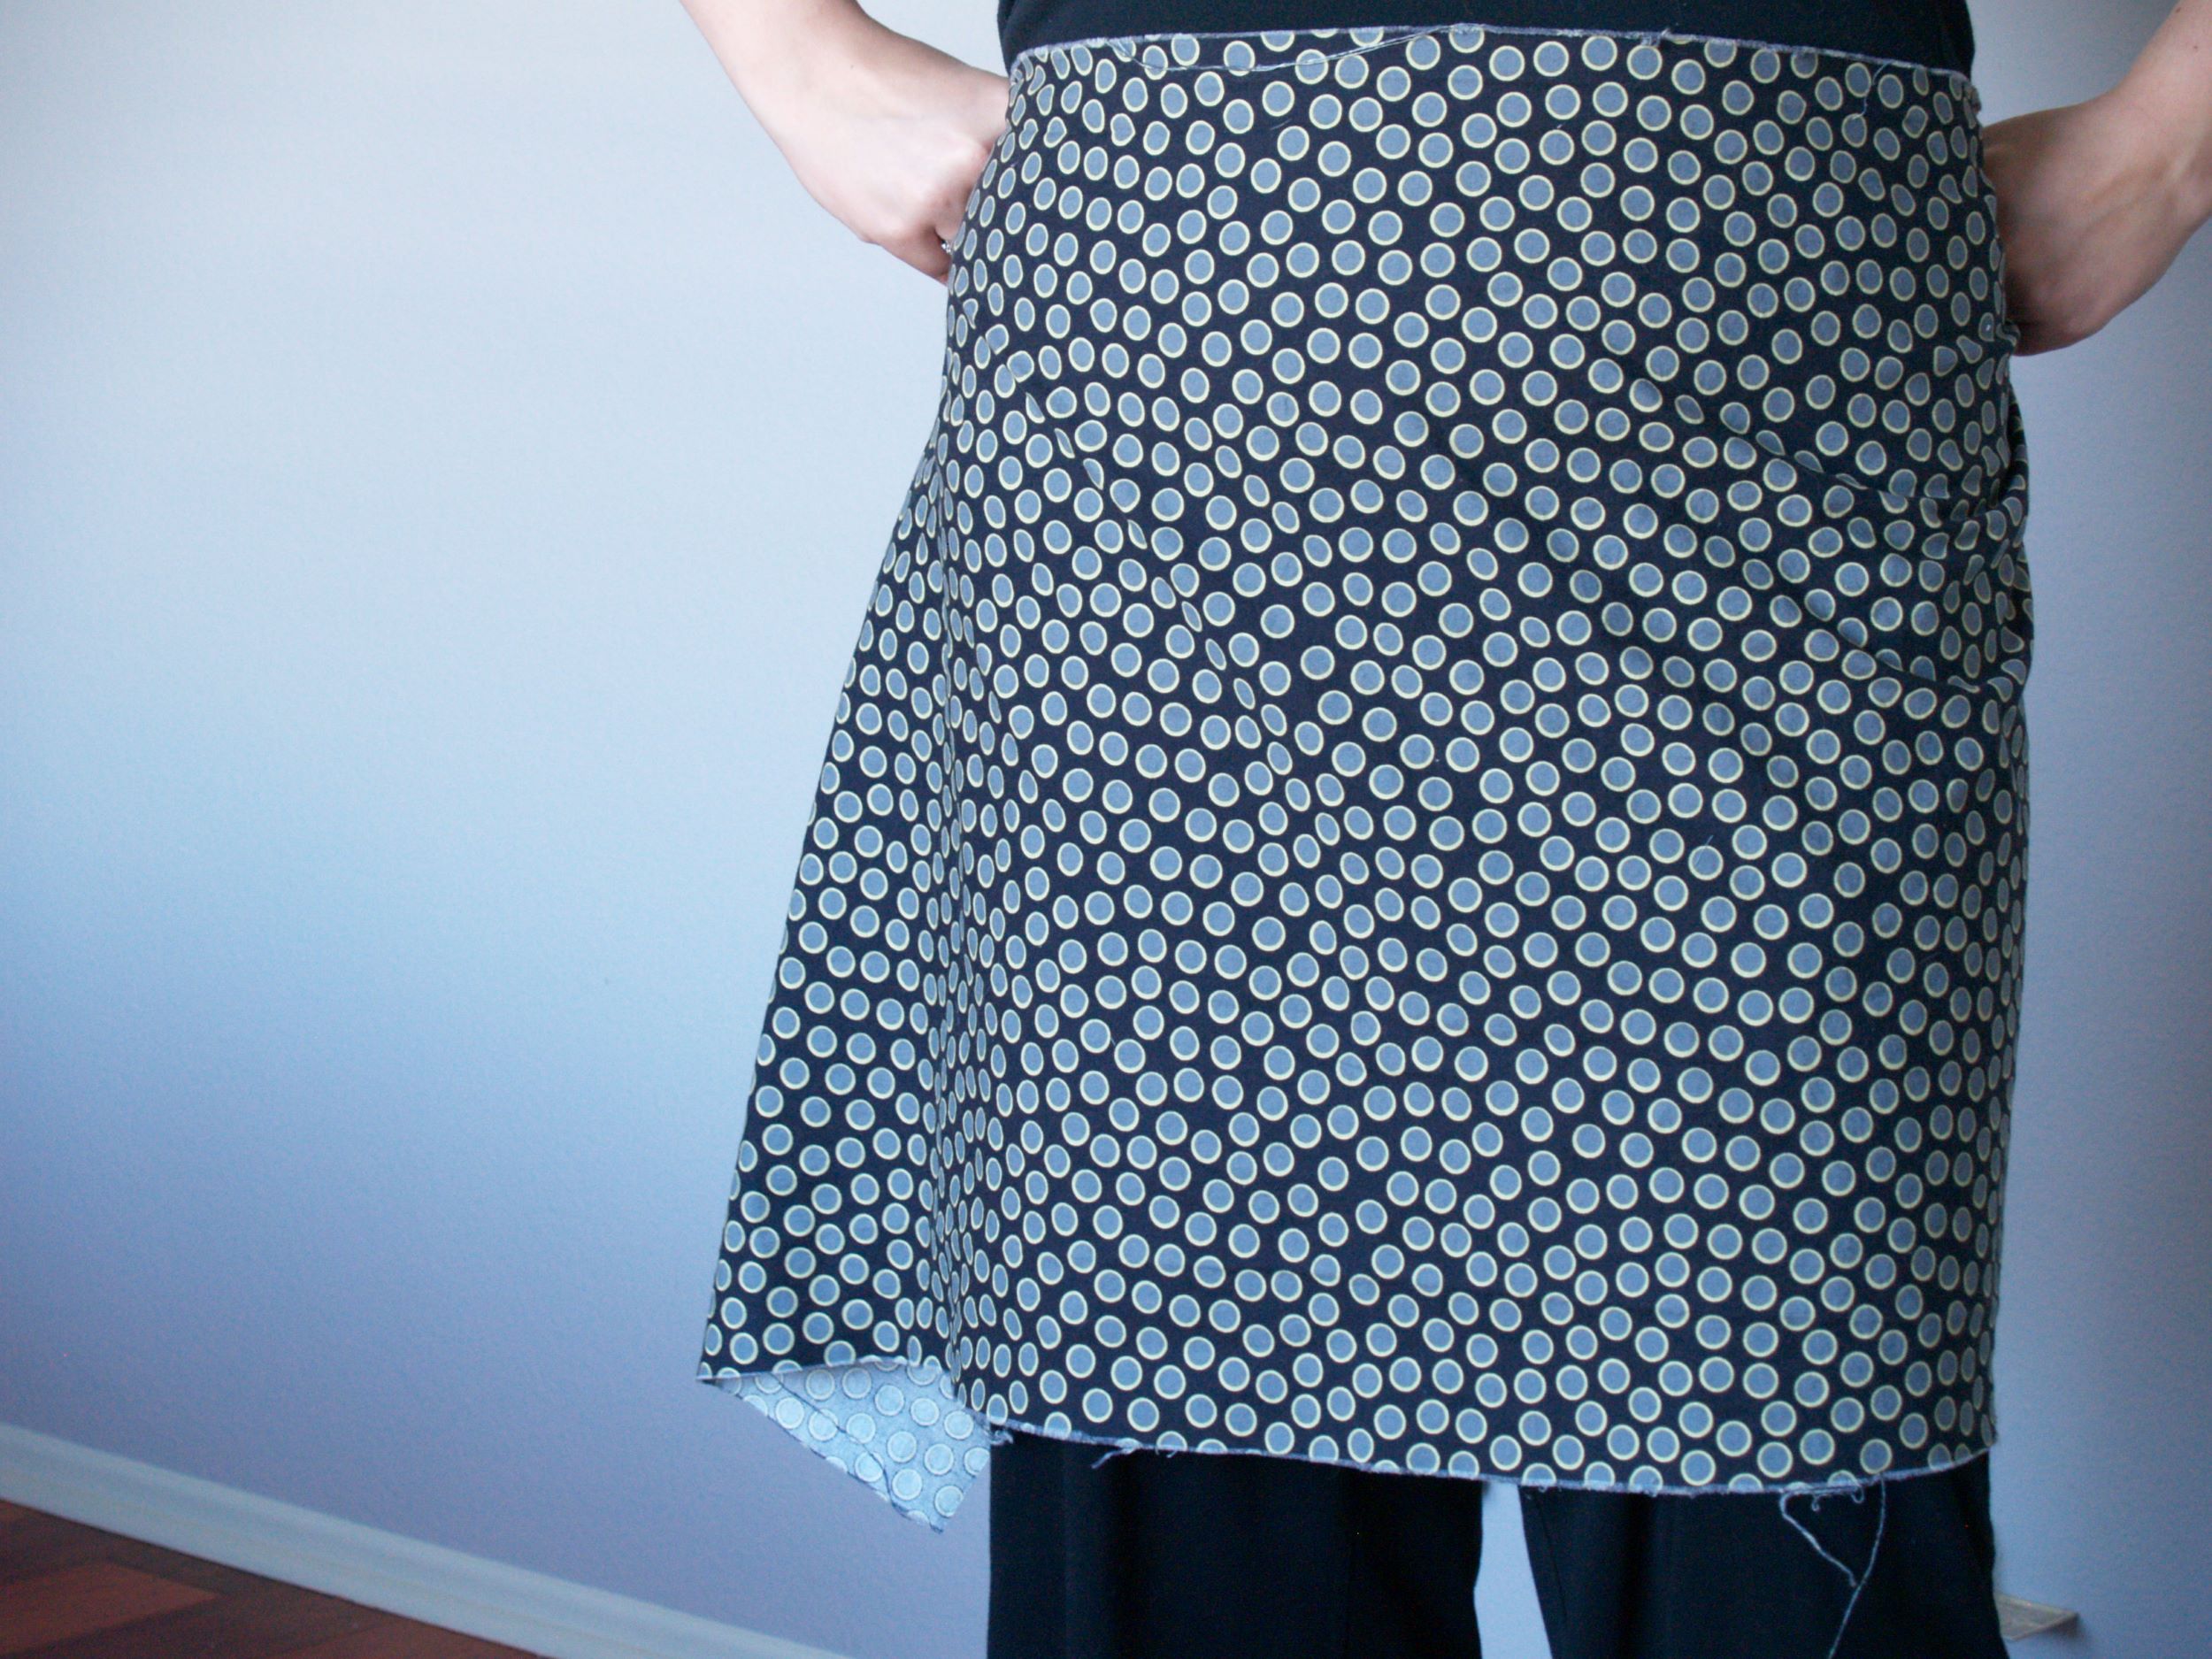
2. Cut your skirt fabrics to the size that will fit you. For mine I just took the half yard and cut off the selvages. It worked perfectly for my height and waist size.
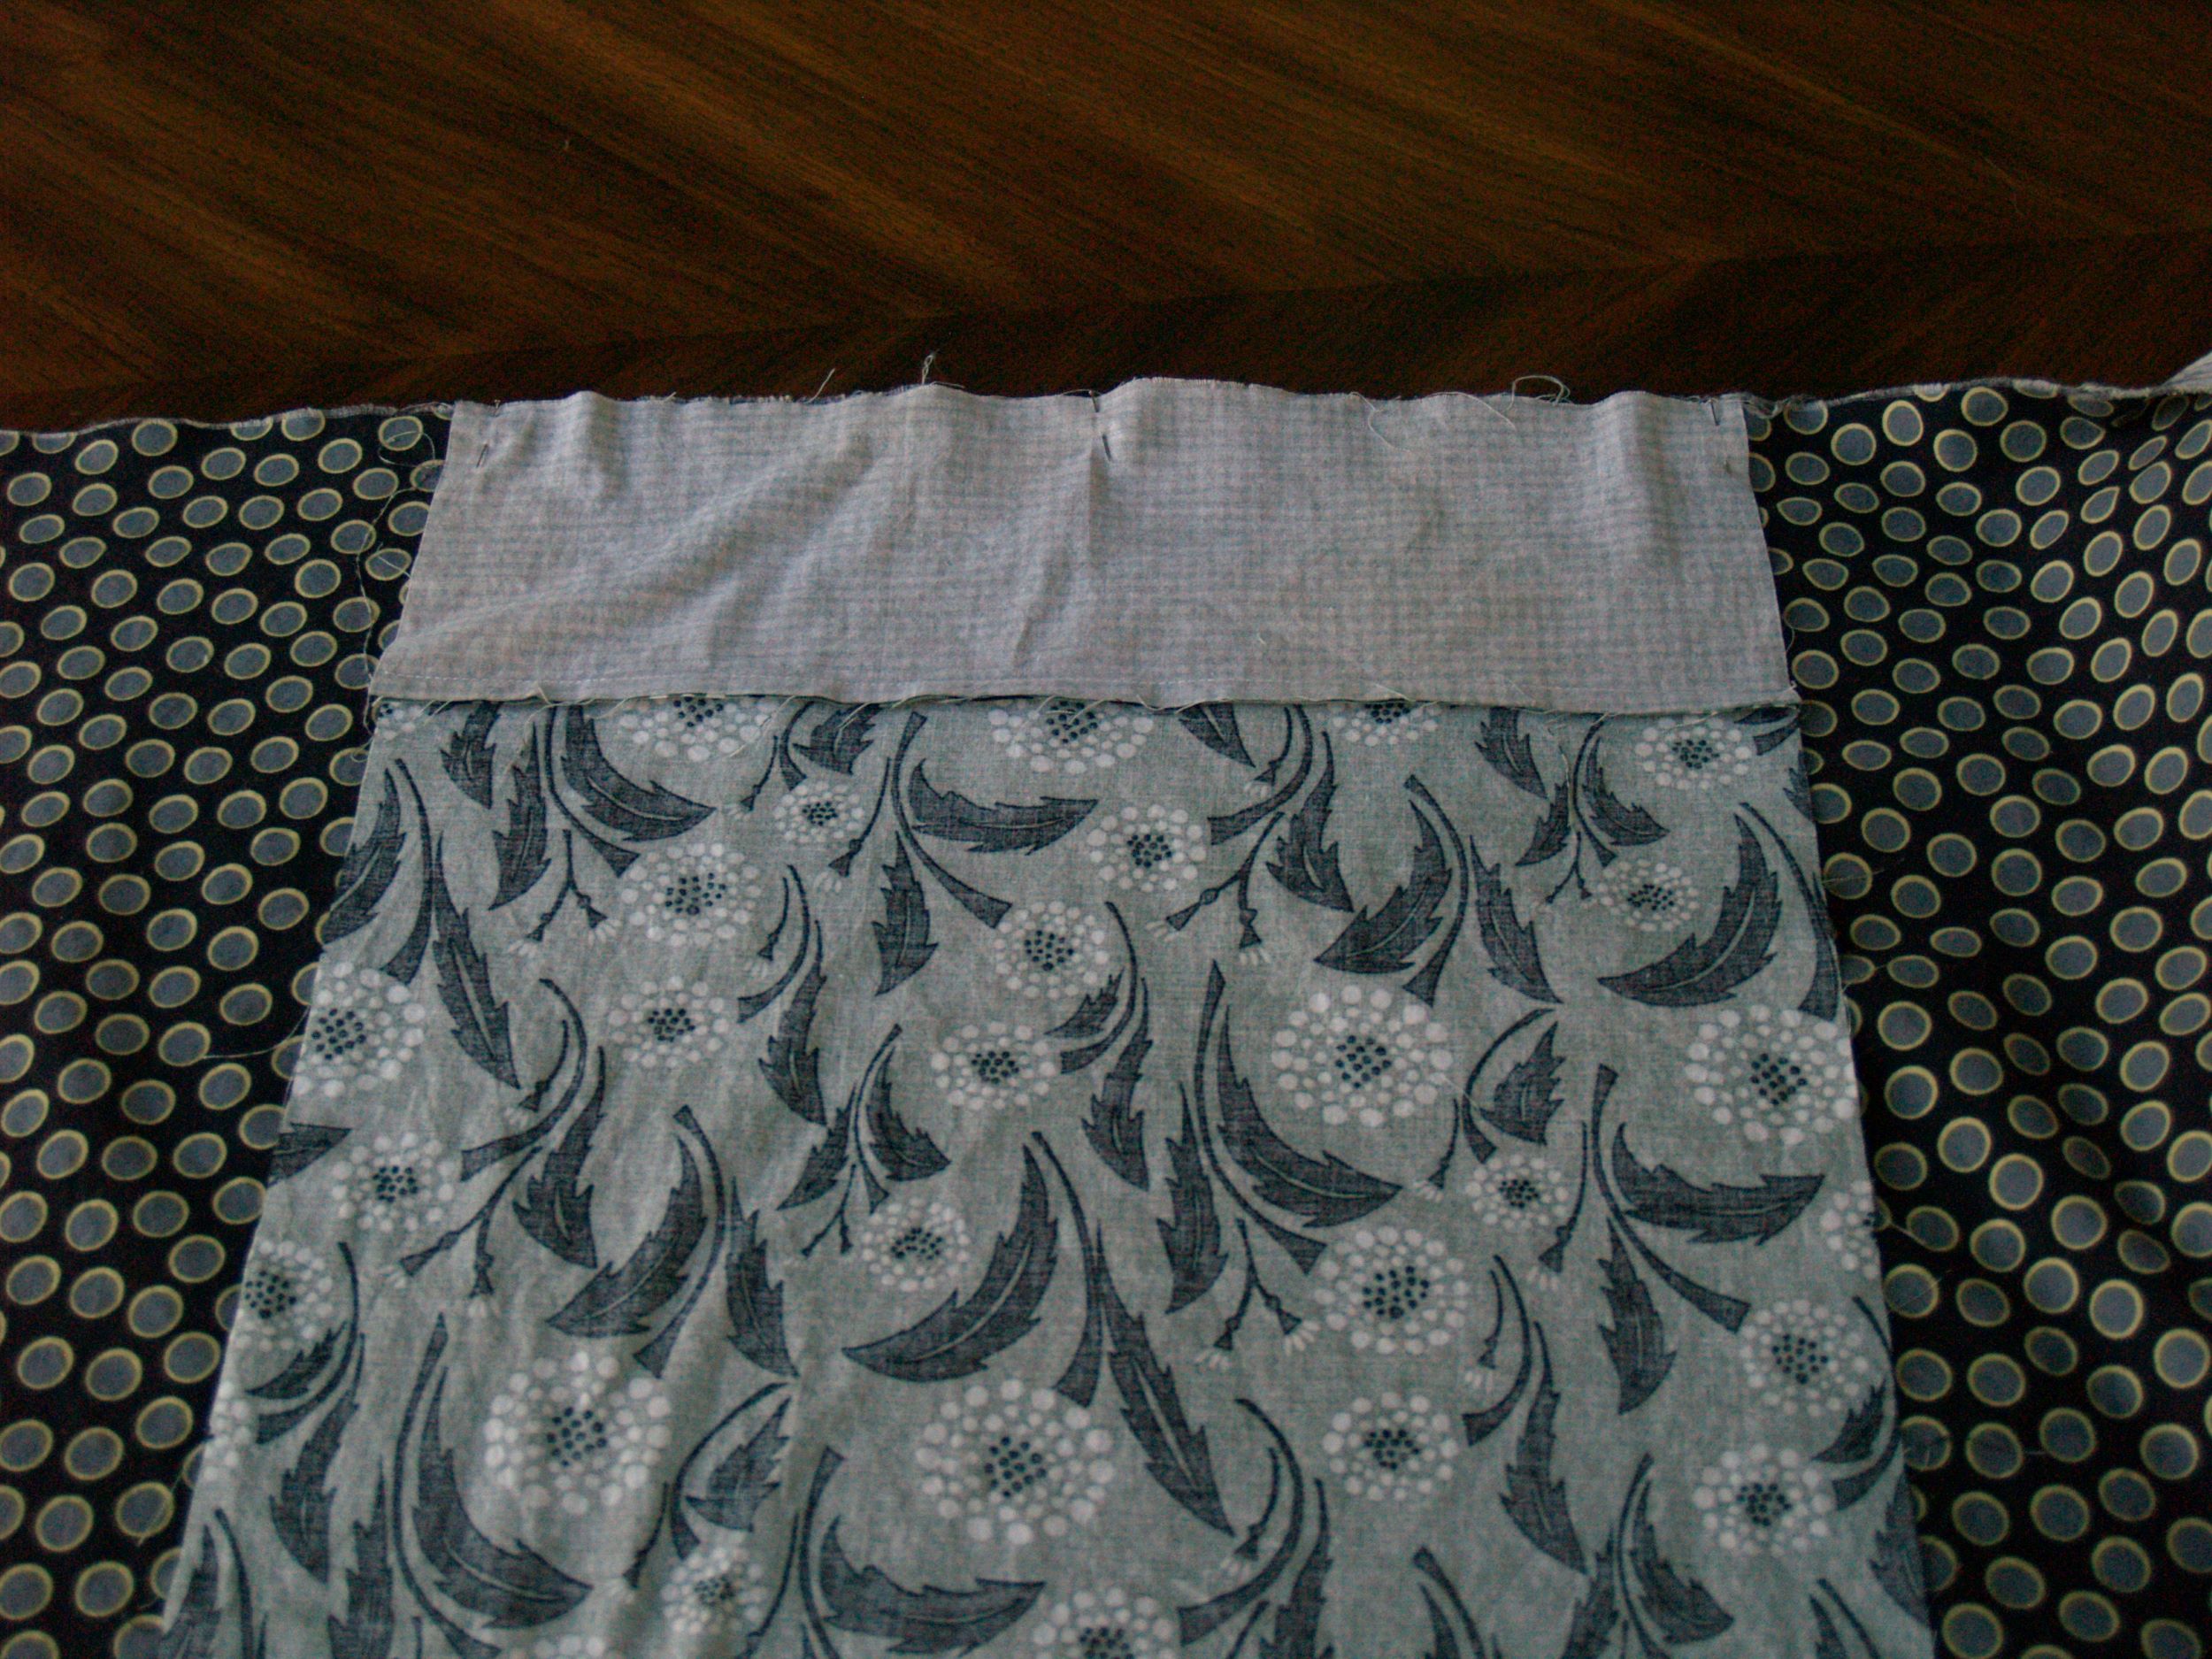
3. Fold your skirt fabric in half along the waistline and pinch to mark the center. Do the same for your bodice fabric. Unfold and match the center marks of both pieces, right sides together, and sew. Do the same thing for the second skirt and bodice pieces.
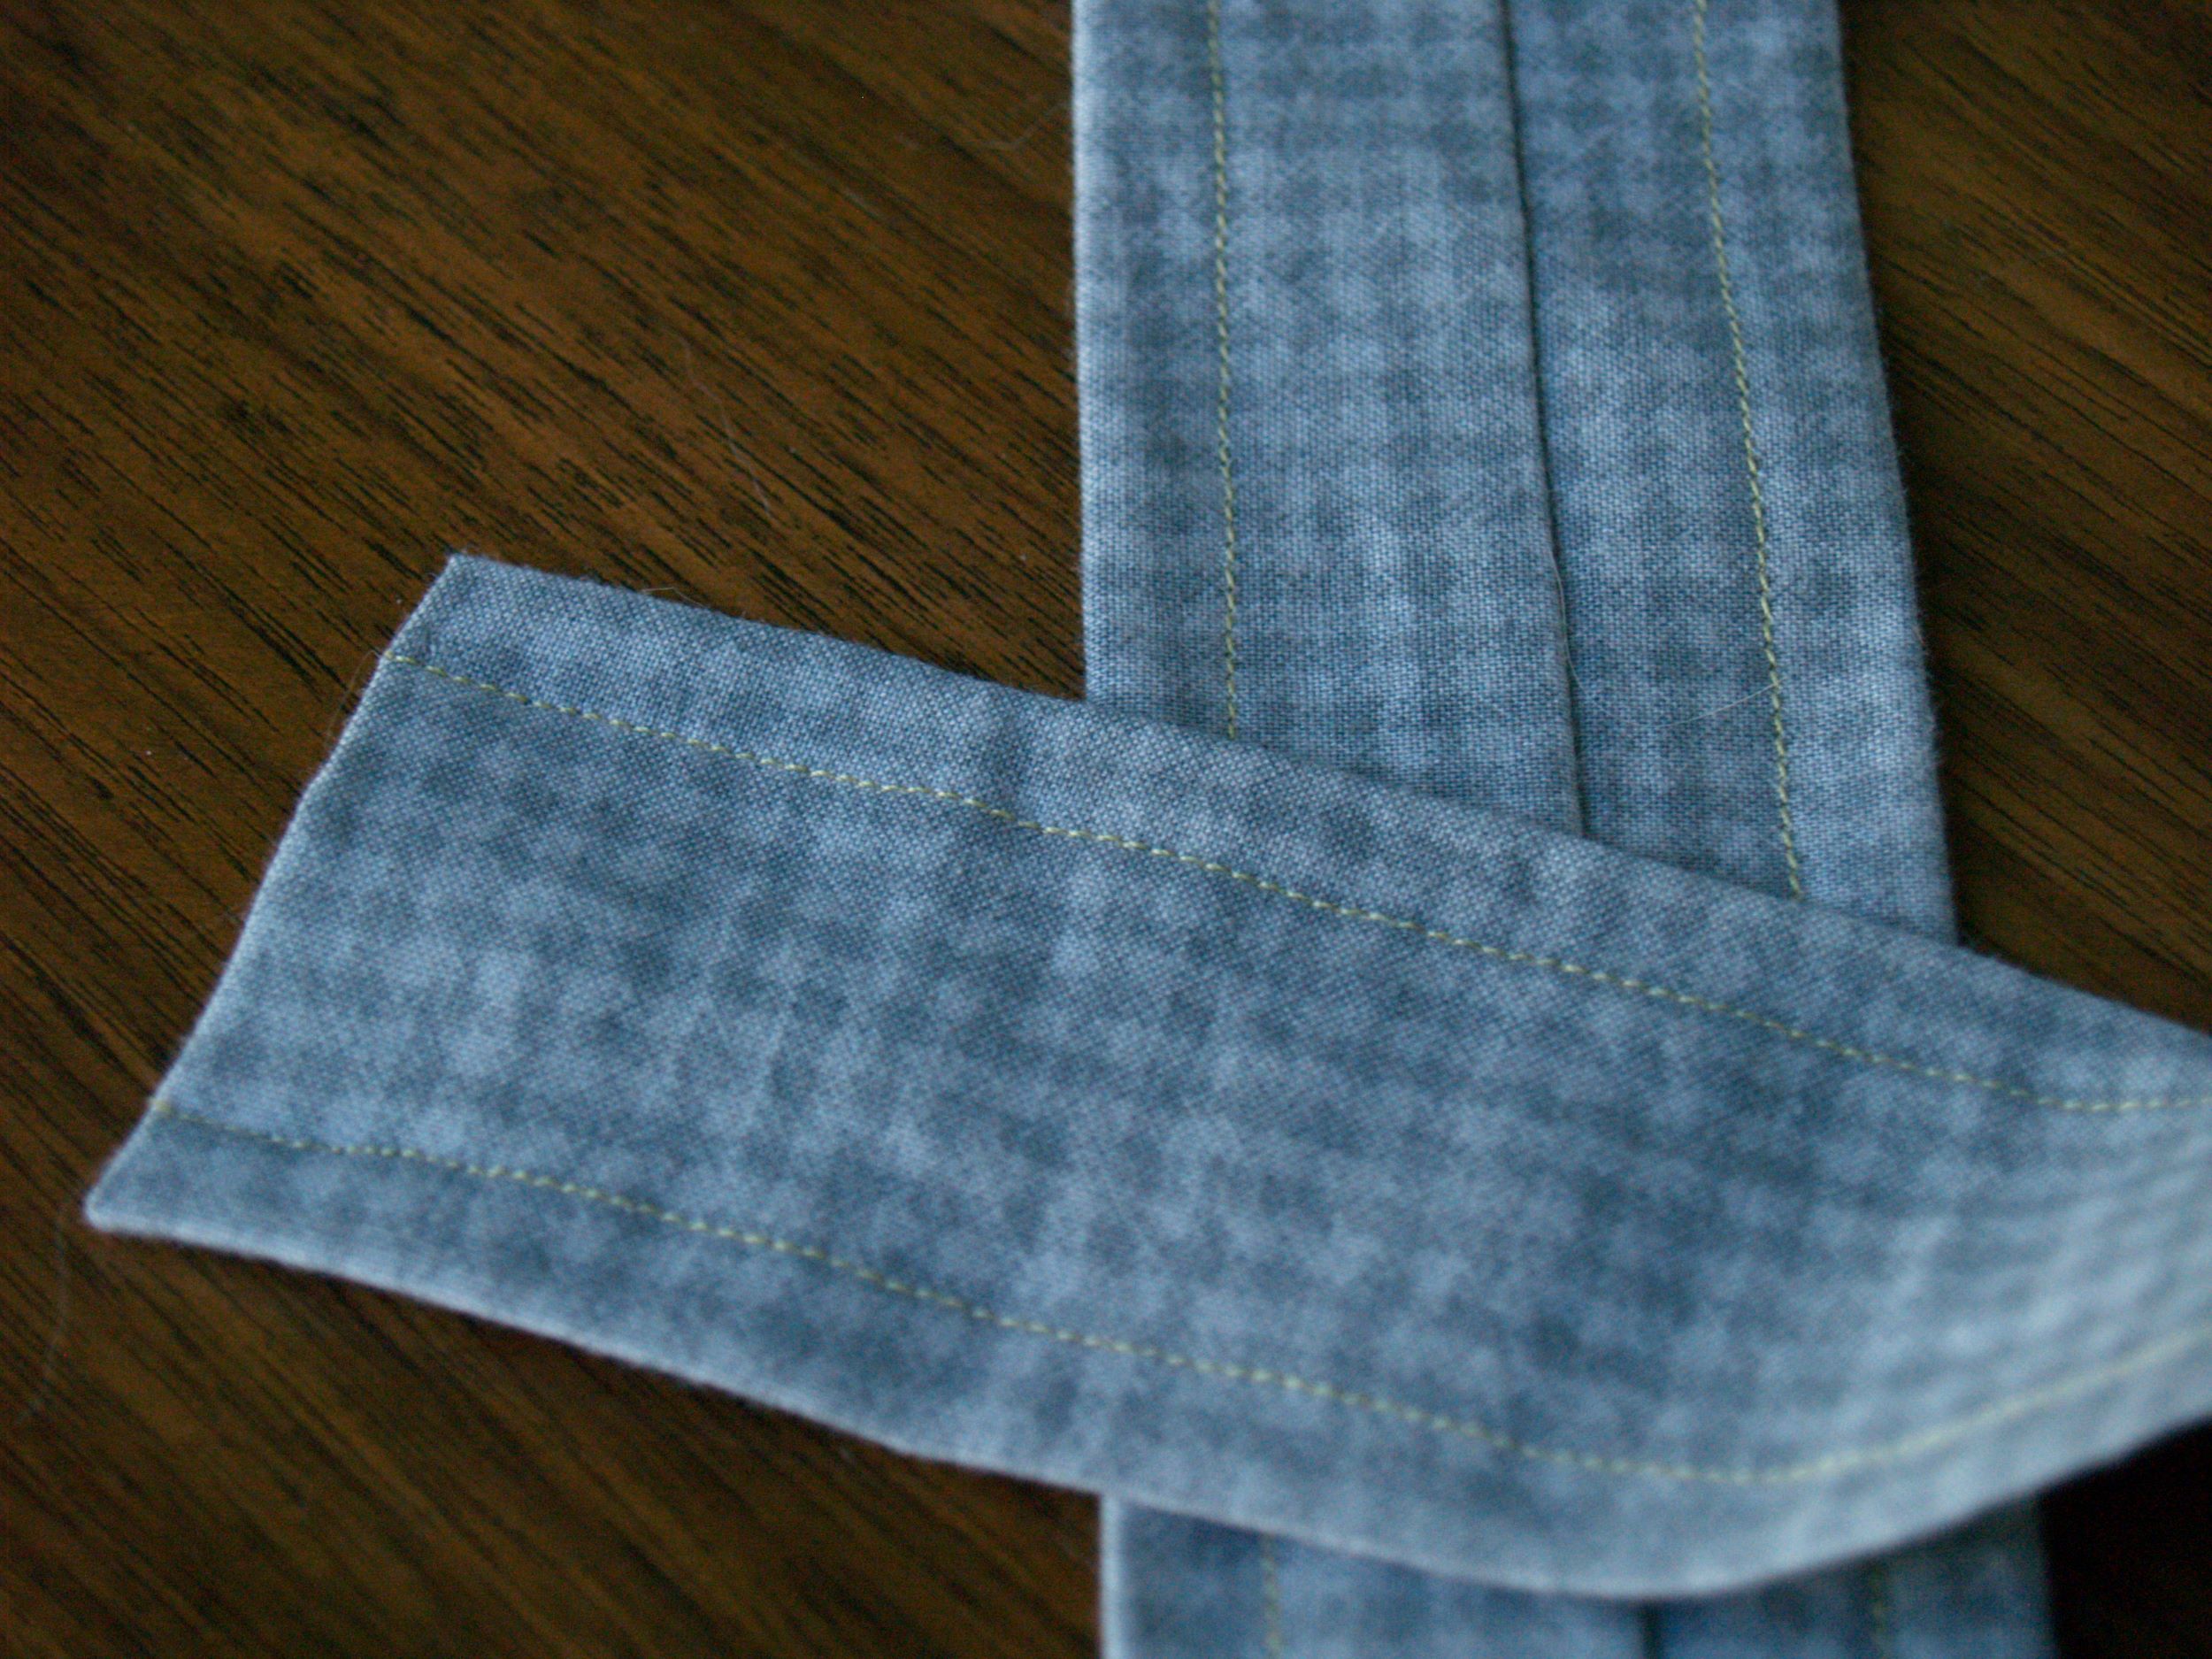
4. Out of your contrast fabric cut two ties for the waist and one for the neck. For the waist ties I cut selvage to selvage, 4 1/2″ wide. I did the same thing for the neck tie, 5 inches wide. If you’re on the smaller end of the scale, your neck tie will end up being way shorter, but this was easy to cut and gives you plenty of room to get the fit right.
For each of these pieces, fold right sides together and sew into a tube. Turn the tube right side out. Iron each tube flat with the seam in the middle of one side. Set the neck piece aside for now. On one side of the waist pieces, turn the ends inside about a 1/2″ and iron down. Sew a top-stitch down each side of each waist tie.
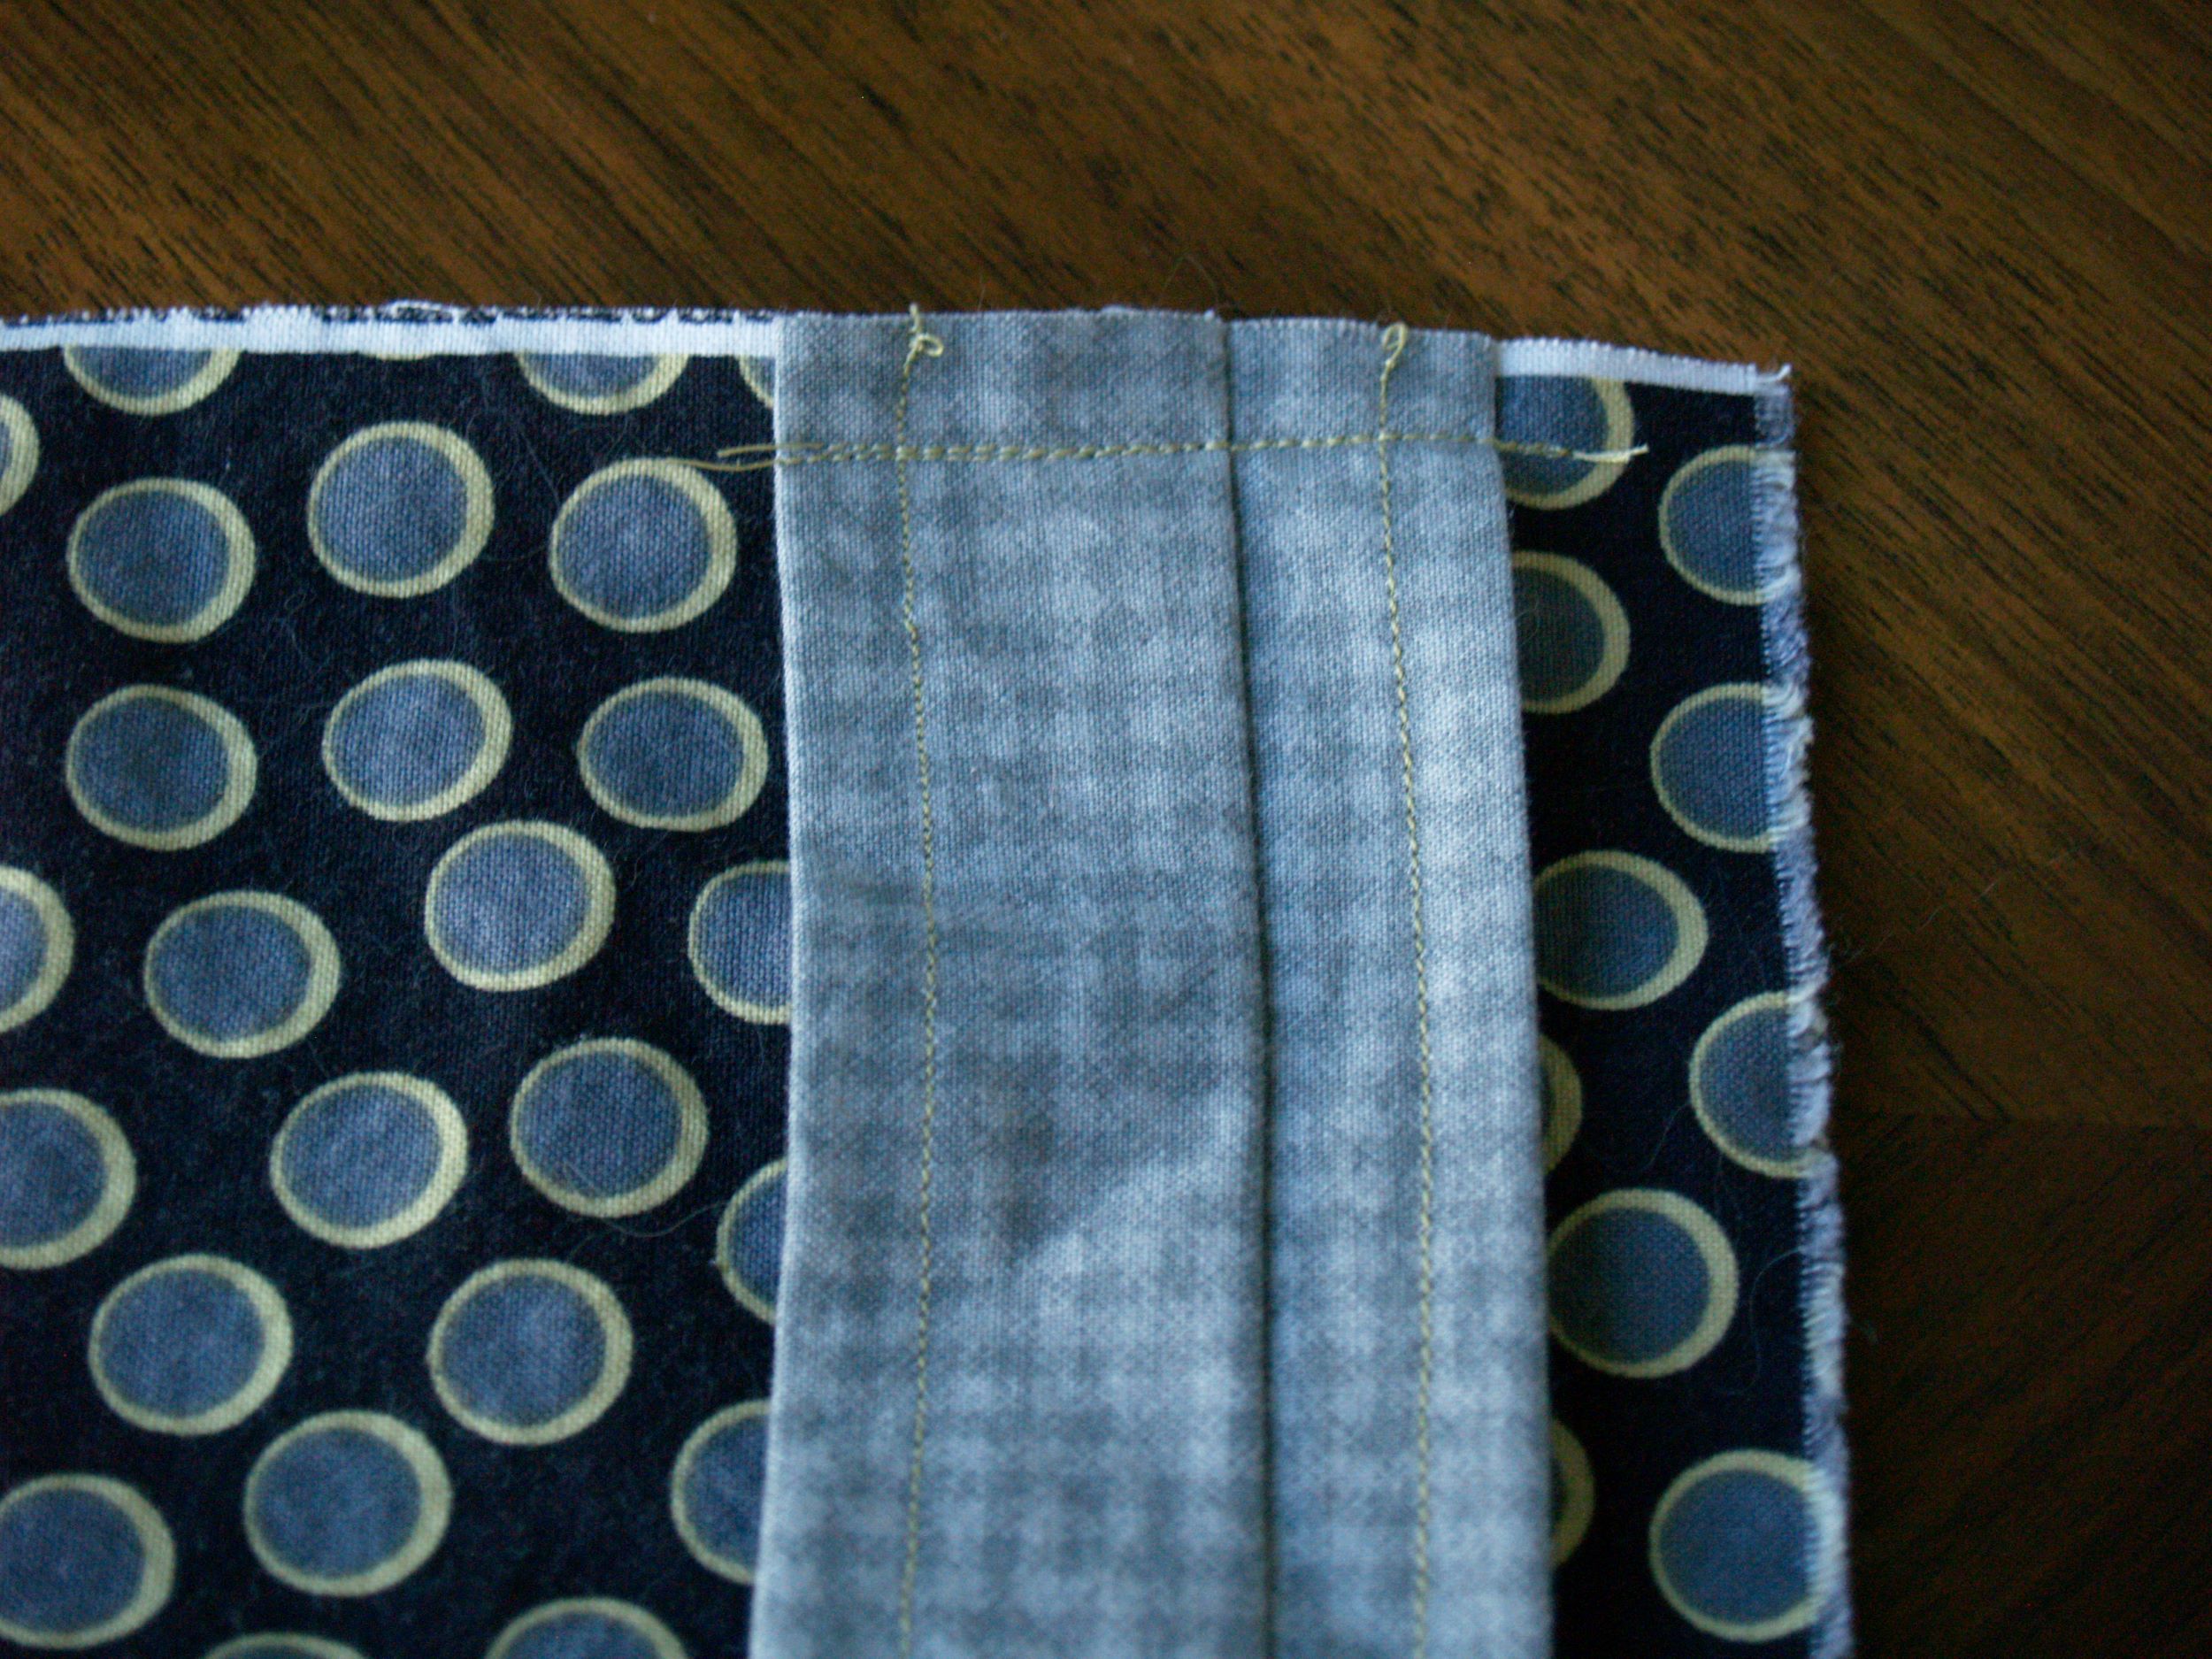
5. Line up the unfinished edge of a waist tie with the edge of one of the skirt pieces and sew in place. Repeat for the other side, making sure that the waist ties line up with each other.
6. Now you can give your apron a quick try on and see if everything lines up just where you want it. You’ll need about 1/2″ on each side to sew the two apron pieces together, so make sure you account for that in your fitting. I ended up cutting my bodice piece way down and making the waistband smaller (which is the measurement I listed). Make sure you make any changes to both sides of the apron.
Pin both apron pieces together and sew nearly all the way around, leaving a couple inches open for turning. Cut a snip into the seam allowance at the corners where the bodice meets the skirt. It will look way nicer when turned.
Turn the apron right side out and give it a really thorough pressing. Then follow with a top-stitch all the way around as close to the edge as you can steer.
7. Now lets address the neck tie. Give yourself another fitting and decide exactly how long you need your neck piece to be. It should extend onto the apron enough to fit the button you’re going to use, and still be long enough to not pull on your neck. Cut it to size and finish just like we did the waist ties. Iron the ends under, sew two lines of top-stitching, then sew your buttons in place.
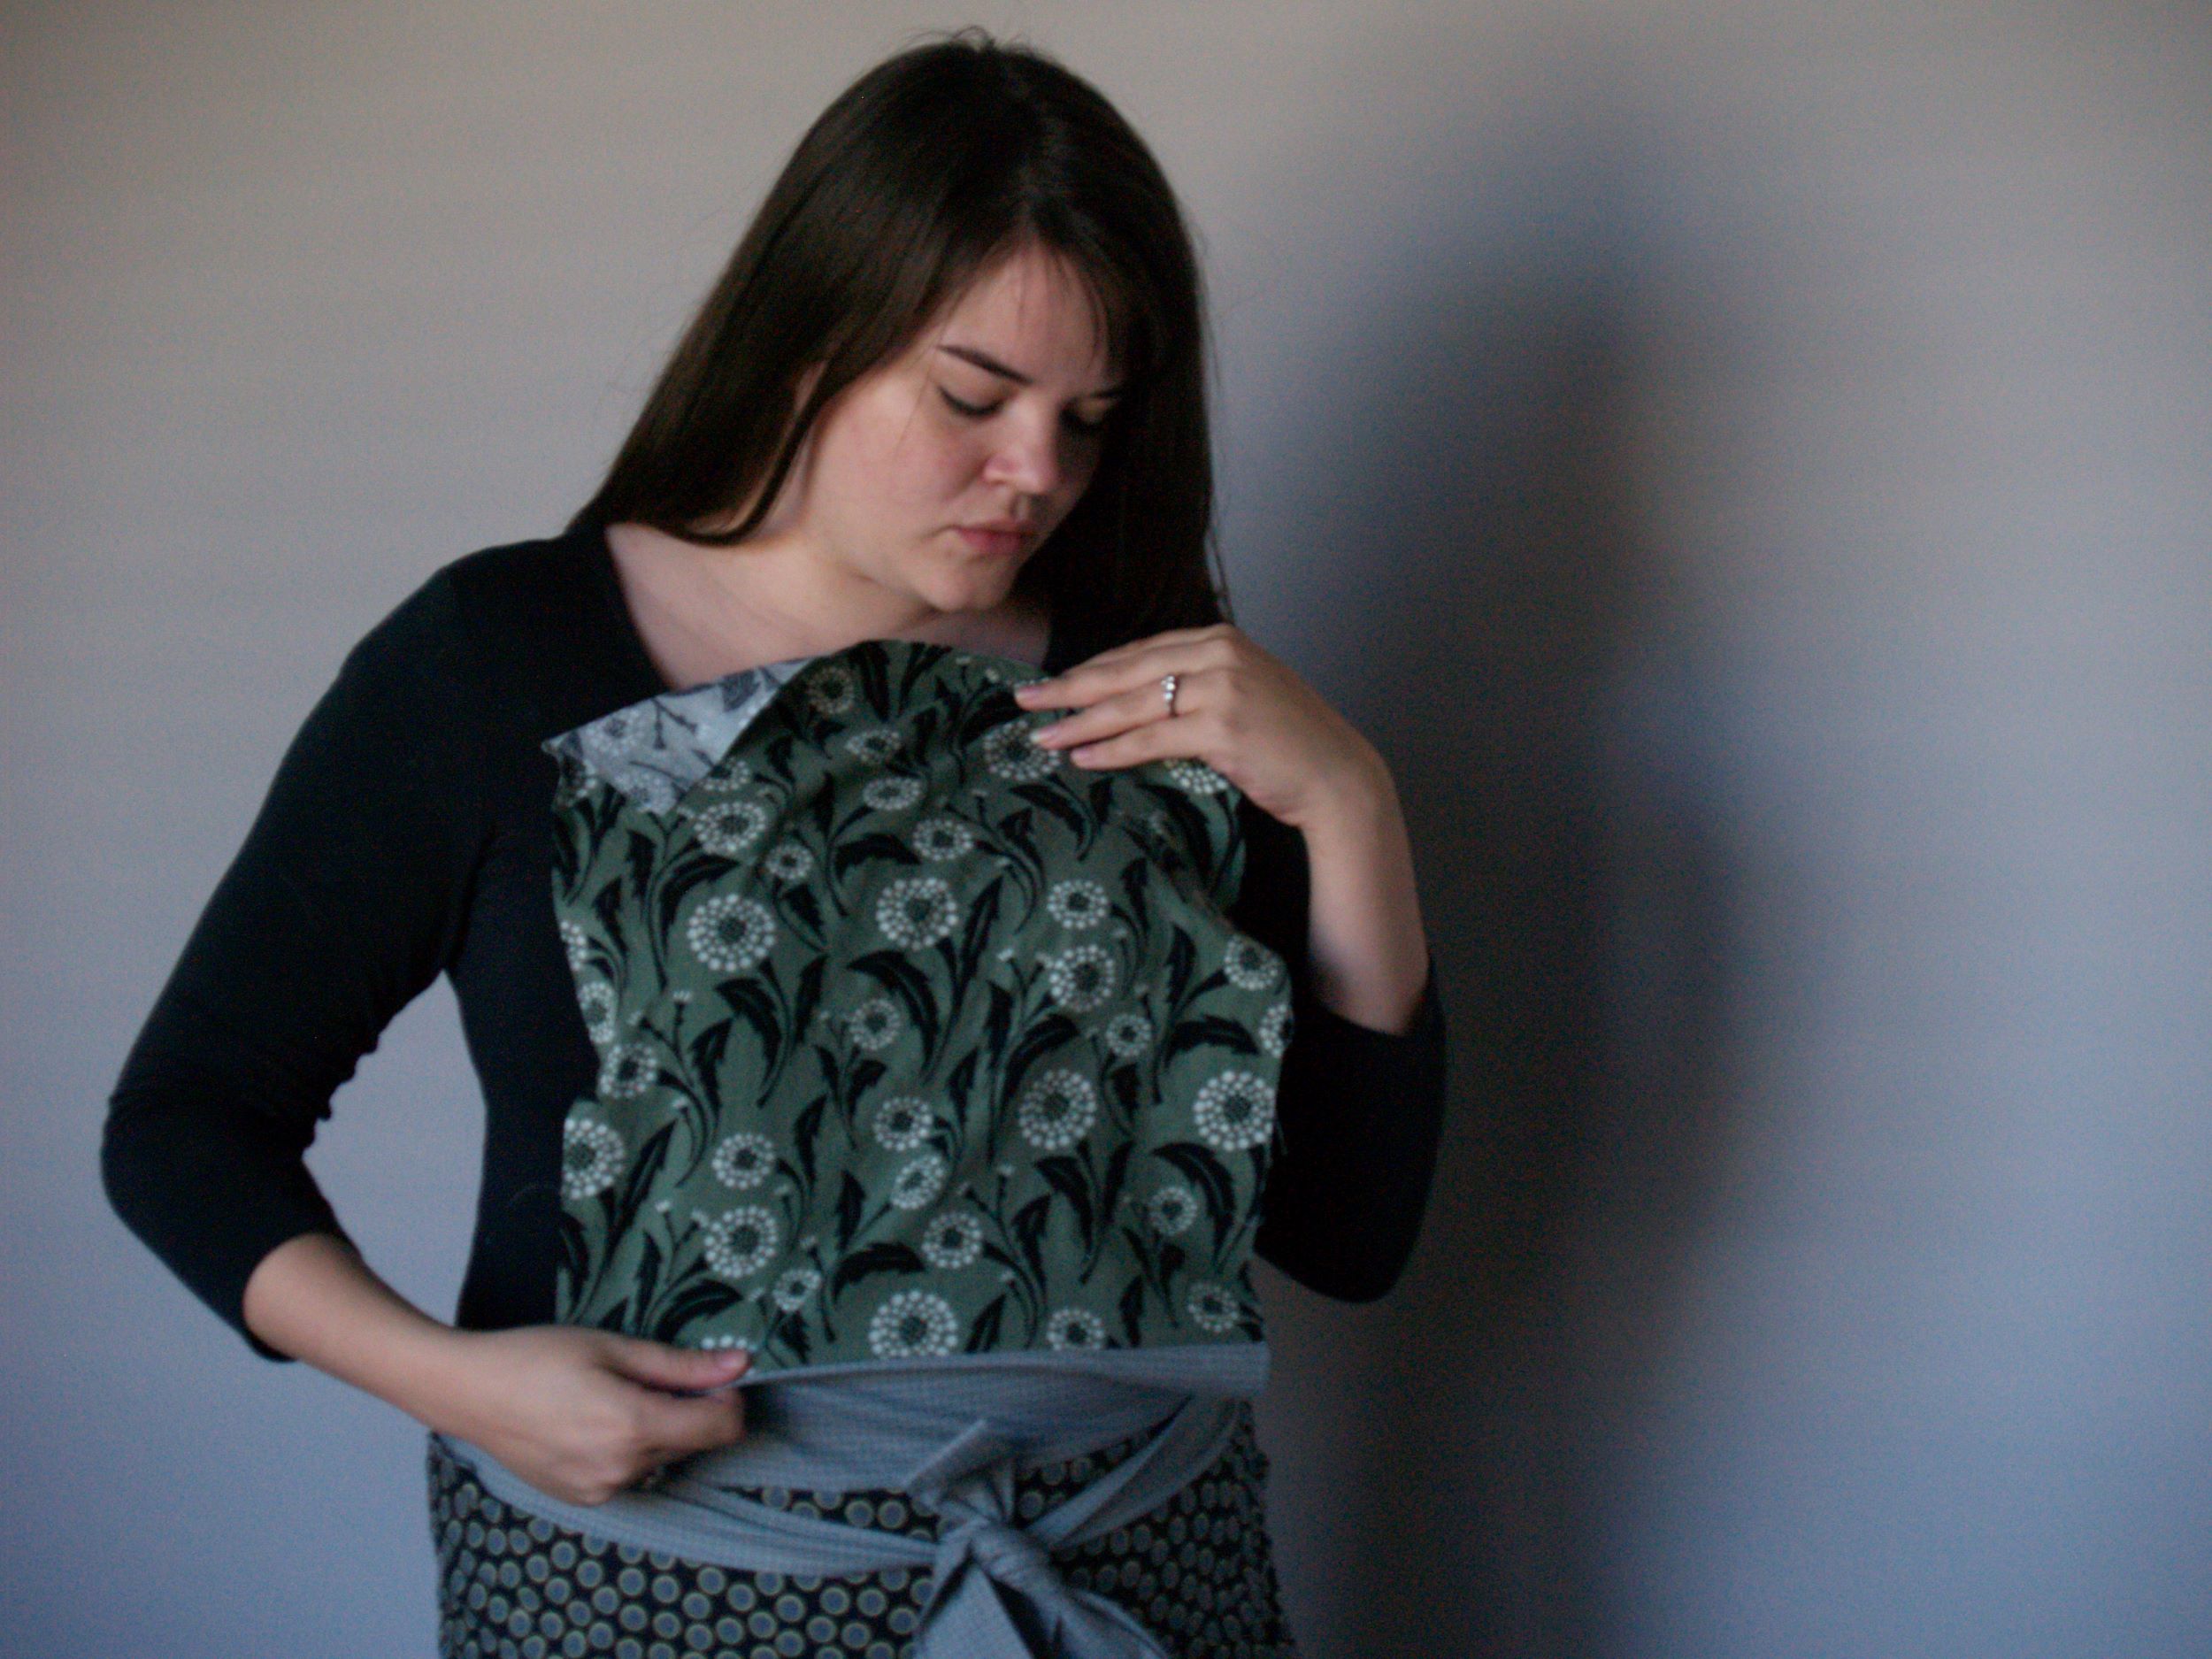
Mark and sew your buttonholes on the top of the apron. Then button onto the apron, reversing when you feel like it.
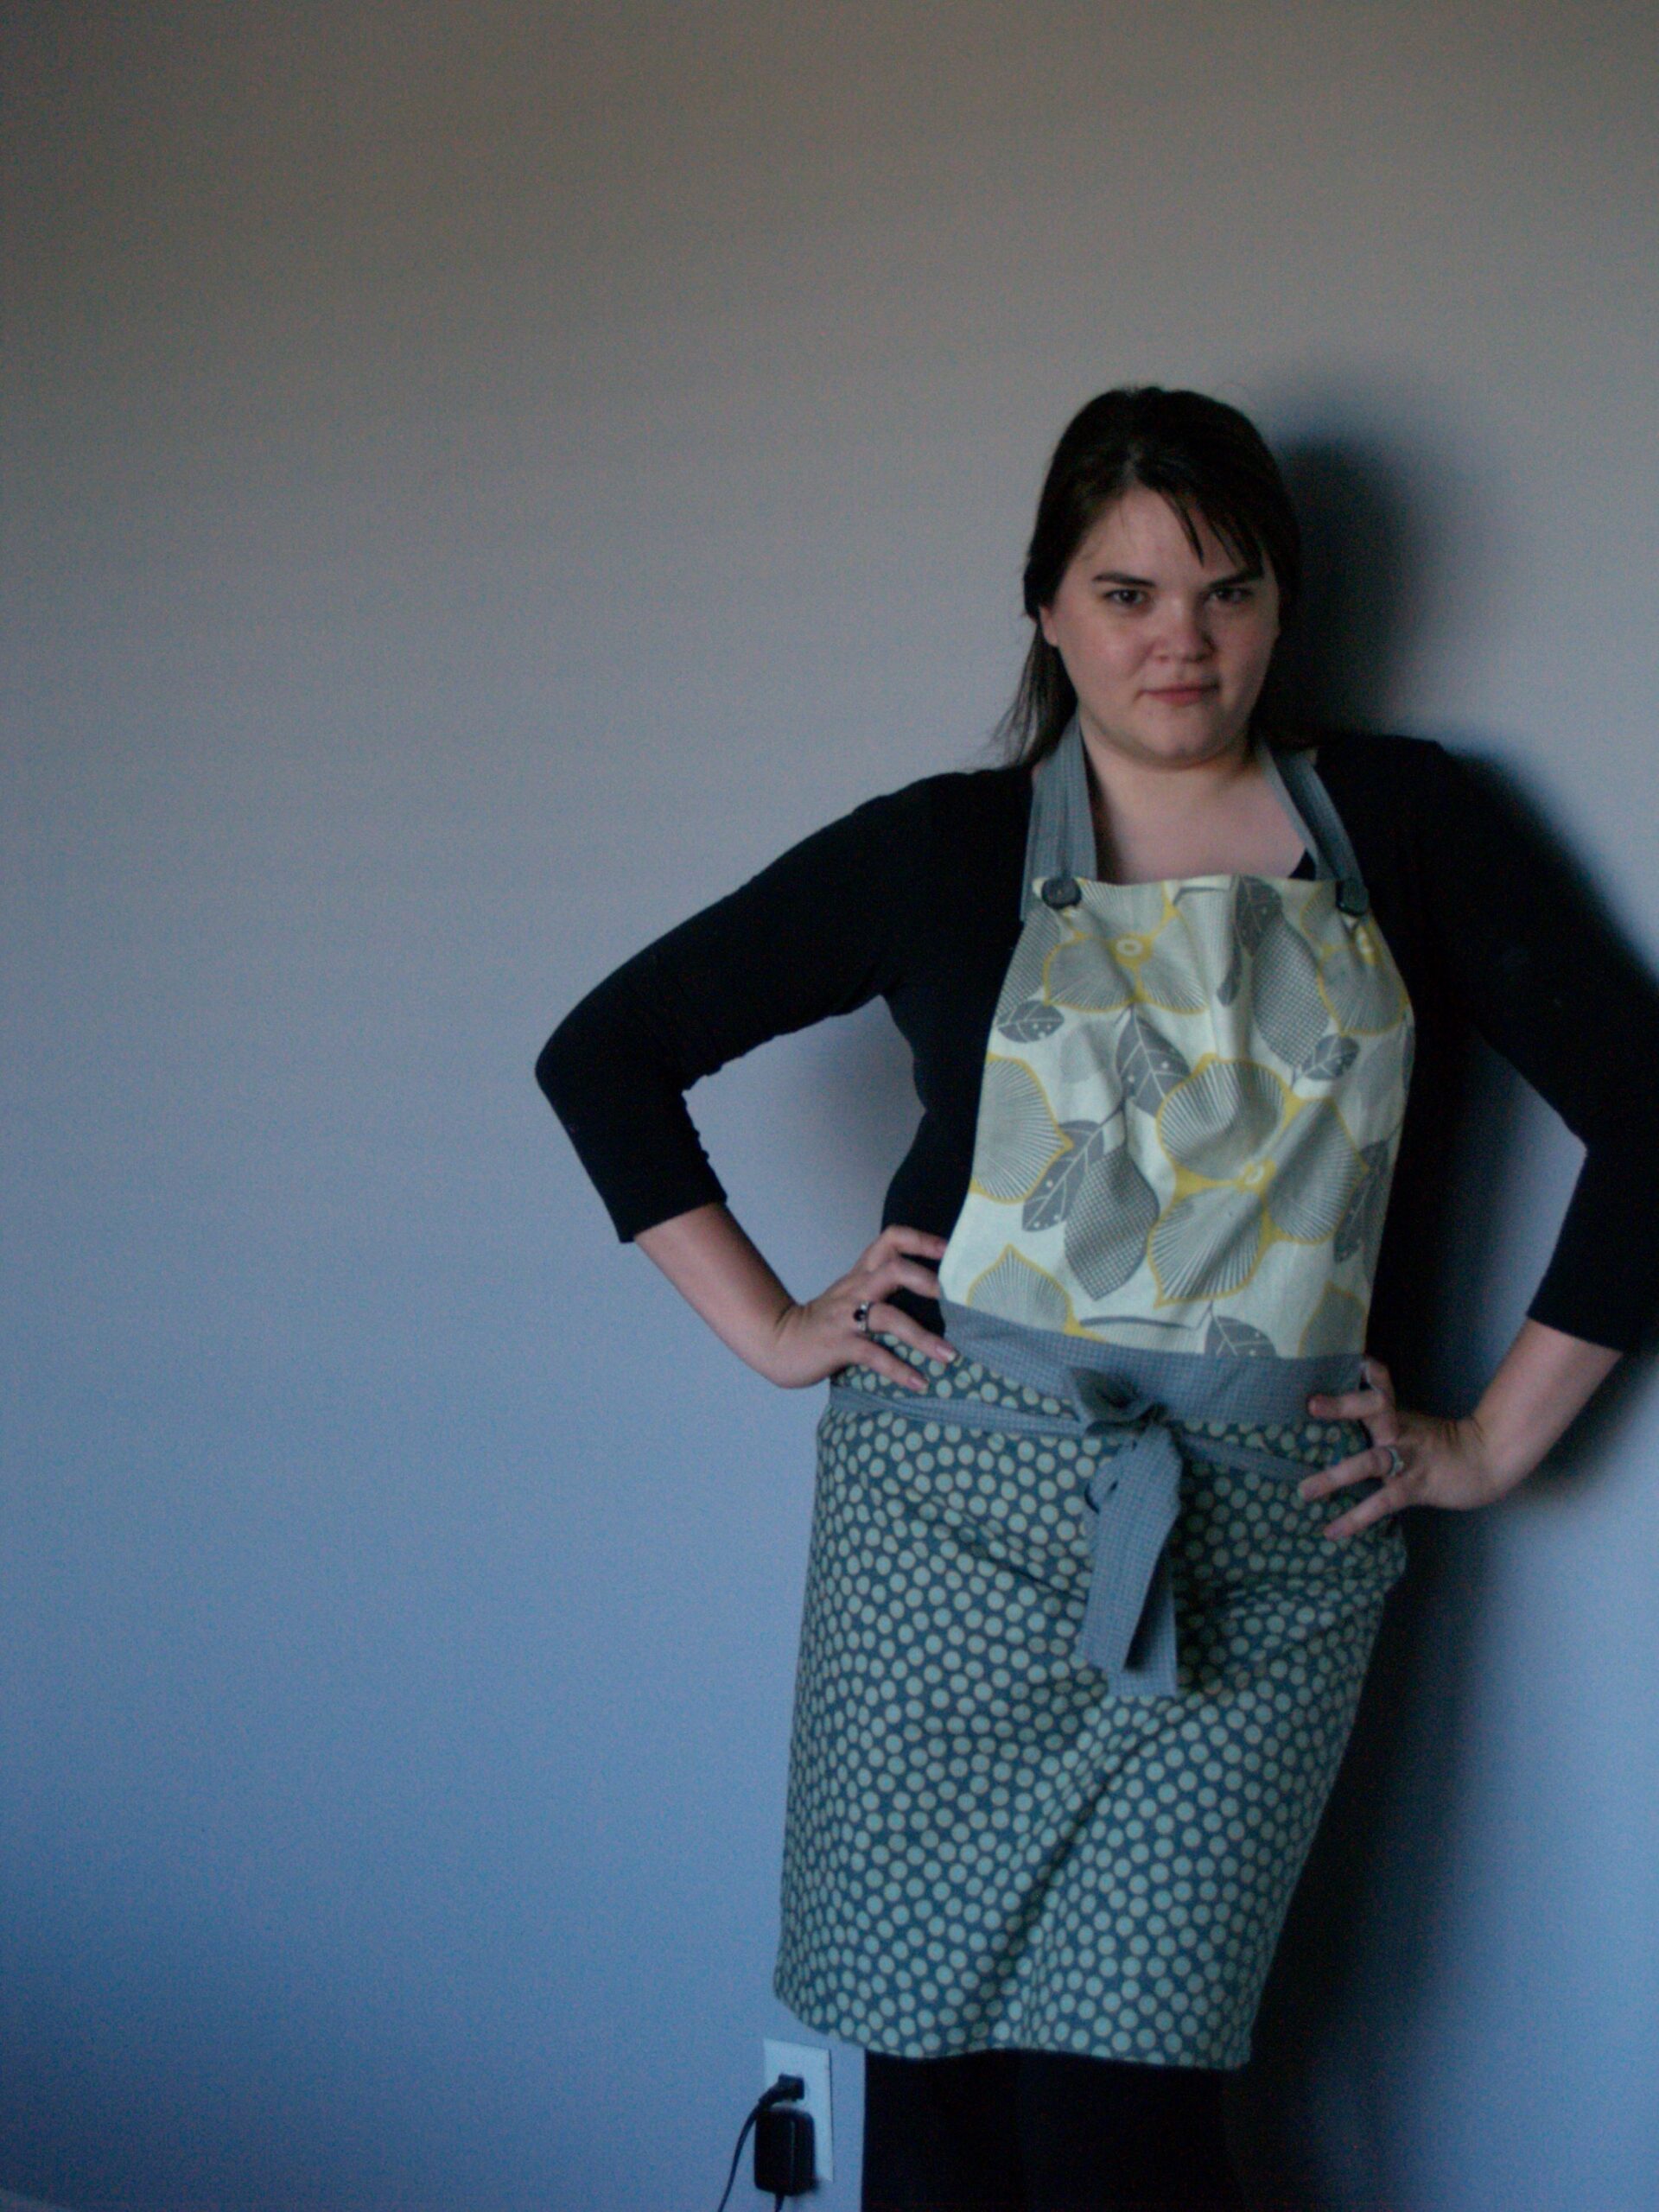
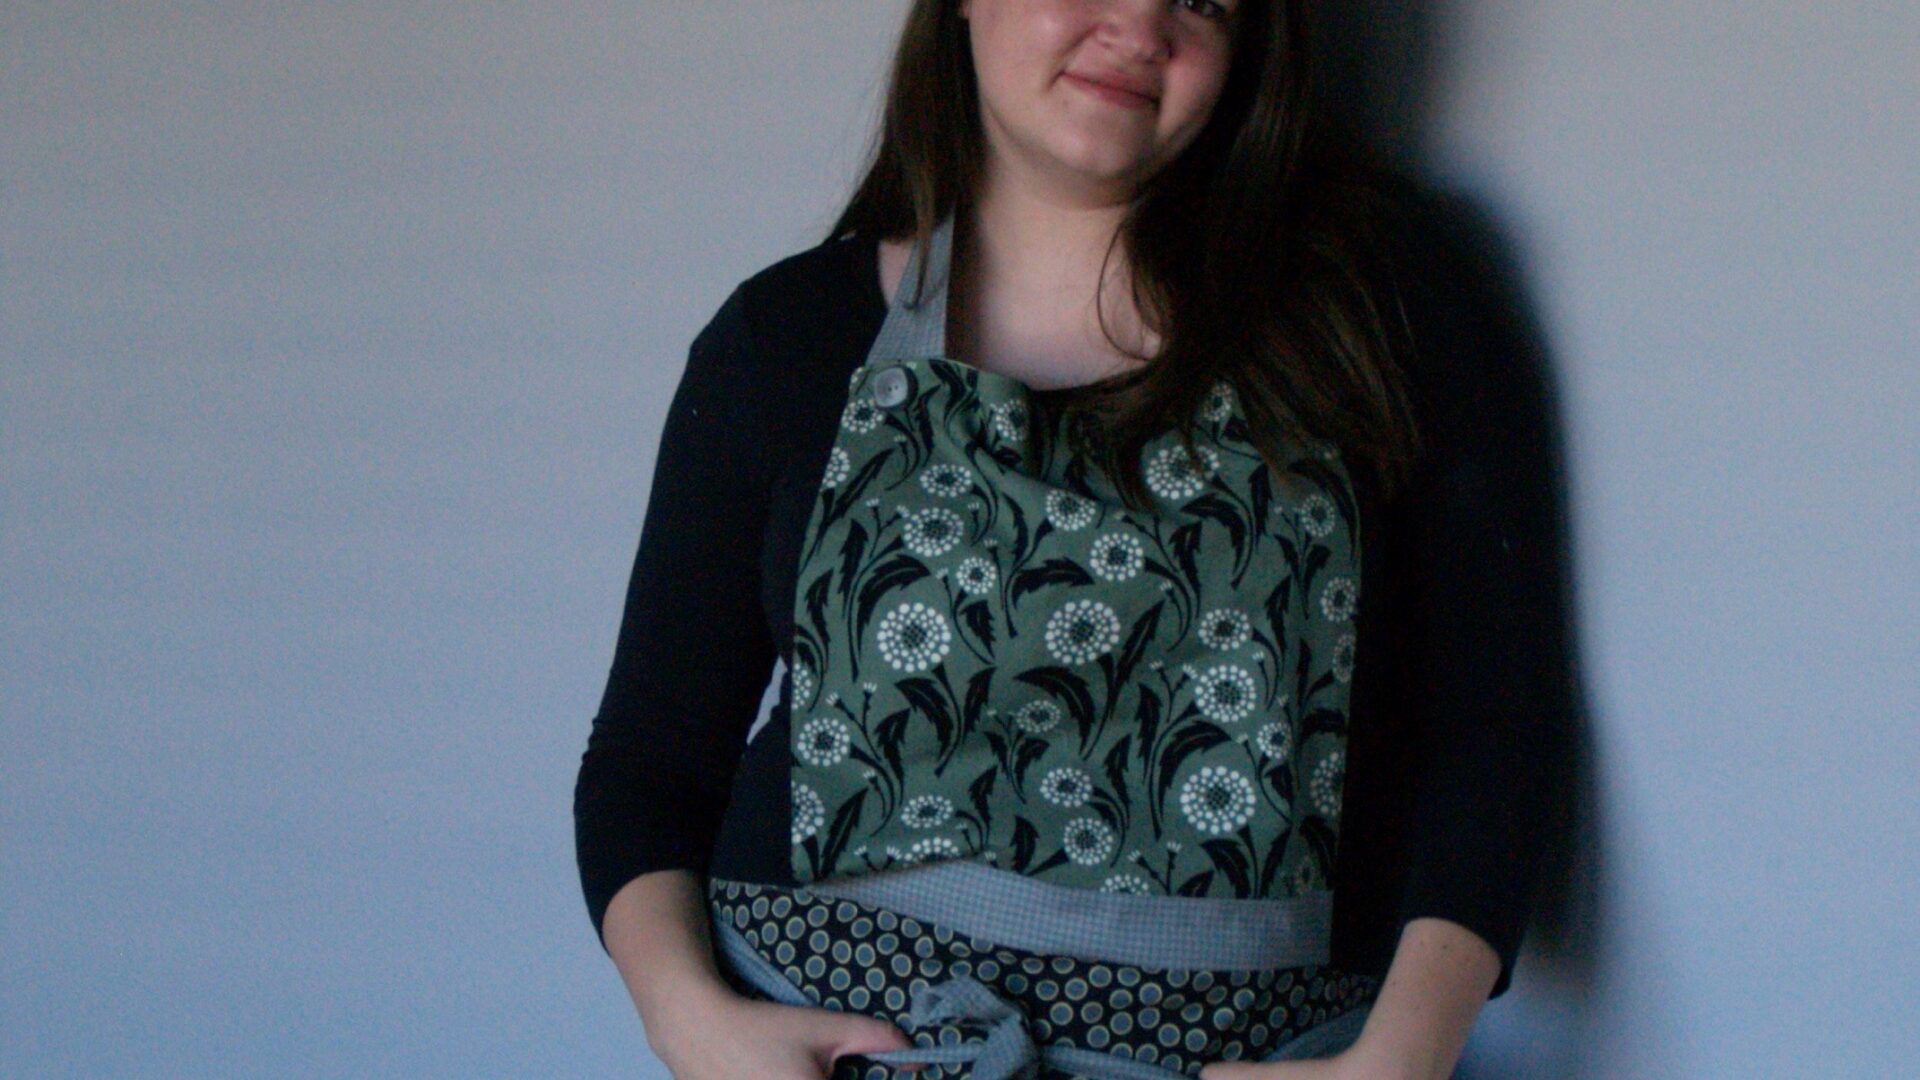
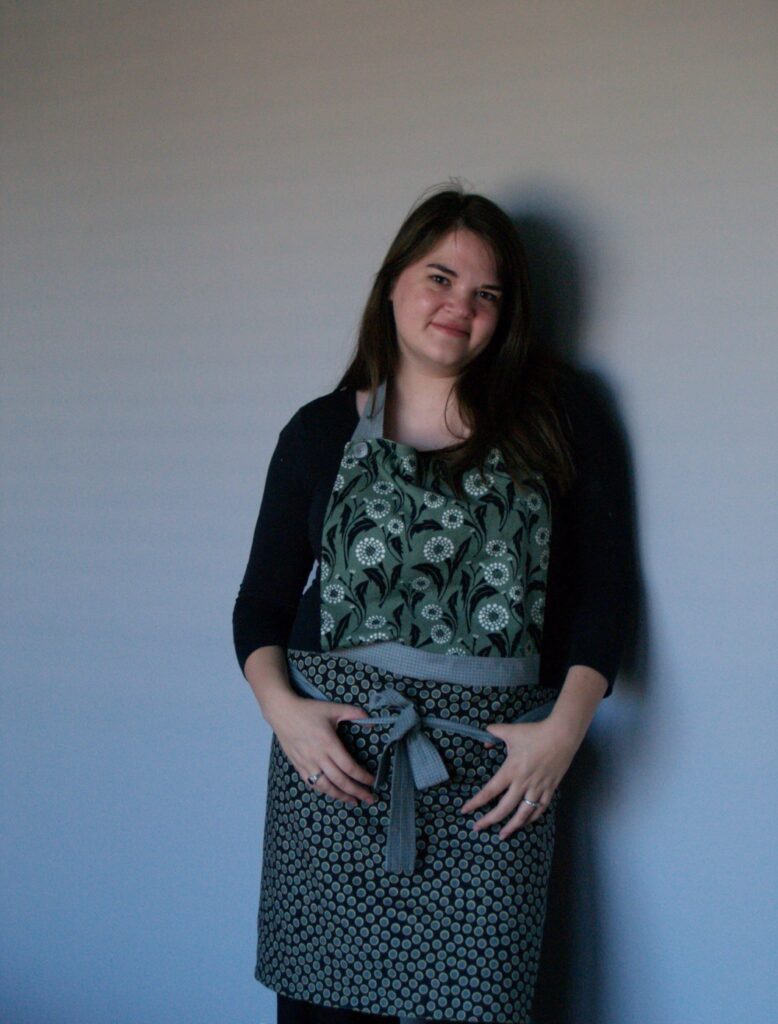
I’m trying my best Smize.
I’m so pleased with this. It’s so easy I made it in a nap time, and so comfortable I still haven’t taken it off. I think I may just make it through cooking for Thanksgiving this year without being covered in flour and gravy splatter, and still not have a sore neck and ripped hanks of fabric at the end of it.


You should try wearing that, and only that, when Bear gets home…(can I say that on your blog???)
Nap time? You accomplished that during nap time? You are my idol. The only thing I used to accomplish during the halcyon days of naptime was reading all of the comments on fMh.
Love the fabrics, very classy. You didn't feel the need for a pocket? Speaking as a person who's smaller, when I made a similar apron this summer for trek, I made the top part trapezoidal instead of rectangular, because I didn't like having too much fabric in the upper corners.I was reading along, tra-la, and I got permanently stuck on the sentence "we often do a craft project." Shudder. This one would almost make such an evening worth while, but WHY O WHY is "craft project" the one true model for an RS meeting? Grr. *threadjack over*
Love the apron, and your smize could totally win ANTM.
Love this post! Thanks so much for sharing. I just discovered your blog; it's amazing!
Thank you! This apron is gonna be a secret santa type gift for a lady I've never actually met. All she said was that she is "full figured." So I searched and searched for a tutorial that fit a full figured lady. All I could found was tiny women making super tiny aprons! That's not reality! Thank you for the fabulous tutorial. You saved my butt!
I also like this apron. I am also a curvy girl, and to get a smooth fit at the top of the bib, i inserted a couple of vertical darts. Now the bib fits like it was made for me!
You are a great apron designer with great choice of fabrics. your designs fits you perfectly.
I am looking for idea on modifying my work apron to be more comfortable. Do you think I could get away with cutting one into two halves near the waist? What would change at the waist?