

So I’m cheating a little bit on this one. These actually aren’t finished yet. I’ve still got piles of paper pieces strewn all around my desk. I just couldn’t wait any longer! February will be here before I know it, and then there go all my big organizational plans.
For this year I’m making 120 cards, so it had to be made out of nothing but paper. Even adding one little brad starts adding up in a hurry when we’re talking about that many of them. This last Christmas I actually ran out. I didn’t count on making new friends throughout the year, so I found myself trying to choose between friends – who wouldn’t care that much, who keeps up with me on the blog, who would never forgive me for leaving them out? That’s the one downside with making your cards so far ahead of time – who knows what’s going to happen by the time Christmas rolls around again.
Without any further ado, Here’s What You’ll Need:
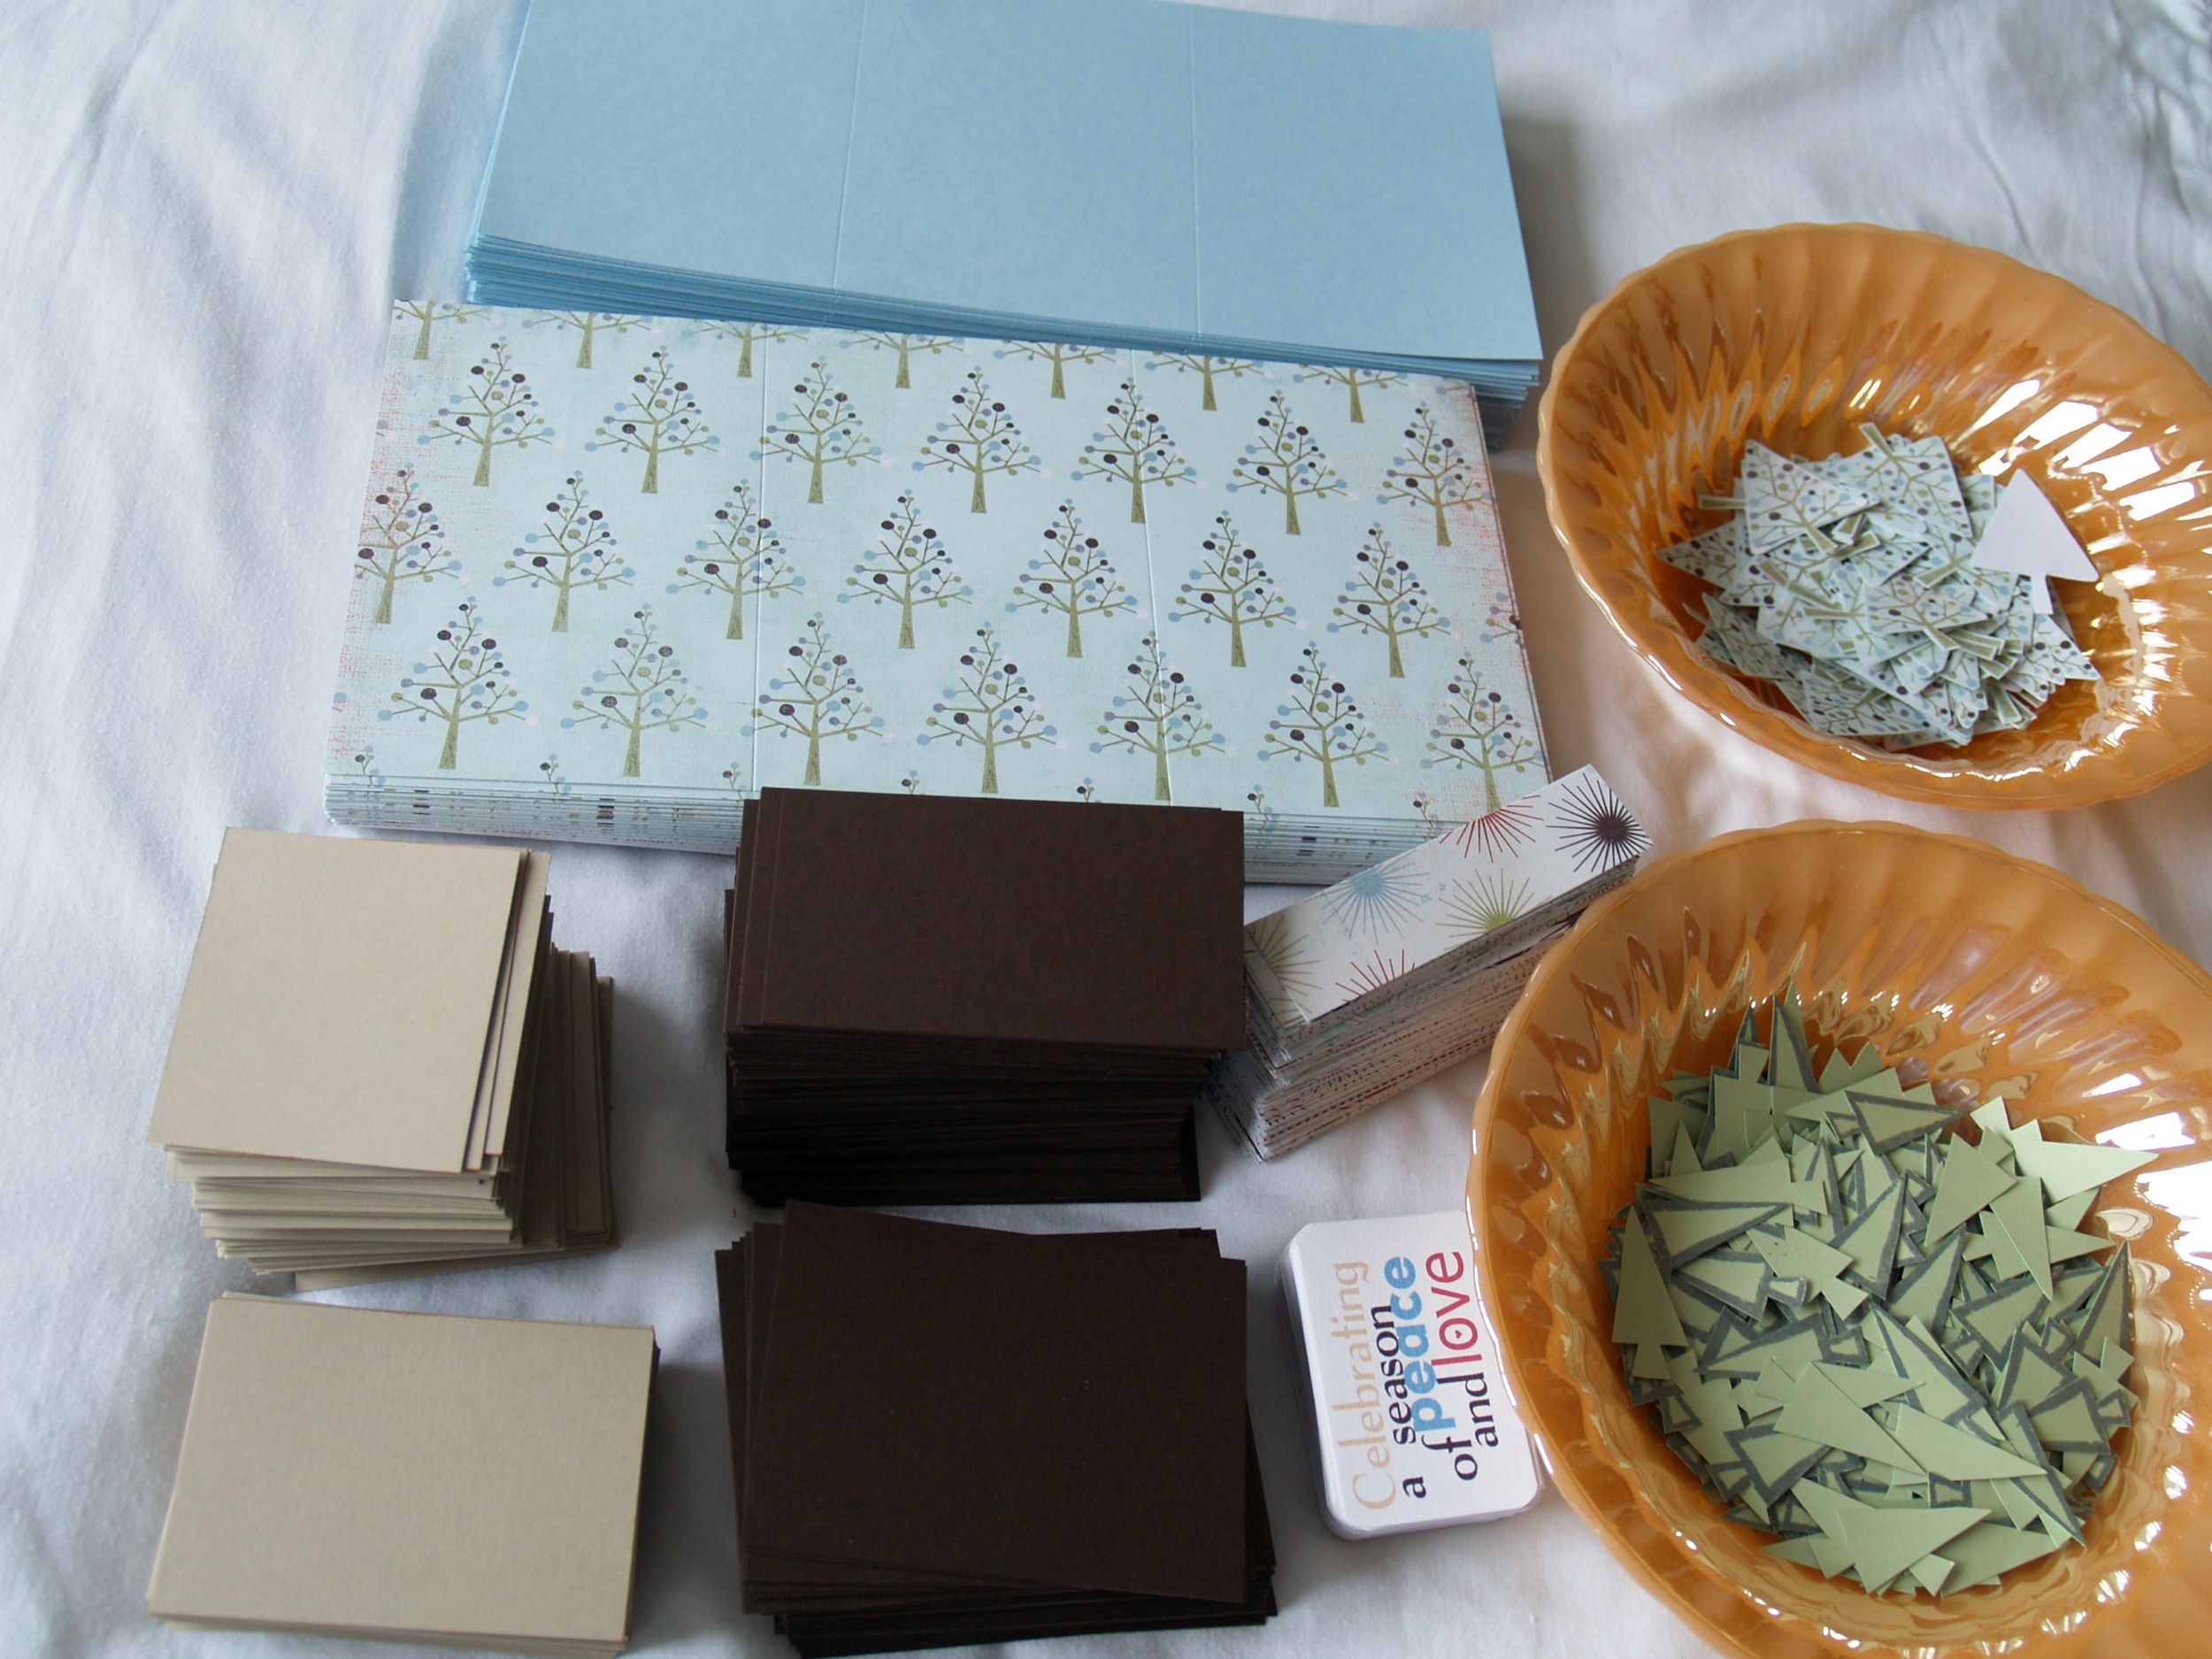
1 card exterior piece @ 6″ x 12″
1 card interior piece @ 6″ x 11 7/8″
3 pocket pieces
{ 1 @ 3 1/2″ x 2 1/2″ }
{ 2 @ 2 3/4″ x 2 1/2″ }
3 Tag pieces
{ 1 @ 3″ x 4″ }
{ 2 @ 2 1/4″ x 4″ }
2 Embellishment strips @ 4″ x 1″
1 Greeting Block @ 2 3/4″ x 2″
1 Cover Embellishment
3 Pocket Embellishments
Start by scoring the exterior piece just shy of 4″ from each edge. Then score the interior piece 3 15/16″ from each edge. These measurements try to take into account the fact that some space is taken up by the score fold itself, and it can be a little bit fiddly to line these two pieces up.
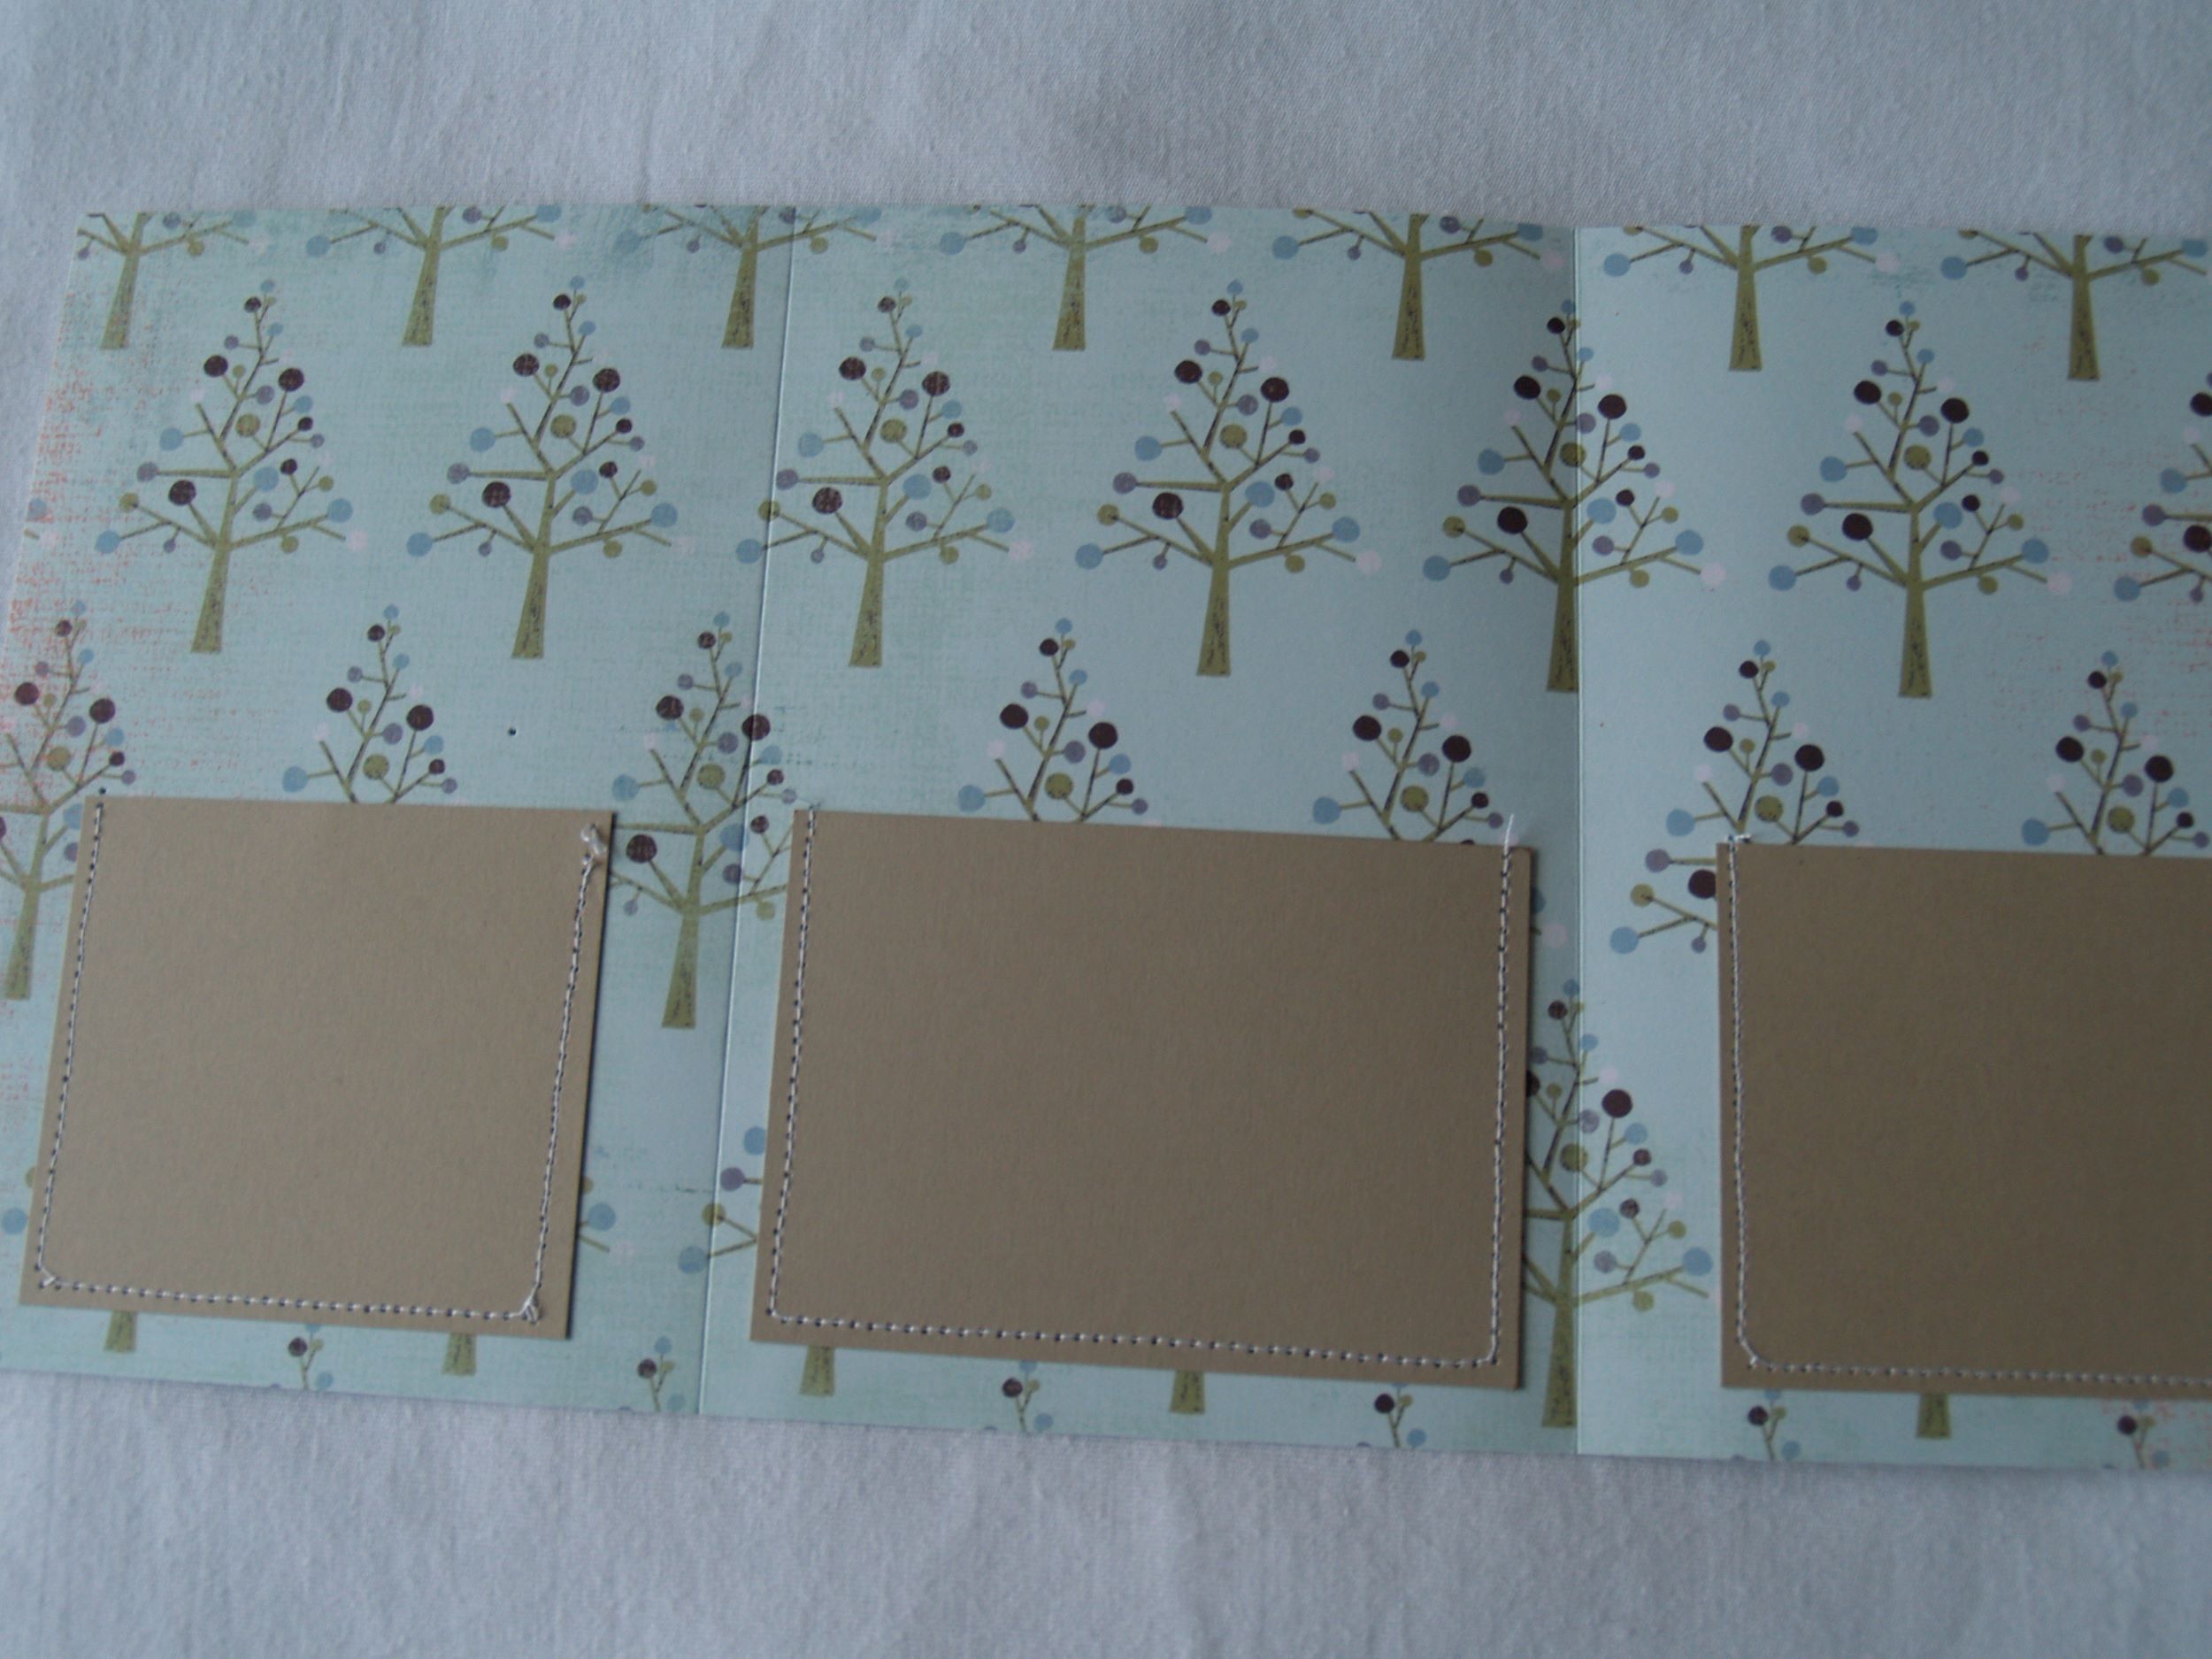
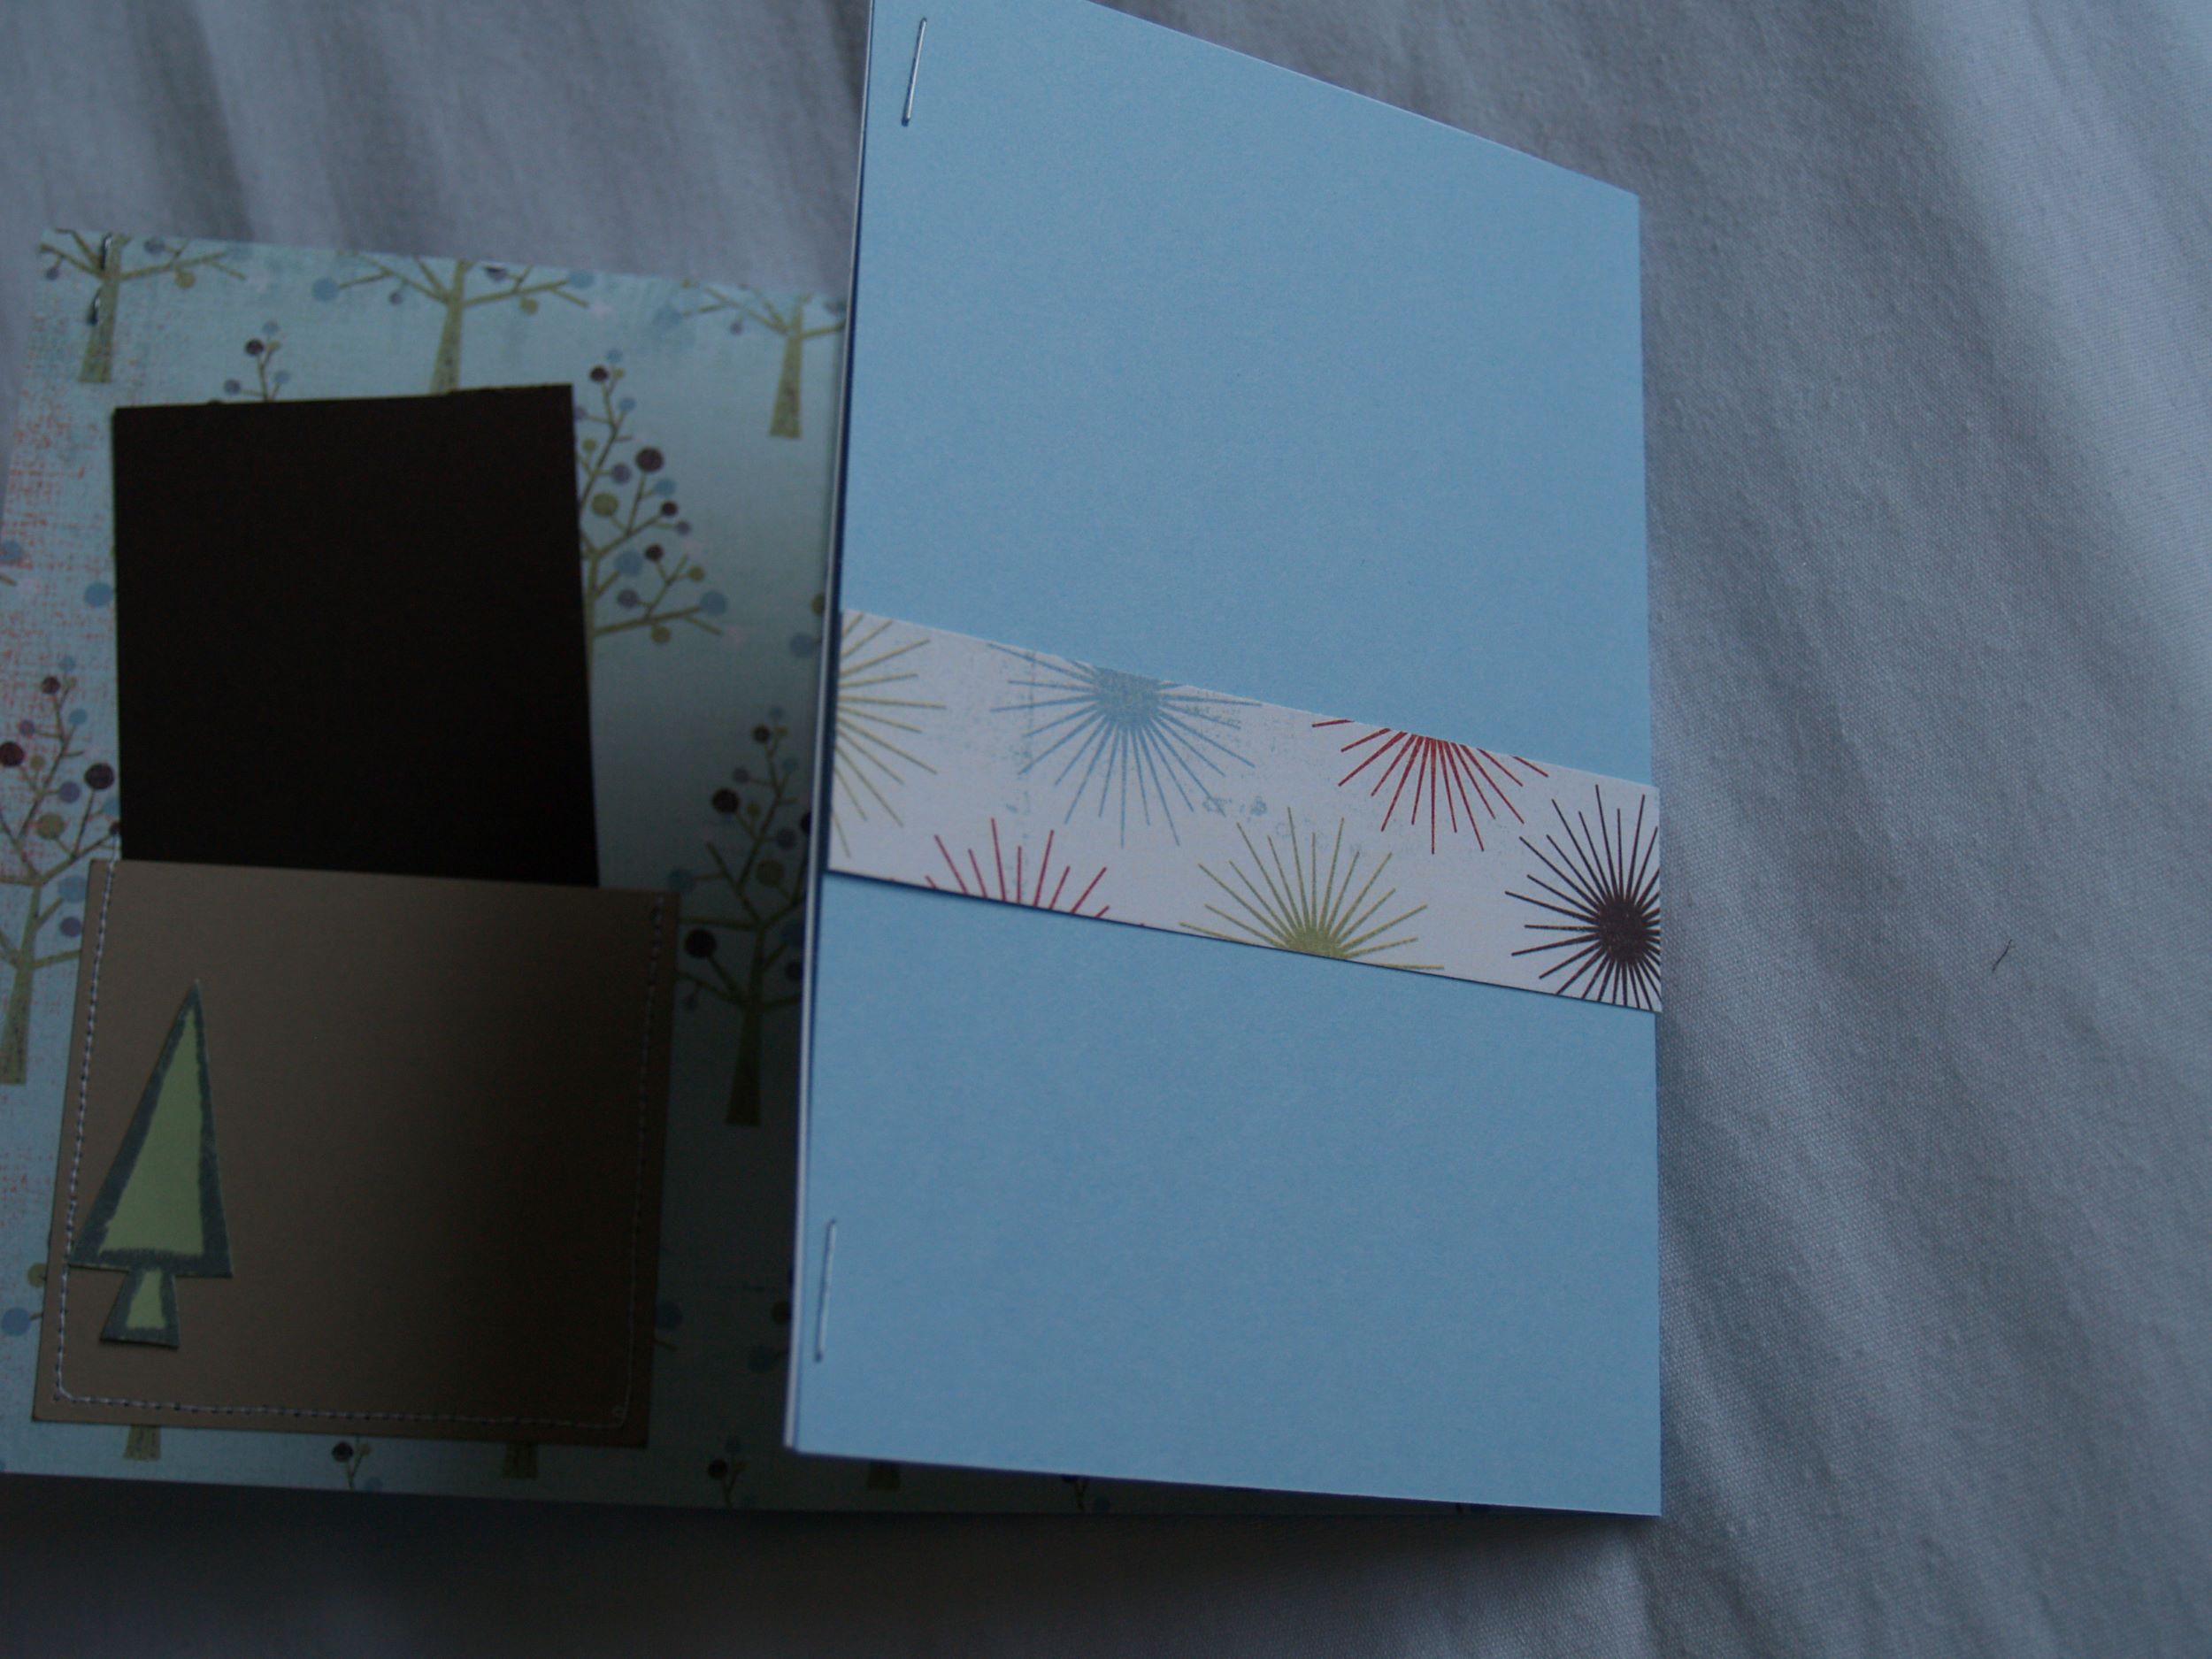
With your score lines complete, it’s time to sew the pockets on to the interior of the card. Sew one pocket centered inside each segment of the card, lined up close to the bottom. Make sure the wider card goes in the center segment. The pockets should all line up together, and all be the same 2 1/2″ height.
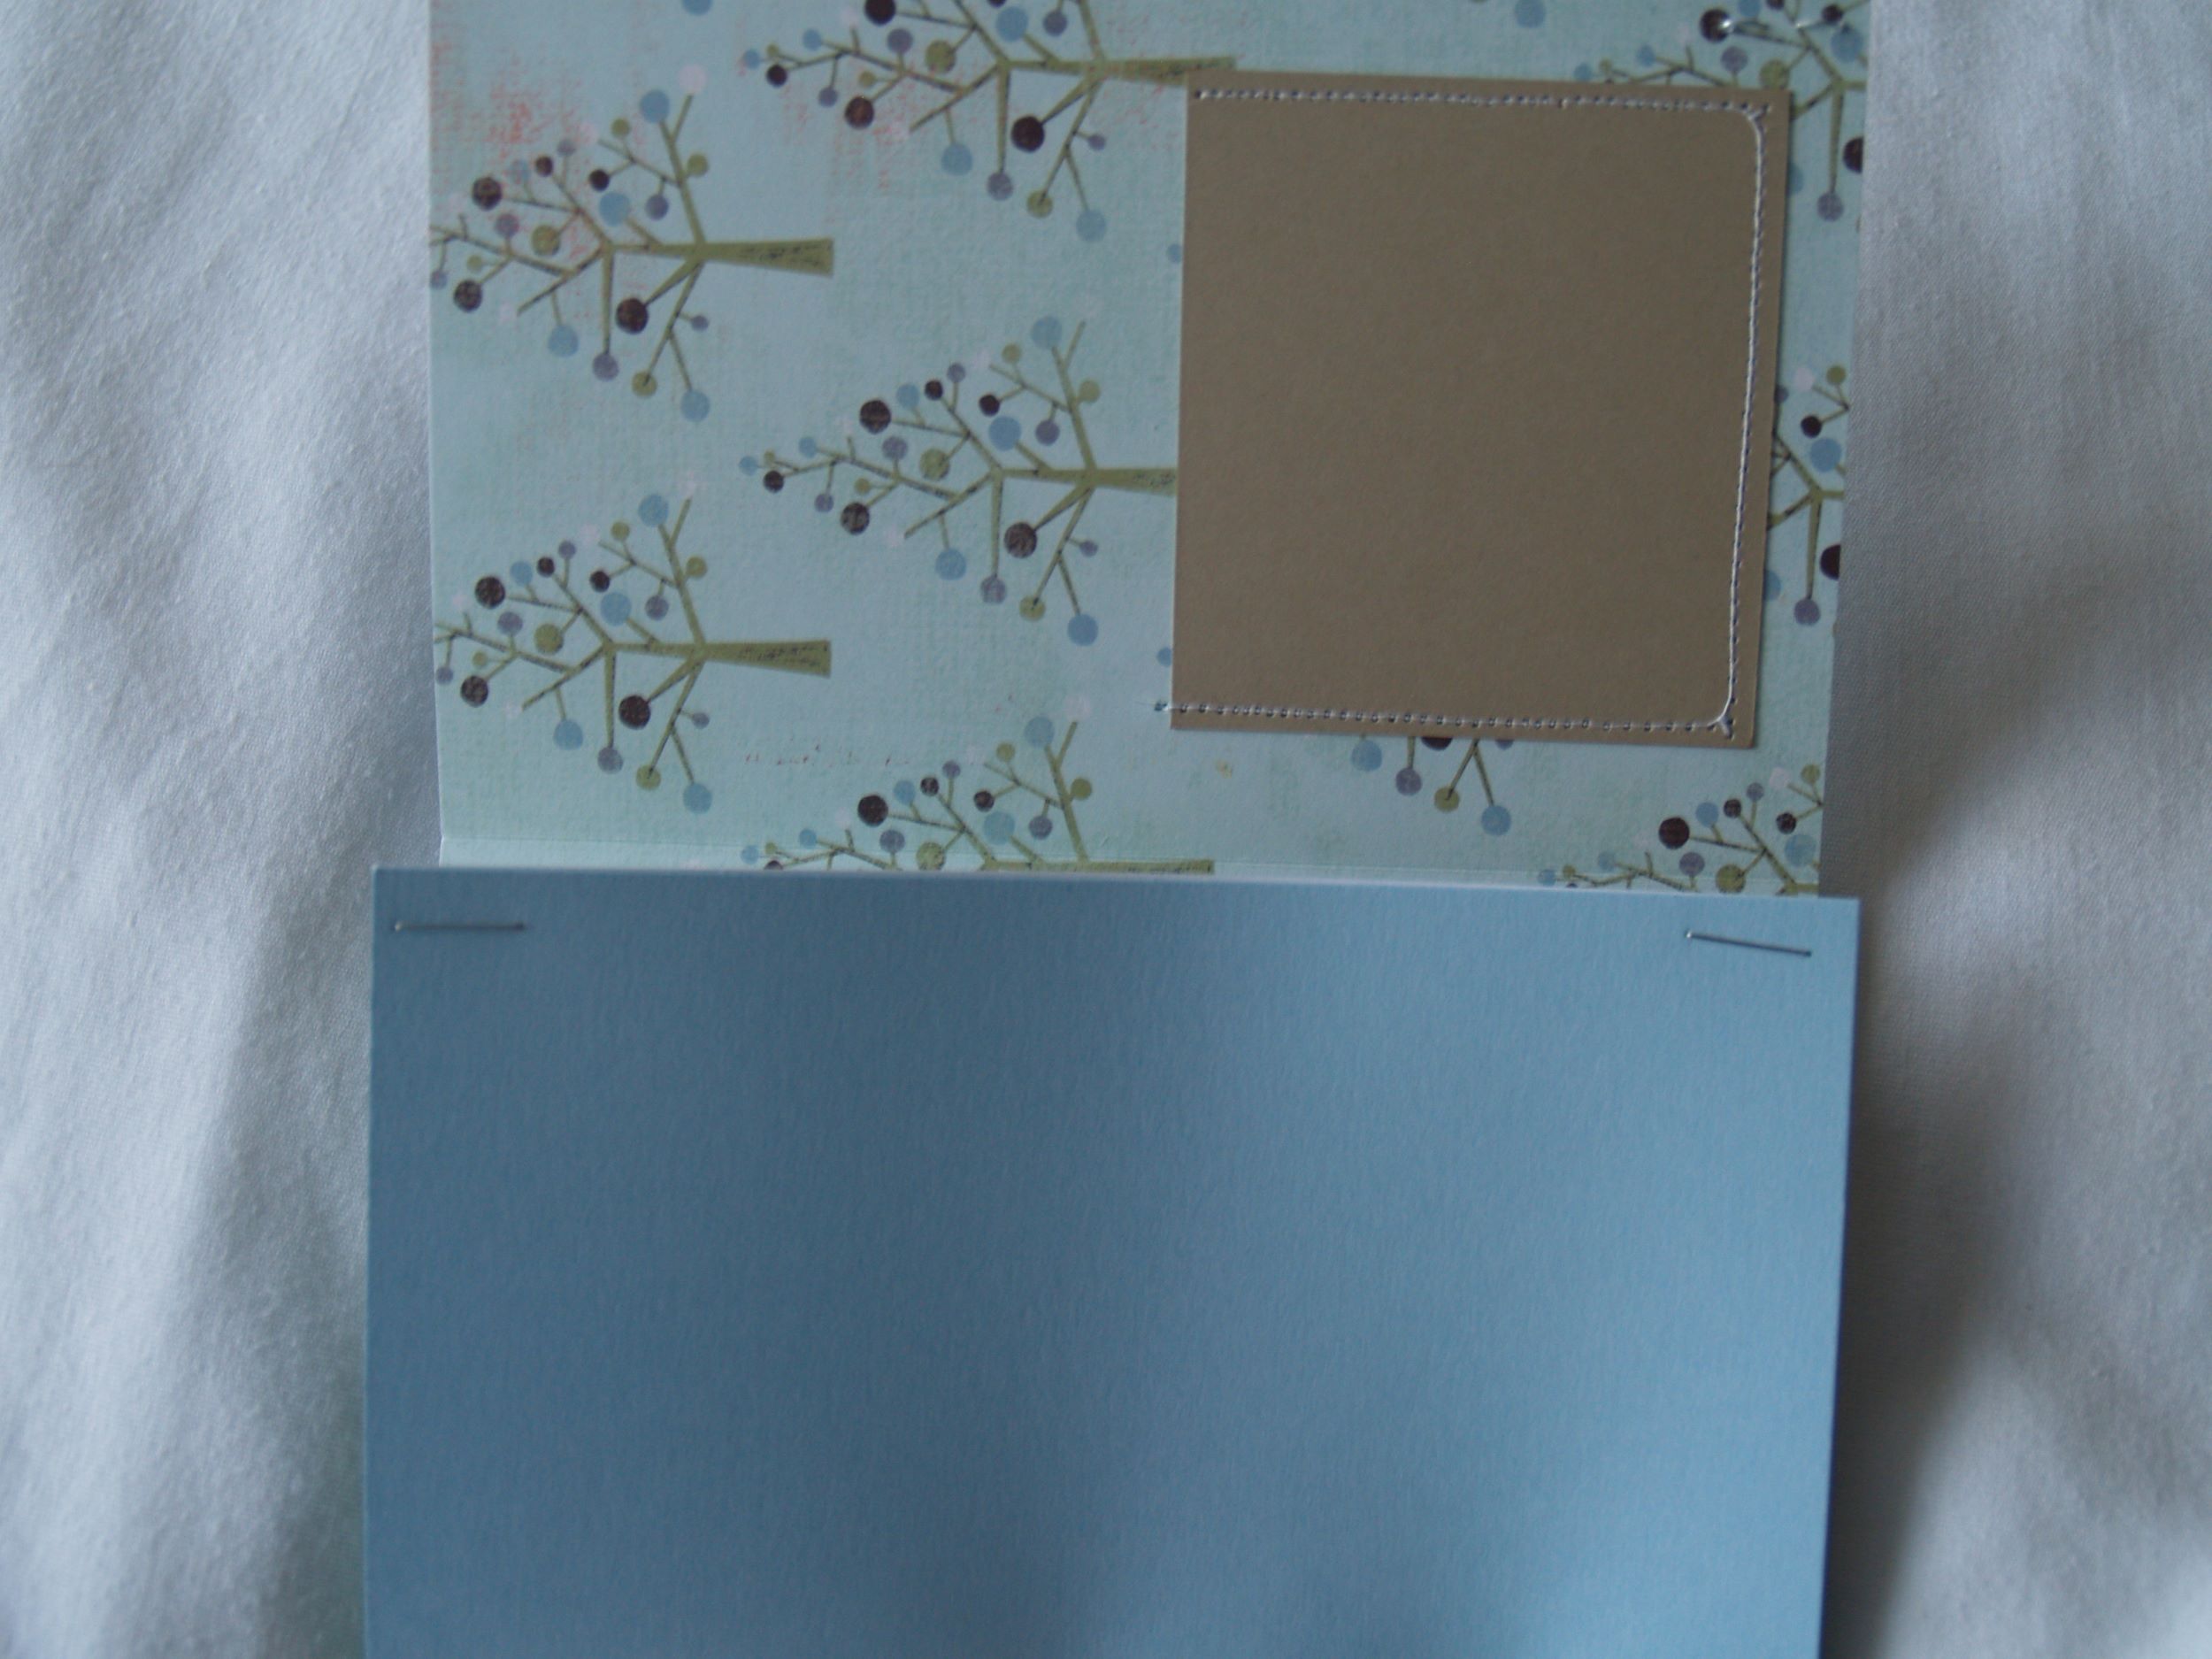
Fold both the interior and the exteriors on the fold lines, then line up the edges and staple together in the corner. Don’t waste your time trying to make the folds line up exactly right, it’s just not going to. There needs to be quite a bit of give between the inner and outer pieces so the card can both fold and open. Only put one staple in each corner. It will be plenty to hold it together, and anymore would restrict it too much.
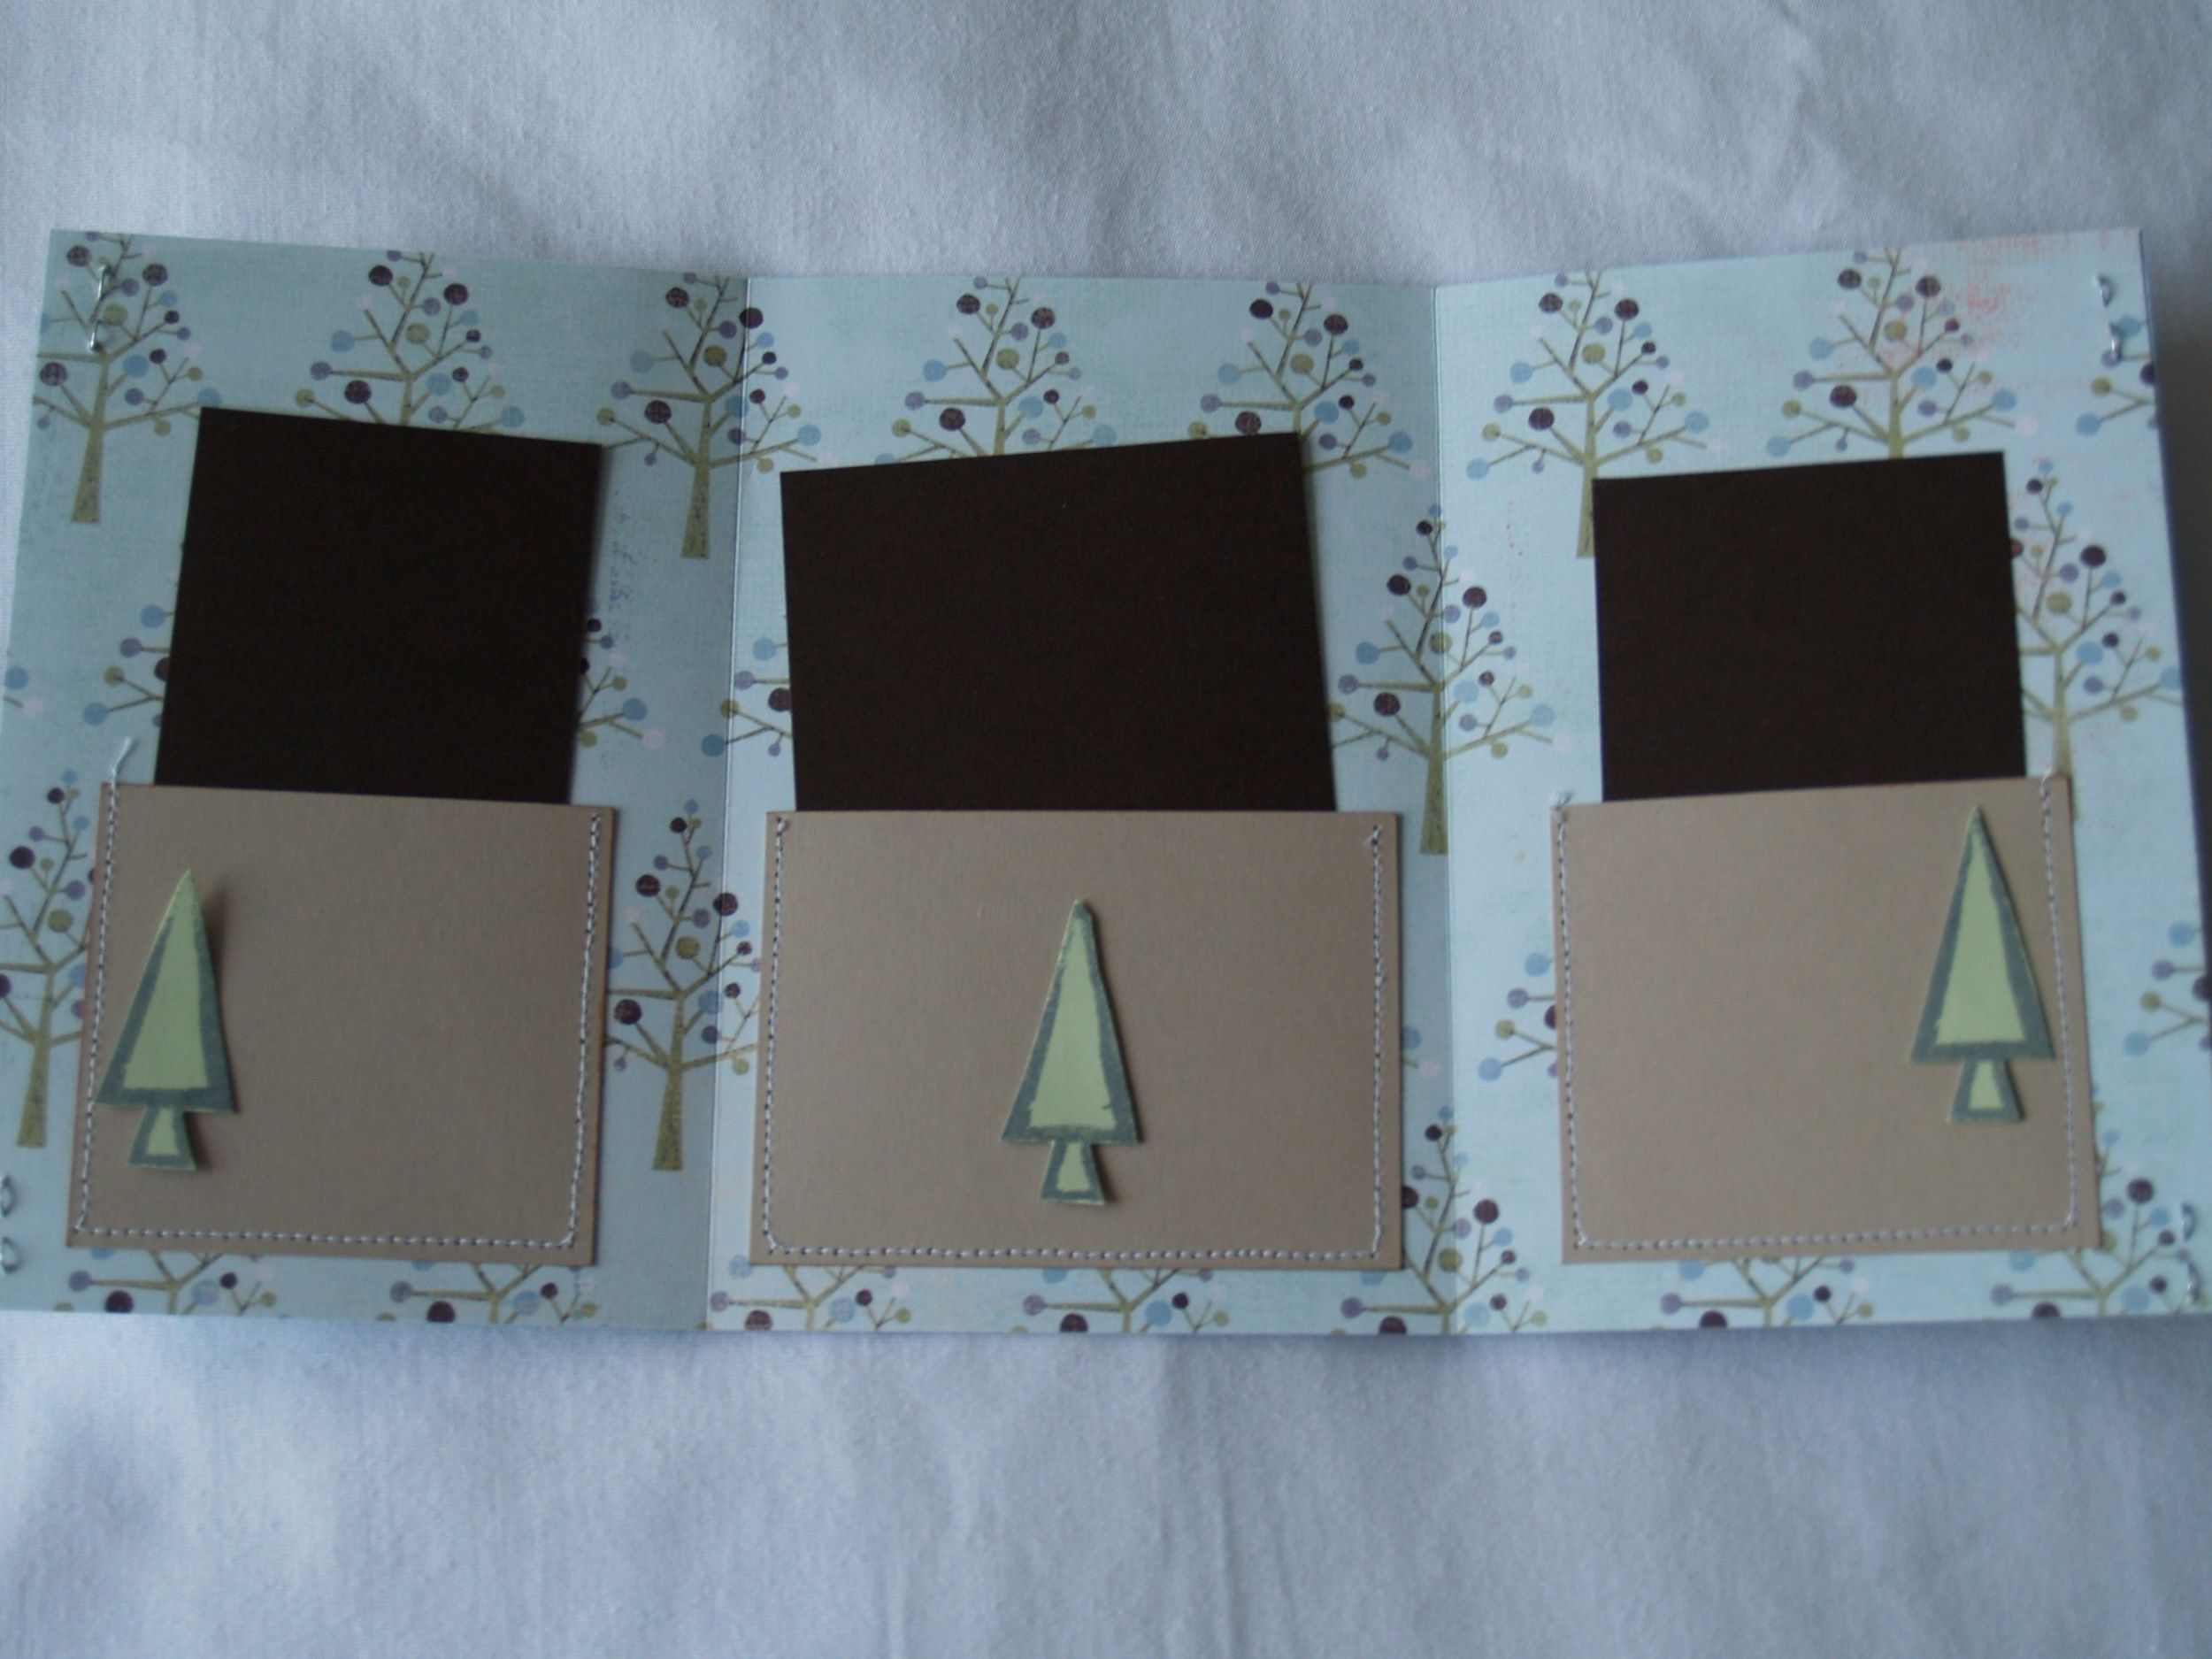
If you’re making this card right before using it, you can decorate the tags here. Since I’ll be putting next year’s family pictures in here, I just stuck my naked tags inside the pockets to keep everything together.
If you haven’t done it yet, you can also decorate the pockets now. This was a stamp I carved out of a pink eraser after every other plan failed. I bought this green paper that turned out to be too thick to go through the printer, and I couldn’t find another stamp I liked, so I finally just grabbed the new pink eraser I bought in my attempts towards drawing and hacked into it. I stamped this little tree and cut it out by hand 360 times.
Glue on your Embellishment Strips, one on the inside flap of the card, and one on the cover.
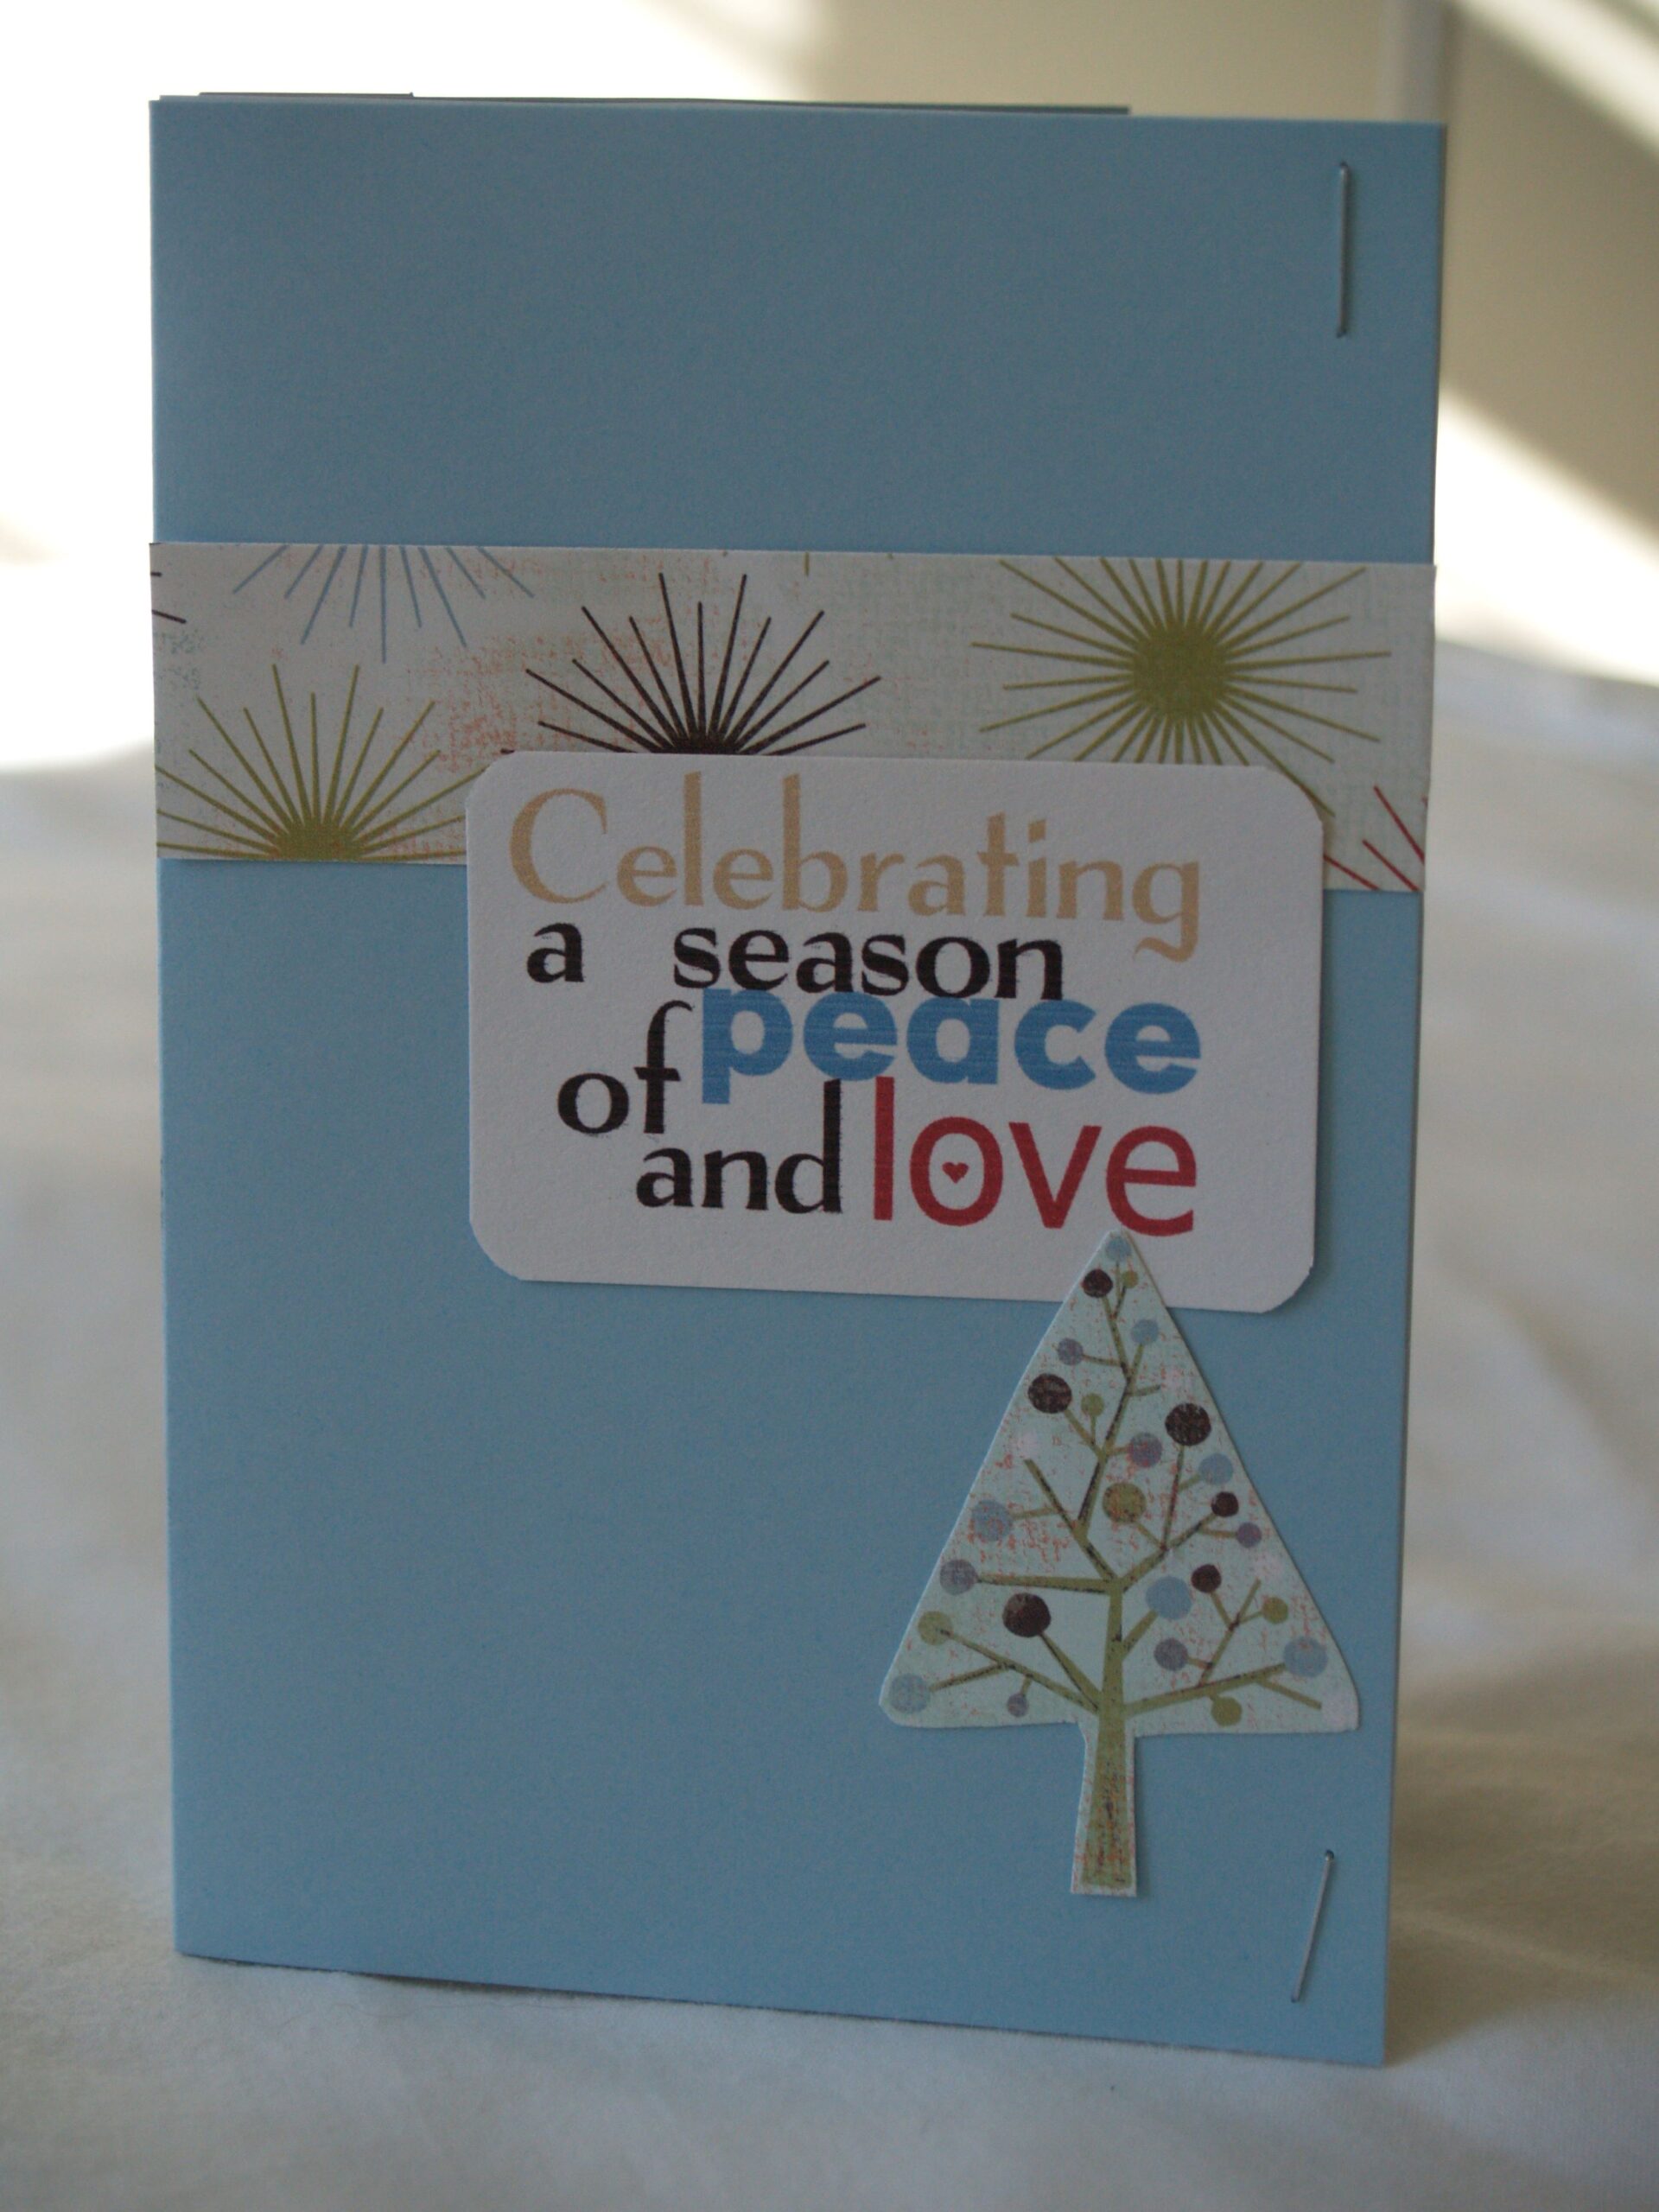
Glue on your last remaining embellishments. I made the greeting block on the computer, and the tree was a cutout from the same paper I used for the interior of the card.
So this may not be the least labor intensive card I ever came up with. It just might, in fact, be the very most amount of work I ever put into a greeting card. But I often find that in card making you have to make a choice between cost in labor and cost in materials, and with so very many cards to make, materials had to lose. You could make this card a whole lot easier just by using a sticker or other embellishment on the pockets and cover, but as it is I’ve designed a fancy card without using anything but paper, glue, and four staples. This year, a cheap but pretty card is worth all the fiddly cutting.


2 thoughts on “Christmas Card 2009”
Comments are closed.